42
3 Installing the Autosampler
Installing the Autosampler
1 Install the LAN interface board in the sampler (if required).
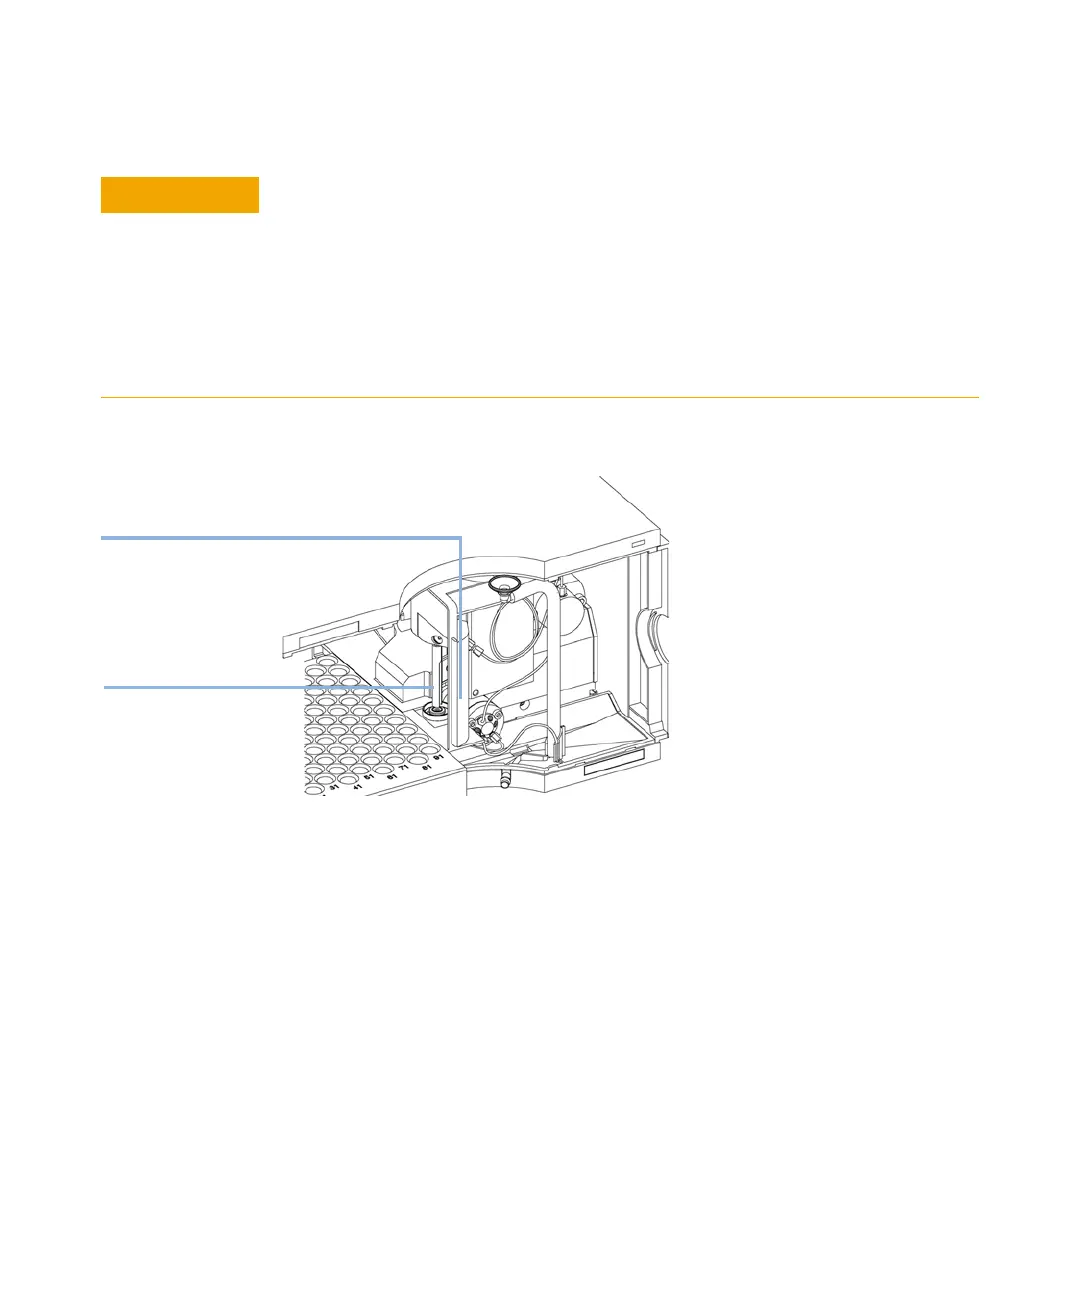
Figure 13 Safety Flap
2 Remove the adhesive tape which covers the front door.
3 Remove the front door and remove the transport protection foam.
4 Place the Autosampler on the bench or in the stack as recommended in
“Optimizing the Stack Configuration” on page 37.
5 Ensure the power switch at the front of the Autosampler is OFF.
6 Connect the power cable to the power connector at the rear of the sampler.
7 Connect the CAN cable to the other Agilent 1200 Infinity modules.
8 If an Agilent Chemstation is the controller, connect either
• The GPIB cable to the detector
CAUTION
“Defective on arrival” problems
If there are signs of damage to the autosampler, please do not attempt to install the
autosampler. Inspection by Agilent is required to evaluate if the instrument is in good
condition or damaged.
➔ Notify your Agilent sales and service office about the damage.
➔ An Agilent service representative will inspect the instrument at your site and
initiate appropriate actions.
HV[Zin[aVe
HV[ZinXdkZg
 Loading...