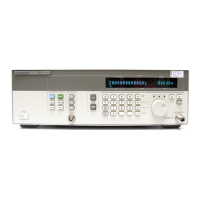
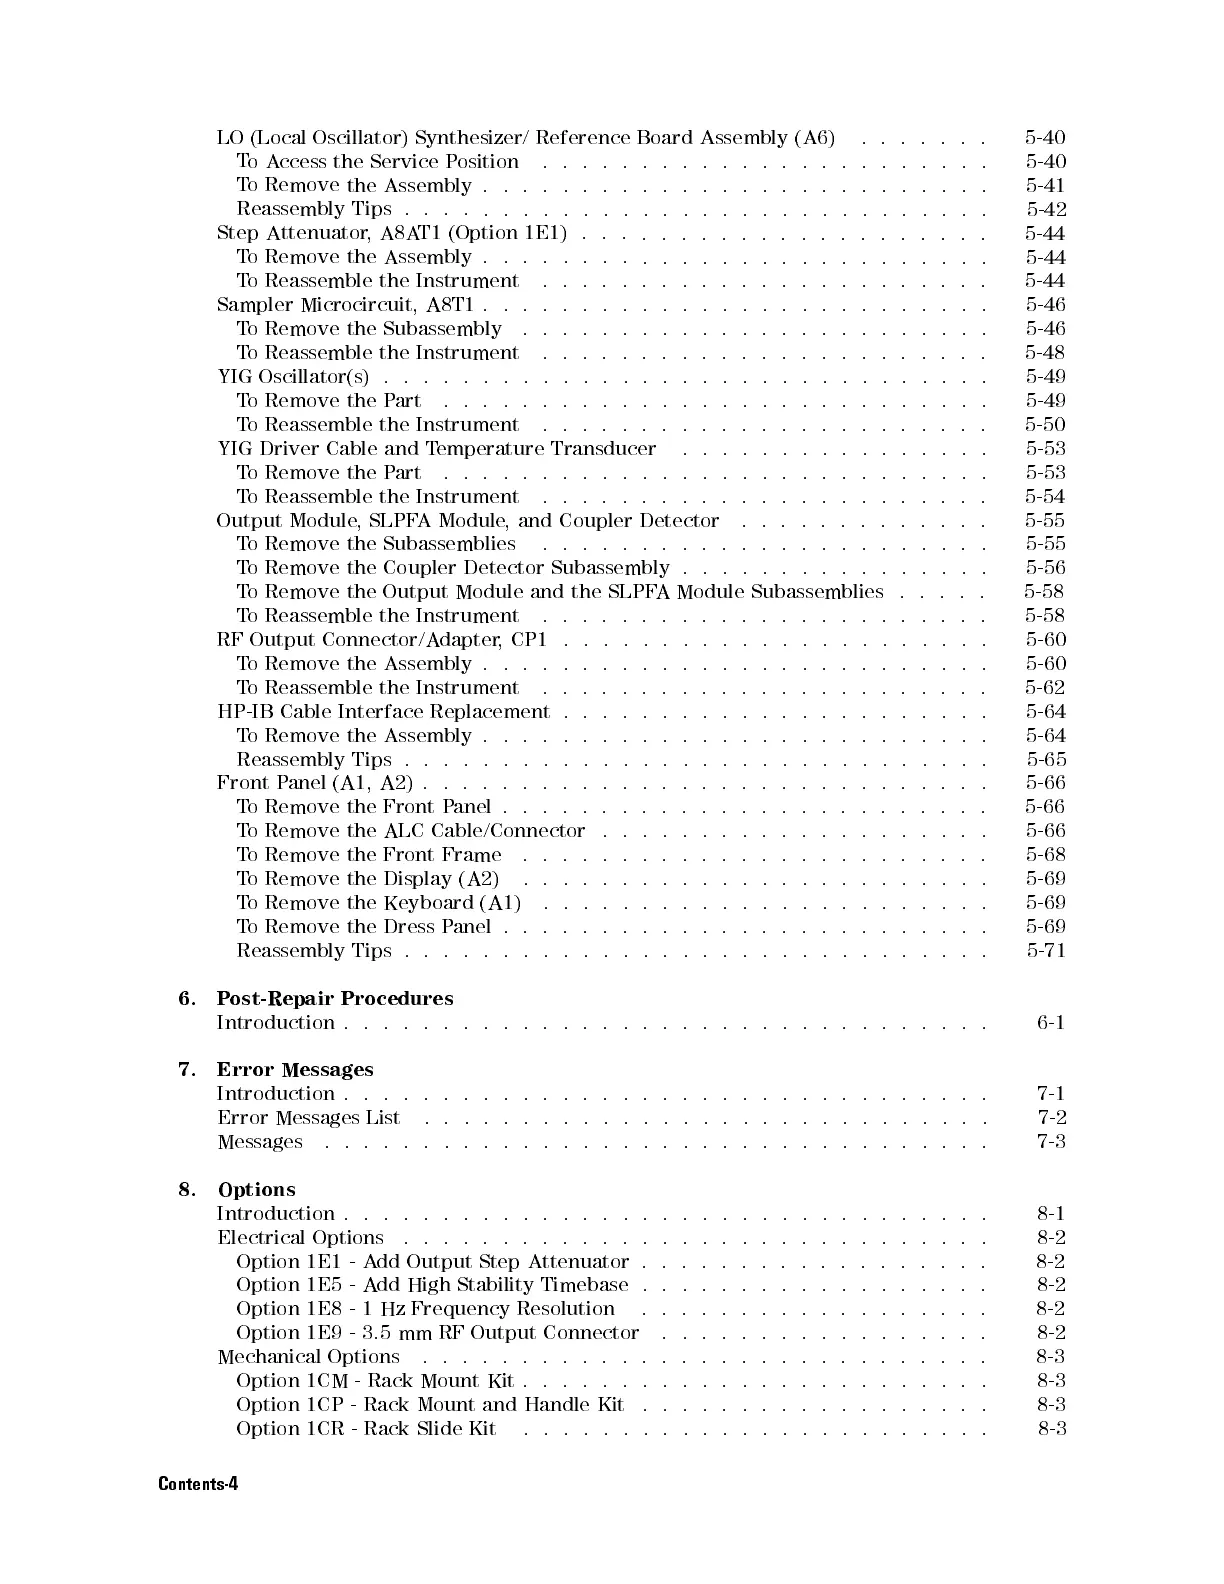
LO
(Local Oscillator)
Synthesizer/ Reference
Board Assembly
(A6) .
.
.
.
.
.
.
5-40
T
oA
ccess the
Service
P
osition
.
.
.
.
.
.
.
.
..
..
..
..
..
..
..
.
5-40
T
o Remove
the Assembly
.
.
.
.
.
.
.
.
.
.
.
..
..
..
..
..
..
..
.
5-41
Reassembly
Tips .
..
.
.
.
.
.
.
.
.
.
.
.
.
.
..
..
..
..
..
..
.
.
5-42
Step
Attenuator,
A8AT1
(Option
1E1)
.
.
.
.
.
.
.
.
.
.
.
..
..
..
..
..
5-44
T
o Remove
the Assembly
.
.
.
.
.
.
.
.
.
.
.
.
.
..
..
..
..
..
..
.
5-44
T
o
Reassemble
the
Instrument
.
.
.
.
.
.
.
.
.
.
.
..
..
..
..
.
.
.
.
5-44
Sampler
Microcircuit,
A8T1
.
.
.
.
.
.
.
.
.
.
.
.
.
..
..
..
..
.
.
.
.
.
5-46
T
o
Remove
the
Subassembly
.
.
.
.
.
.
.
.
.
.
.
.
.
..
..
..
.
.
.
.
.
5-46
T
o
Reassemble
the
Instrument
.
.
.
.
.
.
.
.
.
.
.
.
.
..
..
..
.
.
.
.
5-48
YIG
Oscillator(s)
.
.
.
.
.
.
.
.
.
.
.
.
.
.
.
.
..
..
..
.
.
.
.
.
.
.
.
.
5-49
T
o
Remove
the
P
art
.
.
.
.
.
.
.
.
..
..
..
.
.
.
.
.
.
.
.
.
.
.
.
.
.
5-49
T
o
Reassemble
the
Instrument
.
.
.
.
.
.
.
.
.
..
..
..
..
.
.
.
.
.
.
5-50
YIG
Driver
Cable
and
T
emperature
Transducer
.
.
.
.
.
.
.
..
..
..
..
.
5-53
T
o
Remove
the
P
art
.
.
.
.
.
.
.
.
..
..
..
..
.
.
.
.
.
.
.
.
.
.
.
.
5-53
T
o
Reassemble
the
Instrument
.
.
.
.
.
.
.
.
.
..
..
..
..
.
.
.
.
.
.
5-54
Output
Module
,
SLPF
A
Module
,
and
Coupler
Detector
.
.
.
.
..
..
..
..
.
5-55
T
o
Remove
the
Subassemblies
.
.
.
.
.
.
.
..
..
.
.
.
.
.
.
.
.
.
.
.
.
5-55
T
o
Remove
the
Coupler
Detector
Subassembly
.
.
.
.
.
.
.
.
.
.
.
.
.
.
.
.
5-56
T
o
Remove
the
Output
Module
and
the
SLPF
A
Module
Subassemblies
.
.
.
.
.
5-58
T
o
Reassemble
the
Instrument
.
.
.
.
.
.
.
.
.
.
..
..
..
.
.
.
.
.
.
.
5-58
RF
Output
Connector/A
dapter
,
CP1
.
.
.
.
.
.
.
.
.
..
..
..
..
.
.
.
.
.
5-60
T
o
Remove
the
Assembly
.
.
.
.
..
..
.
.
.
.
.
.
.
.
.
.
.
.
.
.
.
.
.
.
5-60
T
o
Reassemble
the
Instrument
.
.
.
.
..
..
.
.
.
.
.
.
.
.
.
.
.
.
.
.
.
5-62
HP-IB
Cable
Interface
Replacement
.
.
.
.
.
..
..
.
.
.
.
.
.
.
.
.
.
.
.
.
5-64
T
o
Remove
the
Assembly
.
.
.
.
.
.
..
.
.
.
.
.
.
.
.
.
.
.
.
.
.
.
.
.
.
5-64
Reassembly
Tips
.
.
.
.
.
.
.
.
.
..
.
.
.
.
.
.
.
.
.
.
.
.
.
.
.
.
.
.
.
5-65
Front
P
anel
(A1,
A2) .
.
.
.
.
.
.
.
.
.
.
.
.
.
.
.
.
.
.
.
.
.
.
.
..
.
.
.
5-66
T
o
Remove
the
Front
Panel
.
.
.
.
.
.
.
.
.
.
.
.
.
.
.
.
.
.
.
.
.
.
.
..
5-66
T
o
Remove
the
ALC
Cable/Connector .
.
.
.
.
.
.
.
.
.
.
.
.
.
.
.
.
.
.
.
5-66
T
o
Remove
the
Front
Frame .
..
.
.
.
.
.
.
.
.
.
.
.
.
.
.
.
.
.
.
.
.
.
5-68
T
o
Remove
the
Display
(A2) .
..
.
.
.
.
.
.
.
.
.
.
.
.
.
.
.
.
.
.
.
.
.
5-69
T
o
Remove
the
Keyboard
(A1) .
..
.
.
.
.
.
.
.
.
.
.
.
.
.
.
.
.
.
.
.
.
5-69
T
o Remove
the
Dress
P
anel
.
.
.
.
.
.
.
.
.
.
.
.
.
..
..
..
..
.
.
.
.
5-69
Reassembly
Tips .
.
.
.
.
.
.
.
.
.
.
.
.
.
.
.
.
.
.
.
..
..
..
.
.
.
.
5-71
6.
Post-Repair
Procedures
Introduction
..
..
.
.
.
.
.
.
.
.
.
.
.
.
.
.
.
.
.
..
..
..
..
.
.
.
.
6-1
7.
Error
Messages
Introduction . . . . . . . . .
........................
7-1
Error Messages List
.... ....
.... .... .... .... .... .
7-2
Messages ...........
.......................
7-3
8. Options
Introduction......................
.... .... ...
8-1
Electrical Options
......................
........
8-2
Option 1E1 - A
dd Output Step Attenuator . . . . . . . . . . . . . . . . .
. 8-2
Option 1E5 - Add High Stability Timebase . . . . . . . . . . . . . . . . . . 8-2
Option 1E8 - 1 Hz Frequency Resolution .................. 8-2
Option 1E9 - 3.5 mm RF Output Connector ................. 8-2
Mechanical Options .... .... .... .... .... .... .... . 8-3
Option 1CM - Rack Mount Kit . . . . . . . . . . . . . . . . . . . . . . . . 8-3
Option 1CP - Rack Mount and Handle Kit .................. 8-3
Option 1CR - Rack Slide Kit ...... .... .... .... .... .. 8-3
Contents-4
 Loading...