3
From the side menu, expand Site Settings. Starting from the top setting option, Site Information, congure and customize
the system.
Site Settings
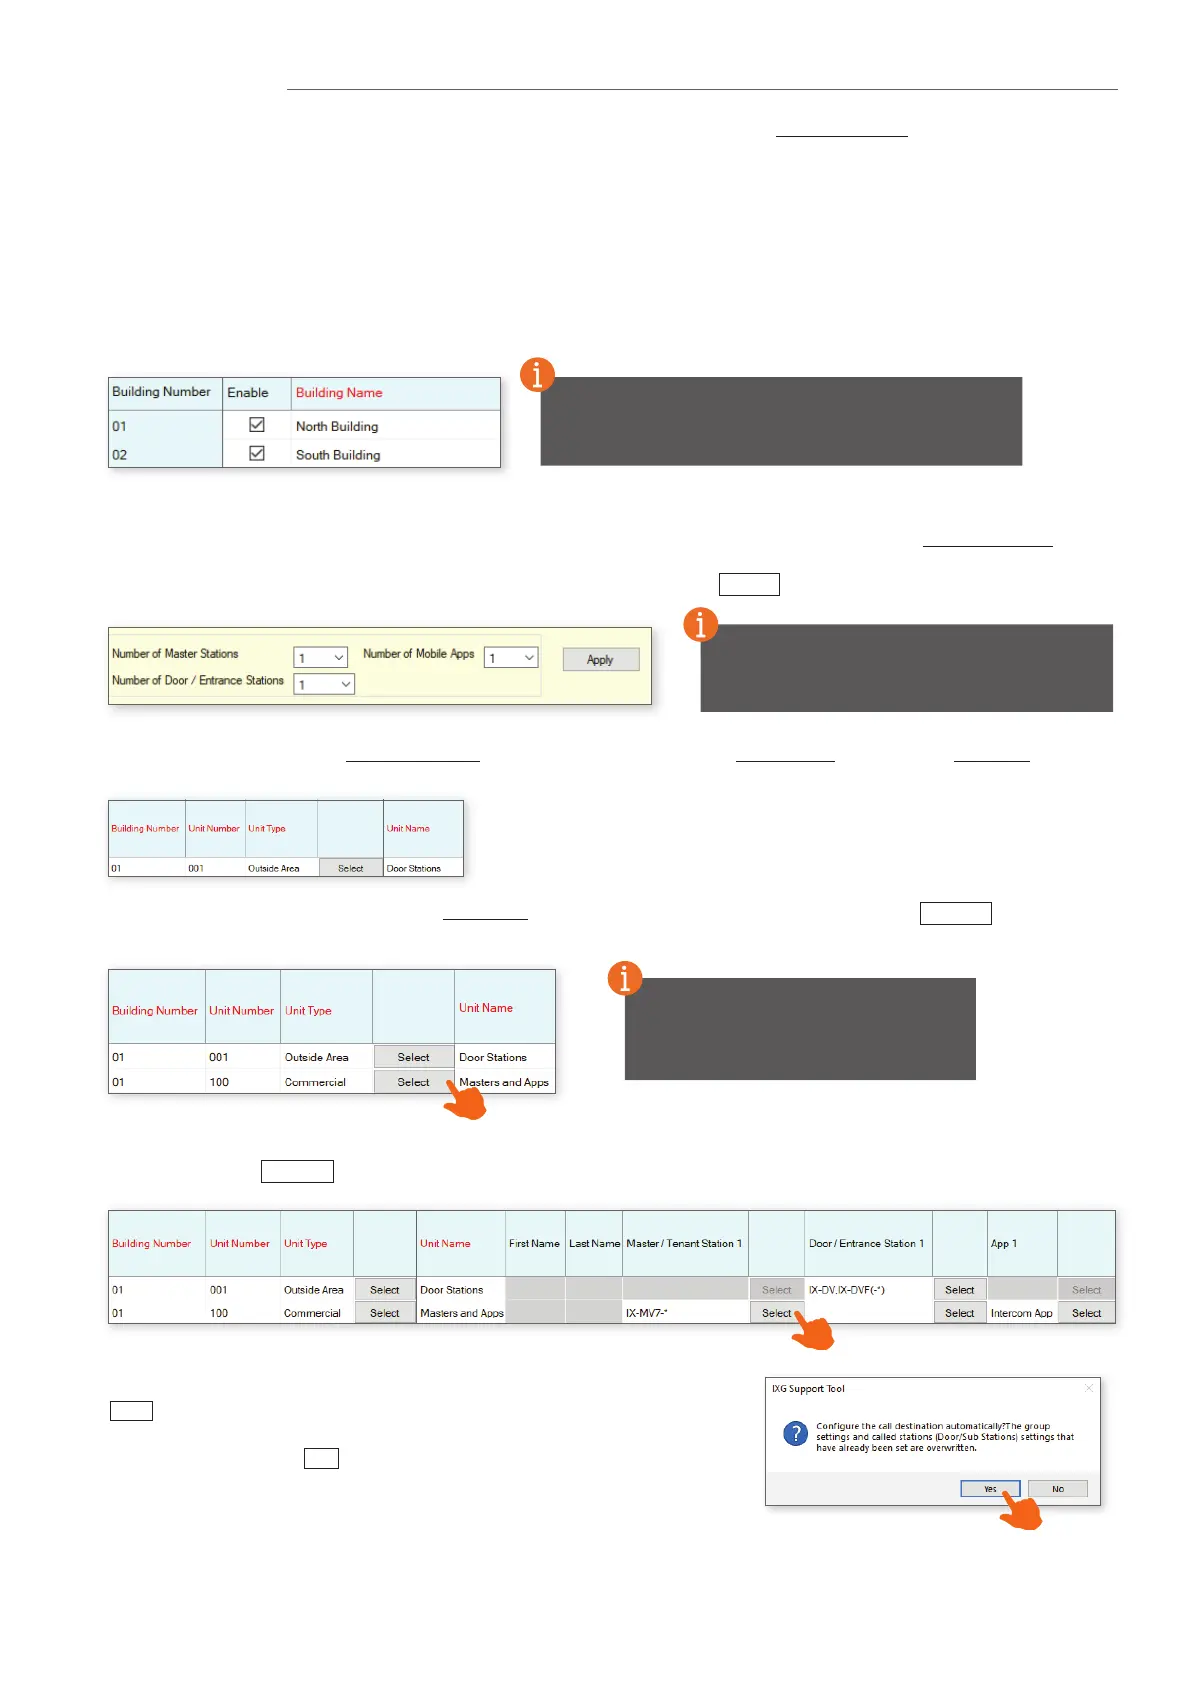
Name the building (or buildings) that Units and their stations will reside in. Place a check mark in the Enable column to add
buildings. This is typically only needed in multi-building systems.
Building Information
Site, Installer and End User information that is set when creating a new system can be found and edited here.
Site Information
To have more than a single building, the Multiple
Buildings option must have been selected when
creating a new system. Single-building systems cannot
be changed once the system has been created.
Units and their stations will be added to the system here. First, look to the top of the screen for the Display Settings
section. By default, each Unit is set to have one Master Station, one Entrance/Door Station, and one Mobile App. Use the
drop-downs to select the number of stations the Units will have, then click Apply .
Units / Stations
From left to right, select the Building Number the Unit will belong to, set the Unit Number, and click the Unit Type button to
select a Unit type.
This is a universal setting. Select quantities
that reect your largest unit. All units will
share the same number of available stations,
even if some units use less than others.
Continue by selecting the stations for each Unit, including Mobile Apps. Once every unit has been created and stations have
been added, click Update .
Once all Units have been added, enter a Unit Name for each. At any point during this process, click Update to save the
congured settings.
When the Update button is clicked, the popup below will appear. Clicking
Yes will automatically enable communication between all appropriate
stations and units for new systems as well as congure and enable
door release. Clicking No will require manual conguration of these
settings, a process that this guide does not cover.
When adding multiple of the same Unit
Type, select a completed Unit Number
eld and press the Enter key. This will
auto-populate the next eld.
 Loading...