This document describes the Air Lift LoadLIFTER 5000 air spring kit, designed to enhance vehicle load support and improve ride quality. The kit is intended for installation on the rear suspension of a vehicle, providing adjustable air pressure to maintain a level stance, improve ride comfort, and enhance stability, especially when carrying heavy loads or towing.
Function Description:
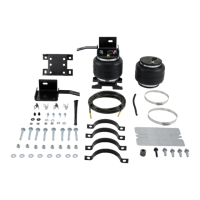
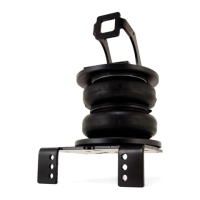
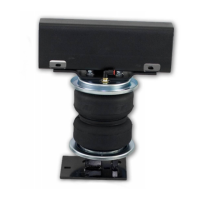
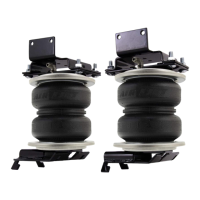
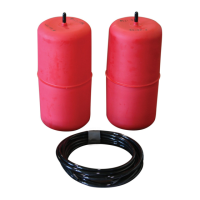
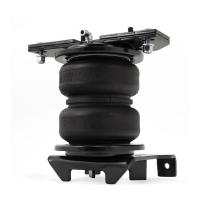
The LoadLIFTER 5000 kit utilizes air springs (bellows) installed between the vehicle's frame and leaf springs. These air springs are inflatable, allowing the user to adjust the air pressure to compensate for varying loads. When inflated, the air springs provide additional support to the suspension, preventing "bottoming out" and maintaining the vehicle's normal ride height. This helps to distribute weight more evenly, reduce sway, improve braking, and enhance overall handling. The system includes an upper bracket, lower bracket, roll plates, and air lines with inflation valves for manual adjustment.
Important Technical Specifications:
- Air Spring Type: Bellows-style air springs.
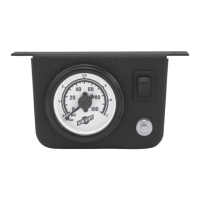
- Minimum Air Pressure: 20 PSI (1.4 BAR).
- Maximum Air Pressure: 100 PSI (7 BAR).
- Hardware Torque Specifications:
- 1/2" Carriage Bolts: 100 lb.-ft.
- 3/8" Frame Bolts: 44 lb.-ft.
- U-bolt Lock Nuts: 16 lb.-ft.
- Air Line Clearance: Maintain at least 6" (150mm) clearance from heat sources.
- Air Line Insertion Depth: Approximately 9/16" into the push-to-connect fitting.
- Air Fitting Tightening: Finger-tight plus 1 and 1/2 turns for the 90-degree elbow fitting.
- Inflation Valve Exposure: Approximately 1/2" (13mm) after installation.
- Drill Bit Sizes: 5/16" for inflation valve holes, 1/2" for jounce bumper bracket holes.
Usage Features:
- Load Leveling: The primary function is to maintain a level vehicle stance regardless of load, preventing the headlights from aiming too high and ensuring proper weight distribution.
- Adjustable Ride Comfort: Users can adjust air pressure to achieve the desired ride comfort. Too much or too little pressure can lead to a rough ride; experimentation is encouraged to find the optimal setting.
- Enhanced Stability: Proper air pressure helps to improve vehicle stability, reducing sway, body roll, bounce, and dive during braking.
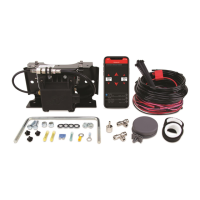
- Easy Inflation: The system can be inflated using any air compressor capable of producing sufficient pressure, including a bicycle tire pump (though an air compressor is recommended for ease).
- Installation Process:
- Assembly: Air springs are assembled with roll plates, upper and lower brackets, and air fittings. The lower bracket is designed with an offset to the outside of the vehicle.
- Jounce Bumper Removal: The existing jounce bumper bracket must be removed by drilling or cutting rivets. Caution is advised, especially on the passenger side, to avoid damaging internal lines.
- Mounting: The assembled unit is mounted on the leaf spring, with carriage bolts securing it through the frame. Frame bolts secure the upper bracket to the frame. Clamp bars and additional bolts secure the lower bracket. All hardware is tightened to specified torque values.
- Air Line Installation: Inflation valves are mounted in a convenient location (e.g., wheel well, bumper) using a 5/16" hole. Air lines are cut to equal lengths, routed along the frame, secured with zip ties, and connected to the air fittings on the air springs. Clean, square cuts are crucial for leak-free connections.
- Pre- and Post-Installation Checks:
- Clearance Test: After inflation to 60 PSI, ensure at least 1/2" clearance around all components (tires, brake drum, frame, shock absorbers, brake cables).
- Leak Test: Inflate to 60 PSI and spray all connections with a soap and water solution to check for bubbles. Leaks must be eliminated before road testing.
- Heat Test: Verify 6" clearance from heat sources.
- Fastener Test: Recheck all bolts for proper torque.
- Road Test: Drive 10 miles (16km) after inflating to 25 PSI (or 50 PSI if loaded) and recheck for clearance, loose fasteners, and air leaks.
- Overnight Leakdown Test: Recheck air pressure after 24 hours. A loss of more than 5 PSI indicates a leak.
- 30-Day/500-Mile Test: Recheck the system for rubbing or abrasion.
Maintenance Features:
- Weekly Air Pressure Checks: Users are advised to check air pressure weekly to ensure optimal performance and prevent damage.
- Maintain Normal Ride Height: Always adjust air pressure to maintain the vehicle's normal ride height, especially when increasing or decreasing loads.
- Leak Detection and Repair: If an air leak develops, use a soapy water solution to identify the source. The manual provides detailed instructions for fixing leaks in swivel fittings (trimming air line, applying thread sealant) and inflation valves (tightening valve core, re-seating air line).
- Proper Air Line Handling: When cutting or trimming air lines, use a hose cutter, razor blade, or sharp knife to ensure clean, square cuts. Avoid wire cutters or scissors, which can crimp the line and cause leaks.
- Avoid Over-Inflation: Never inflate beyond 100 PSI (7 BAR).
- Vehicle Lifting: When raising the vehicle on a hoist for short-term service, no special action is needed. For prolonged periods, support the axle with jack stands to relieve tension on the air springs.
- Warranty: Air Lift Company provides a limited lifetime warranty against defects in workmanship and materials, provided the product is used as specified and maintained correctly. Failure to maintain minimum pressure, bottoming out, over-extension, or rubbing against other components will void the warranty.