The roof members MUST be strong
enough to support the weight of the unit
without any roof deflection that will
cause “pooling” of water around the
unit. Contact your caravan manufacturer
to confirm the max load the roof is able
to handle.
If the roof does not have an existing hole
one must be cut. Cut through the roof
then use the roof hole as a guide to cut
through the ceiling. Contact your
caravan manufacturer for the best
method to cut through the roof.
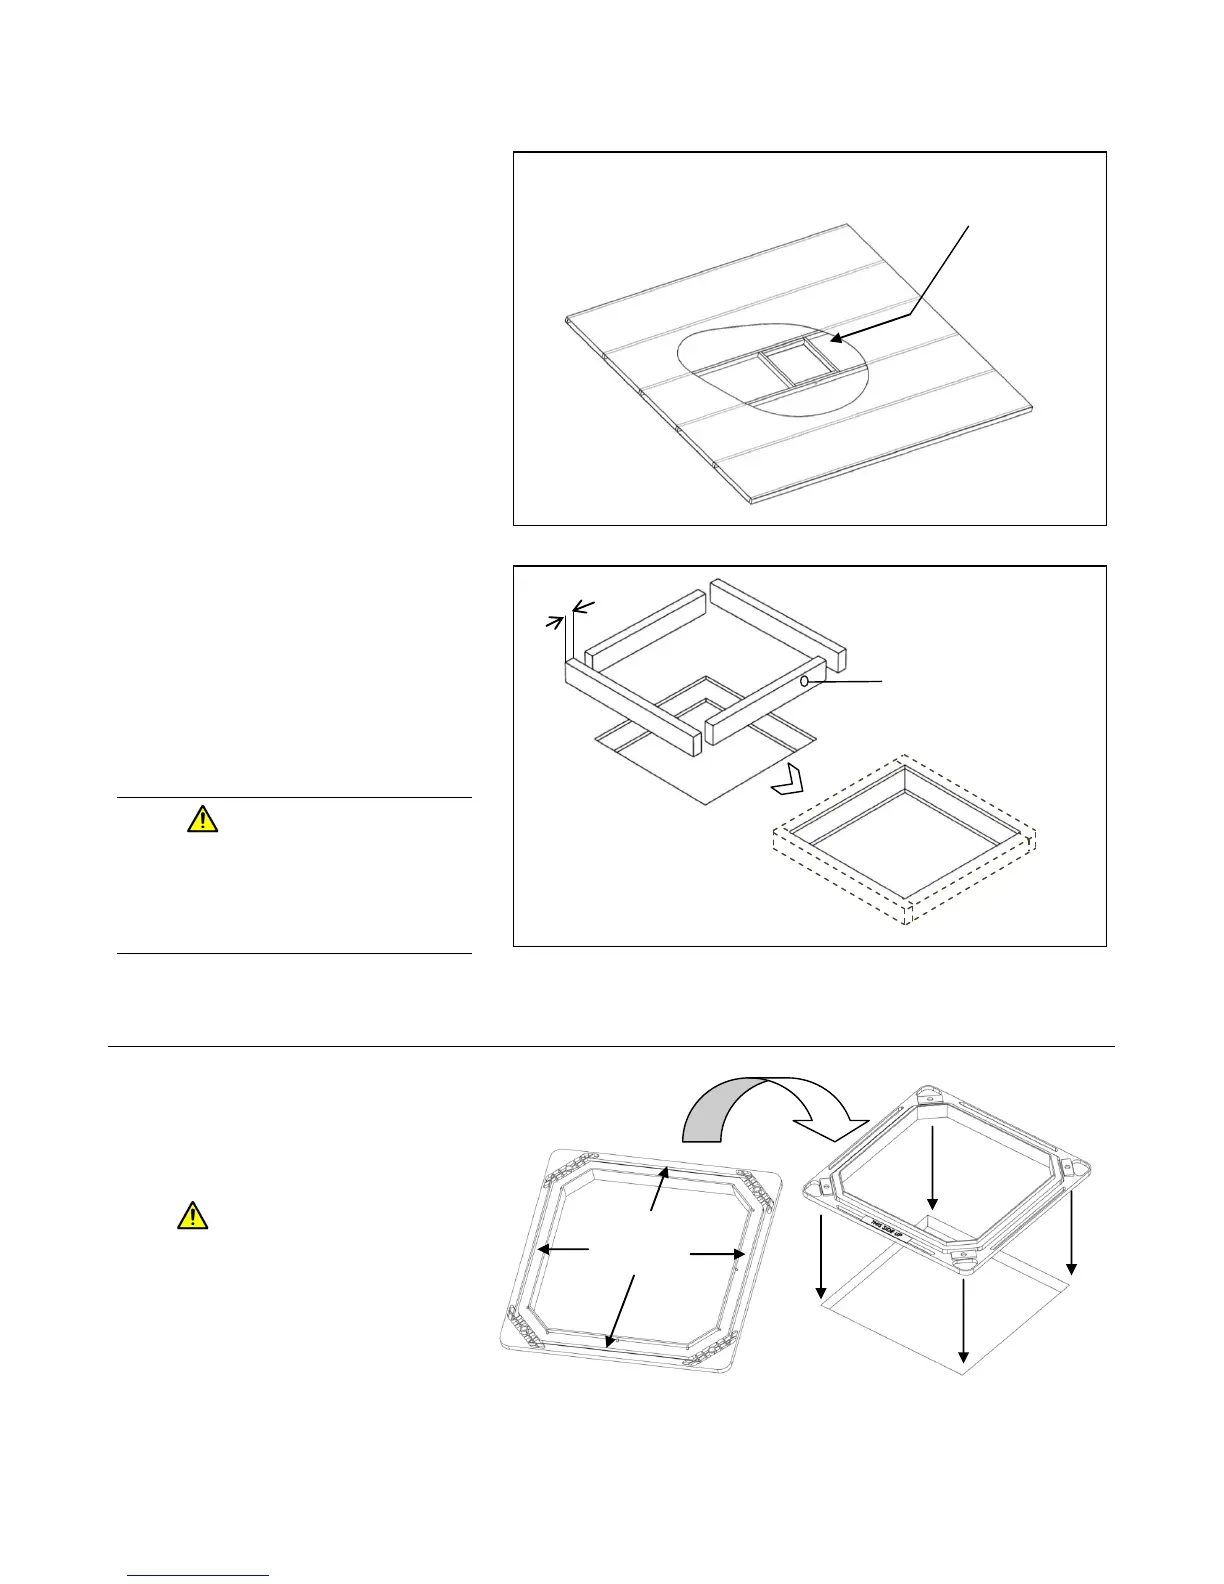
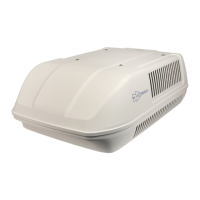
The square hole in the roof (360 x
360mm, 14” x 14”) MUST be boxed up
with minimum 20mm square timber to
provide a structure strong enough to
withstand the compression of the
installation bolts. This is also to ensure
that air in not drawn from the roof cavity
(Fig 3 & 4). Remember to leave access
for wiring.
Longitudinals MUST be fixed securely to
the transverse roof members to transfer
load (see Fig 3 & 4).
WARNING
There may be electrical wiring located
between the roof and ceiling. Ensure that
power is properly disconnected at the
supply (mains and/or battery). Failure to do
so may result in personal injury or death.
TIP: Always use crawl boards across the roof
to avoid damage.
Ensure that the roof is clean, dry and free
from grease or oil & that there are no roof
seams running through the installation area.
IMPORTANT
The weather collar must be assembled to the
roof top the right way up. Check orientation
of the part. Look for the ‘THIS SIDE UP
STICKER’.
Apply silicone sealant to underside face
of collar (Fig 5 – left hand picture).
Turn collar over, make sure ‘THIS SIDE
UP’ sticker is facing up and apply the
collar to the 14” hole.
Push down on collar and remove excess
sealant from around the edges.