800.909.9709
www.AirCycle.com [9]
The Assembly Instructions
What You’ll Need:
Instructions:
1. Attach the plug assembly to the handle and install the
handle to the lid assembly using (2) 1/4”-20 x 3/4” screws.
Figure 1
2. Mount the Bulb Eater
®
3 onto the drum, tightening the bolt
ring with a 15/16” wrench or socket. Figure 2
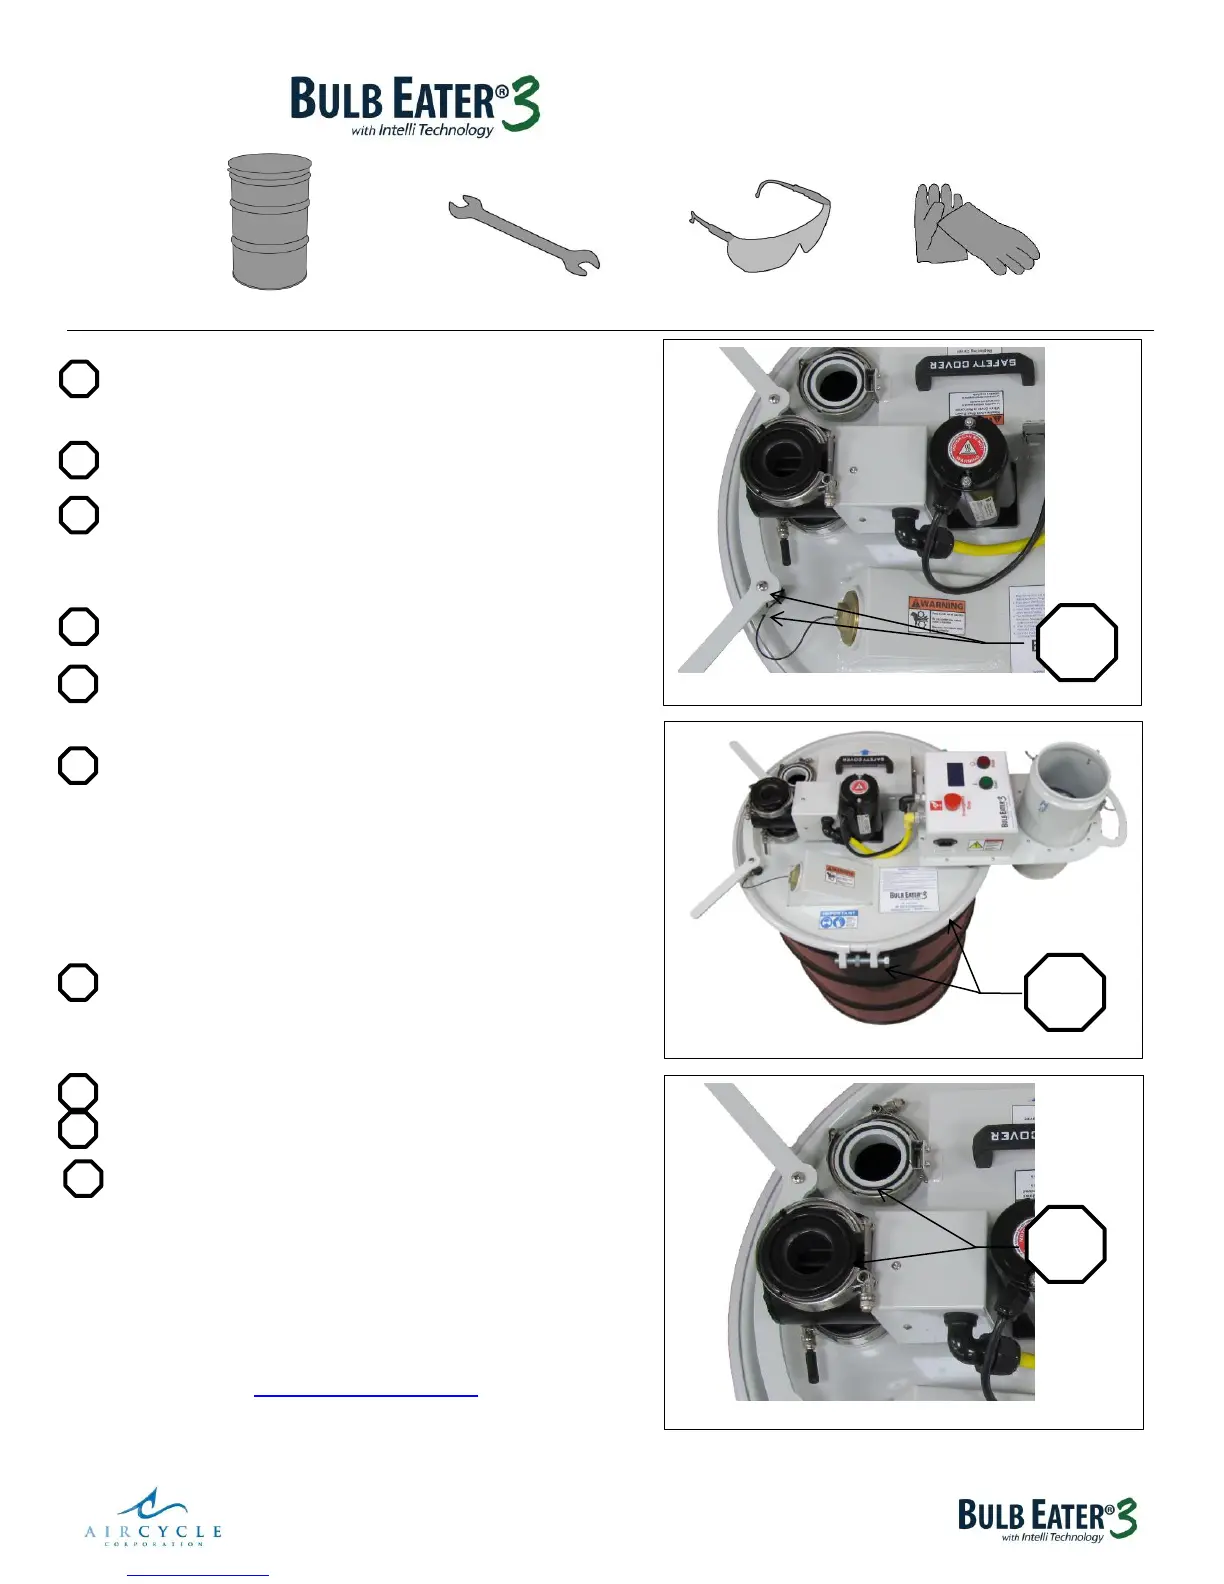
3. Apply silicone grease on the two O-rings and place an O-ring
and a clamp on the airlock assembly & an O-ring and a clamp
on the mounting flange for the installation of the cyclone
assembly. Figure 3
4. Place the 2
nd
stage cartridge filter into the upper housing
of the vacuum housing assembly. Figure 4
5. Place the cyclone assembly on the mounting flanges with
the lid assembly attached to it, and place onto the upper
housing which holds the cartridge filter. Figure 5
6. Fasten the lid clips on the vacuum lid and secure. Tighten
the clamp on the airlock assembly to the cyclone assembly
until it’s snug. Tighten the clamp on the cyclone flange to
the cyclone assembly all the way until it’s tight. Now
re-tighten the clamp on the airlock assembly to the cyclone
assembly all the way. Figure 6
Note: This will allow the cyclone assembly to be
installed correctly & air tight.
7. Apply silicone grease to the O-ring and place the O-ring and
clamp on the carbon canister. Figure 7 Hold the carbon
canister up to the lower housing and tighten the clamp all
the way (2 persons required). Figure 8
8. Place the 3 caps on the clamps. Figure 9
9. Unscrew the plug assembly and install the entry tube.
Figure 10
10. Finally, connect the power cord to the control panel on
your Bulb Eater
®
3 and plug it into an outlet. Figure 10
55-Gallon Drum 15/16” wrench or socket Safety Glasses Safety Gloves
IMPORTANT: Electrical Requirements
120V AC / Single Phase / 50HZ or 60HZ
OR
240V AC / Single Phase / 50 HZ or 60HZ
Must be protected by a minimum of 15 amp fuse or circuit breaker
Watch the Bulb Eater
®
3 Training Video at:
www.aircycle.com/videos