This document is a user manual for Airemax portable air conditioners, specifically models APE508CH and APE508CE. It provides comprehensive instructions for setting up, operating, and maintaining the unit, along with important safety information and troubleshooting tips.
Function Description
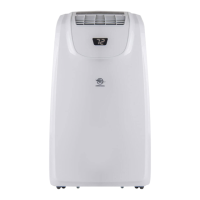
The Airemax portable air conditioner is designed to provide cooling, dehumidification, and fan-only operation for indoor spaces. It is a self-contained unit that can be easily moved and installed in various locations, requiring only a window for exhaust. The unit features a control panel and a remote control for convenient operation, allowing users to adjust temperature, fan speed, and set timers.
Important Technical Specifications
While specific power consumption and cooling capacity are not detailed on the provided pages, the manual indicates the following:
- Electrical Requirements: 115 Volt, 60Hz, 15-amp fused grounded 3-prong outlet. A dedicated circuit is recommended.
- Temperature Range: The temperature can be set between 62°F and 86°F (17°C and 30°C) in Cool mode.
- Refrigerant: The maximum refrigerant charge amount for APE508CH is 11.46oz and for APE508CE is 11.46oz. The manual emphasizes strict regulations regarding refrigerant handling and disposal, requiring qualified personnel for any work involving the refrigerant circuit.
- Window Opening: The window panel can be installed in a window with a minimum opening of 50 cm and a maximum of 102 cm.
- Clearance: A minimum clearance of 50 cm from the air conditioner to any wall or obstruction is required for proper airflow and operation.
Usage Features
The portable air conditioner offers several user-friendly features:
- Control Panel and Remote Control: Both provide access to various settings, including:
- Timer Button: Allows programming a time (1-24 hours) for the unit to turn On or Off. The Timer indicator light illuminates when active.
- Fan Speed Button: Adjusts fan speed between Low and High. Not adjustable in Dehum mode.
- Up and Down Arrow Buttons: Used to adjust the temperature or set the hours for the Time Delay. Pressing both simultaneously toggles between Celsius and Fahrenheit display.
- Mode Button: Toggles between Cool, Dehum, Heat (on some models), and Fan modes.
- Power Button: Turns the unit On or Off.
- Sleep Mode: Activates a quiet operation mode.
- Installation: The manual provides detailed, step-by-step instructions for installation, including:
- Unpacking the unit.
- Twisting the exhaust hose connector onto the exhaust hose.
- Connecting the exhaust hose to the air conditioner.
- Installing the window panels, which can accommodate both vertical and horizontal slide windows.
- Securing the window slide set with butterfly nuts.
- Emphasizes maintaining a 50 cm clearance from walls and other objects after installation.
- Safety Protections:
- Water-full Safety Alarm: The unit sounds a warning and illuminates a water-full icon when the water tank is full, requiring drainage.
- Anti-frozen Protection (Optional): In COOL mode, if the tube temperature drops too low, the compressor and water wheel motor will stop, while the upper fan continues running. The unit will resume normal operation once the temperature rises.
- Compressor Delay Protection: A 3-minute delay is implemented before the compressor restarts after being shut down, except for the initial power-on.
- Coil and Room Temperature Sensor Failure: The unit detects sensor failures and enters a failure state if issues are present.
- Drainage:
- Manual Drainage: Instructions are provided for manually draining the internal water tank when the "water-full" indicator illuminates. This involves turning off the unit, unplugging it, placing a tray below the water outlet, and removing the drain cover and stopper.
- Continuous Drainage: The unit can be set up for continuous drainage by connecting a 13mm drain hose to the drain hole. It is suggested to use continuous drainage in HEAT mode to avoid frequent manual drainage, but not in COOL mode to enhance cooling effects.
Maintenance Features
Regular maintenance is crucial for the optimal performance and longevity of the air conditioner:
- Surface Cleaning:
- Always unplug the appliance before cleaning.
- Clean the unit surface with a wet, soft cloth. Avoid chemical solvents like alcohol, gasoline, or thinners, as these can damage the unit.
- Clean dirty air outlets or louvers with a wet, soft cloth and detergent.
- Filter Cleaning:
- Clean the filter every two weeks, or more frequently if it becomes clogged with dust, as this affects unit function.
- Gently pull out the filter by its handle.
- Clean dirty particles from the filter using a cleaner if necessary.
- Immerse and wash the filter in warm water (about 40°C) mixed with a neutral cleaner, then rinse and dry thoroughly in the shade.
- Important: Do not squash or hit the mesh, and do not operate the appliance without the filter installed.
- Internal Water Tank Emptying:
- Instructions are provided for emptying the internal water tank when the "Water Full" indicator illuminates. This involves unplugging the unit, placing a pan below the lower drain, and removing the cap and rubber plug.
- Storage:
- Before storing, completely drain any condensate water by unscrewing the drain cover and pulling out the stopper, or by tilting the unit.
- Run the unit in fan mode for half a day to dry the inside and prevent mold growth.
- Turn off the unit, unplug it, and wrap the power cord around the wire-winding pillar.
- Remove the heat exhaust hose assembly, clean it, and store it properly.
- Remove batteries from the remote control and store them in the remote control box.
- Store the unit in a dry place, ensuring all accessories are protected and kept away from children.
The manual also includes a detailed troubleshooting section to help users identify and resolve common issues, such as power supply failure, the unit failing to start, poor cooling/heating, high noise levels, compressor not working, remote control issues, and error codes ("E1" for room temperature sensor failure, "E2" for tube temperature sensor failure). It emphasizes contacting customer service for complex issues and provides an email address and website for support. The warranty covers manufacturing defects for 12 months from the purchase date, with specific exclusions for physical damage, misuse, unauthorized repairs, and commercial use.