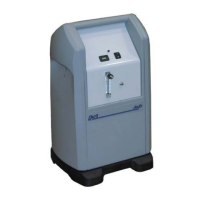
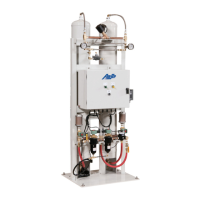
How to troubleshoot AirSep Medical Equipment that does not operate?
J
Jerry WhiteAug 17, 2025
If your AirSep Medical Equipment unit isn't working, first ensure the power cord is properly connected to the electrical outlet and that the outlet has power. Check the wall switch, fuse, or circuit breaker in your house. If problems persist, it may be due to the oxygen concentrator circuit breaker being activated. Contact your Equipment Provider for service.
I
ismithAug 19, 2025
What to do if I have limited oxygen flow with AirSep Medical Equipment?
S
Sharon JonesAug 20, 2025
To address limited oxygen flow in your AirSep Medical Equipment, first, remove the humidifier bottle (if used) from the oxygen outlet. If flow is restored, clean or replace the humidifier bottle. If the issue persists, remove the nasal cannula, face mask, or other accessories from the oxygen tubing and replace them if flow improves. Disconnect the delivery tubing at the oxygen outlet to check the oxygen tubing for kinks or obstructions. Replace the tubing if needed. If none of these steps restore proper flow, contact your Equipment Provider.
J
Juan MayerAug 22, 2025
What to do if AirSep Medical Equipment has intermittent alarm sounds at one second intervals?
J
Joshua BuckleyAug 22, 2025
If your AirSep Medical Equipment unit sounds an intermittent alarm at one-second intervals, it indicates an equipment malfunction. Immediately set the I/0 power switch to the 0 position, use your reserve oxygen supply (if provided), and consult your Equipment Provider.
L
Lindsay HeathAug 26, 2025
Why does condensation collect in the oxygen tubing when I use the humidifier bottle with AirSep Medical Equipment?
H
Holly GutierrezAug 26, 2025
If condensation collects in the oxygen tubing when you use the humidifier bottle with your AirSep Medical Equipment, ensure the unit is properly ventilated. Position it away from curtains, drapes, hot air registers, heaters, and fireplaces, ensuring all sides are at least 12 inches (30.5 cm) away from any obstruction. Do not place the unit in a confined area. Allow the oxygen tubing to dry out, or replace it. Refill the humidifier bottle with COLD water, being careful not to overfill it. The issue is often caused by elevated operating temperature or improper ventilation.
V
Virginia OdomAug 28, 2025
What to do if AirSep Medical Equipment does not alarm, or weak alarm sounds for 5 seconds during start-up?
D
darincoleAug 28, 2025
If your AirSep Medical Equipment unit does not alarm, or a weak alarm sounds for 5 seconds during start-up, this is due to a weak 9-volt battery. Call your Equipment Provider to replace the 9-volt battery.
W
William WarrenAug 30, 2025
What to do with all other problems of AirSep Medical Equipment?
D
Duane LeeAug 30, 2025
Set I/0 power switch to the 0 position, use your reserve oxygen supply (if provided), and consult your Equipment Provider immediately.
N
nathanielmasonSep 2, 2025
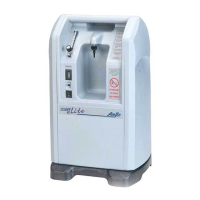
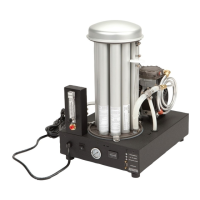
What to do if AirSep NewLife Elite Oxygen Equipment does not operate?
N
nicholas16Sep 2, 2025
If your AirSep Oxygen Equipment isn't operating, first, check the power cord connection at the electrical outlet. Then, verify the power source, wall switch, fuse, or circuit breaker in your house. Press, but do not hold, the circuit breaker reset button on the front of the unit.
J
jasonrobertsSep 5, 2025
What to do if AirSep NewLife Elite Oxygen Equipment has limited oxygen flow?
A
Alexandra PetersonSep 5, 2025
If you're experiencing limited oxygen flow with your AirSep Oxygen Equipment:
* First, remove the humidifier bottle (if you're using one) from the oxygen outlet. If the flow returns, clean or replace the humidifier bottle.
* Next, remove the nasal cannula or catheter from the oxygen tubing. If the flow improves, replace the cannula or catheter.
* Then, disconnect the delivery tubing at the oxygen outlet on the front of the unit. If the flow is restored, check the oxygen tubing for any kinks or obstructions, and replace the tubing if needed.
J
Jeffrey GordonSep 7, 2025
What to do if condensation collects in the oxygen tubing of AirSep Oxygen Equipment?
C
Courtney WarnerSep 7, 2025
If condensation is collecting in the oxygen tubing of your AirSep Oxygen Equipment when using a humidifier bottle:
* Ensure the unit is properly ventilated, positioned away from curtains, drapes, hot air registers, heaters, and fireplaces.
* Make sure all sides of the unit are at least 12 inches away from any wall or obstruction, and avoid placing it in confined areas.
* Refill the humidifier bottle with cold water, being careful not to overfill it.
* Allow the oxygen tubing to dry out, or replace it with new tubing.
B
barkerruthSep 12, 2025
What to do if AirSep NewLife Elite does not alarm during start-up?
K
Kevin PayneSep 12, 2025
If your AirSep Oxygen Equipment doesn't alarm, or if the alarm sounds weakly for only 5 seconds during start-up, it could be due to a weak 9-volt battery. Call your Equipment Provider to replace the 9-volt battery.