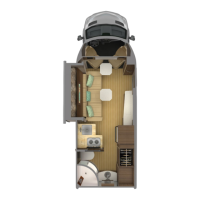
Interior
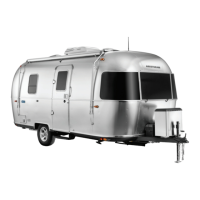
2017 Basecamp 5-5
Plumbing
Water System (Self-Contained)
Fill the water tank by opening the exterior access door
and removing the screw cap� A standard garden hose
can now be inserted� It is a good idea to let the water
run through the hose for a short time to ush it out.
Experienced RVers usually ll their tanks with “home”
water to avoid strange water that may be distasteful to
them� The amount of water in the tank may be checked
on the Monitor Panel, or you may ll the tank until
water overows out of the ll.
Open the hot side of the galley faucet and turn on the
water pump switch located on the monitor panel� For
some time, the open faucet may only sputter� This is
because the water heater is being lled and air is being
pushed out through the lines� Once the water heater is
full, a steady stream of water will ow from the faucet.
Now, open a cold faucet� It may sputter for a short time,
but will soon expel a steady stream� All other faucets
can now be opened until all air is expelled� Once the
system is lled with water and the faucets closed, the
water pump will shut off� When a faucet is opened, the
pump will come back on automatically� If the faucet is
just barely open, it is normal for the pump to cycle on
and off rapidly�
Water Pump
The water pump switch (monitor panel mounted, see
Appliances in this section) operates the pump� Once
the switch is turned on, the pump will run until the
water pressure reaches about 55 PSI� At this point, an
internal pressure switch will shut it off� When a faucet is
opened, the water pressure will drop and the pump will
start to run again�
As a general rule, the water pump should be turned
off while using a city water hookup, however the water
pressure at some campgrounds may be low� The water
pump can be turned on to assist the city water hookup
pressure� Be sure there is some water in the fresh
water tank� The pump will only use the water that is
needed out of the tank to bring the pressure up to the
usual standard of 55 PSI�
Access to the water pump will be necessary for
periodic cleaning of the strainer screen� Refer to
Section 8 - Maintenance for water pump access and
strainer screen removal�
Exhaust Fans
Basecamp trailers are equipped with a high volume
roof vent in the living area� Refer to High Volume Roof
Vent in this section�
In the bathroom a round ventilator is used and is
opened by pushing straight up on the crossbar handle
and pressing the red switch to engage the fan motor�
Ceiling and Directional Lighting
A wall switch just inside the door controls step, front,
rear and bathroom lights� At the rear door an adjustable
reading light has been installed and is operated by
pressing the lights lens�
Storage Tips
Kitchen cabinets should have the heaviest items stored
on the bottom and lighter items placed higher� After
loading, put skillets and canned goods on the oor or
bottom shelf, while cereals and crackers can be stored
higher� Use unbreakable-type plates and saucers, and
consider storing your dish towels around them�
Overhead custom netting has been installed in several
locations around the Basecamp� Use common sense
when storing items in these locations� Large heavy
items can be dangerous if stored in these locations
while traveling and can cause damage to the interior of
the trailer should they become dislodged�
WARNING
Keep ammable material away from the furnace.
 Loading...