Exterior
6-4 2017 Basecamp
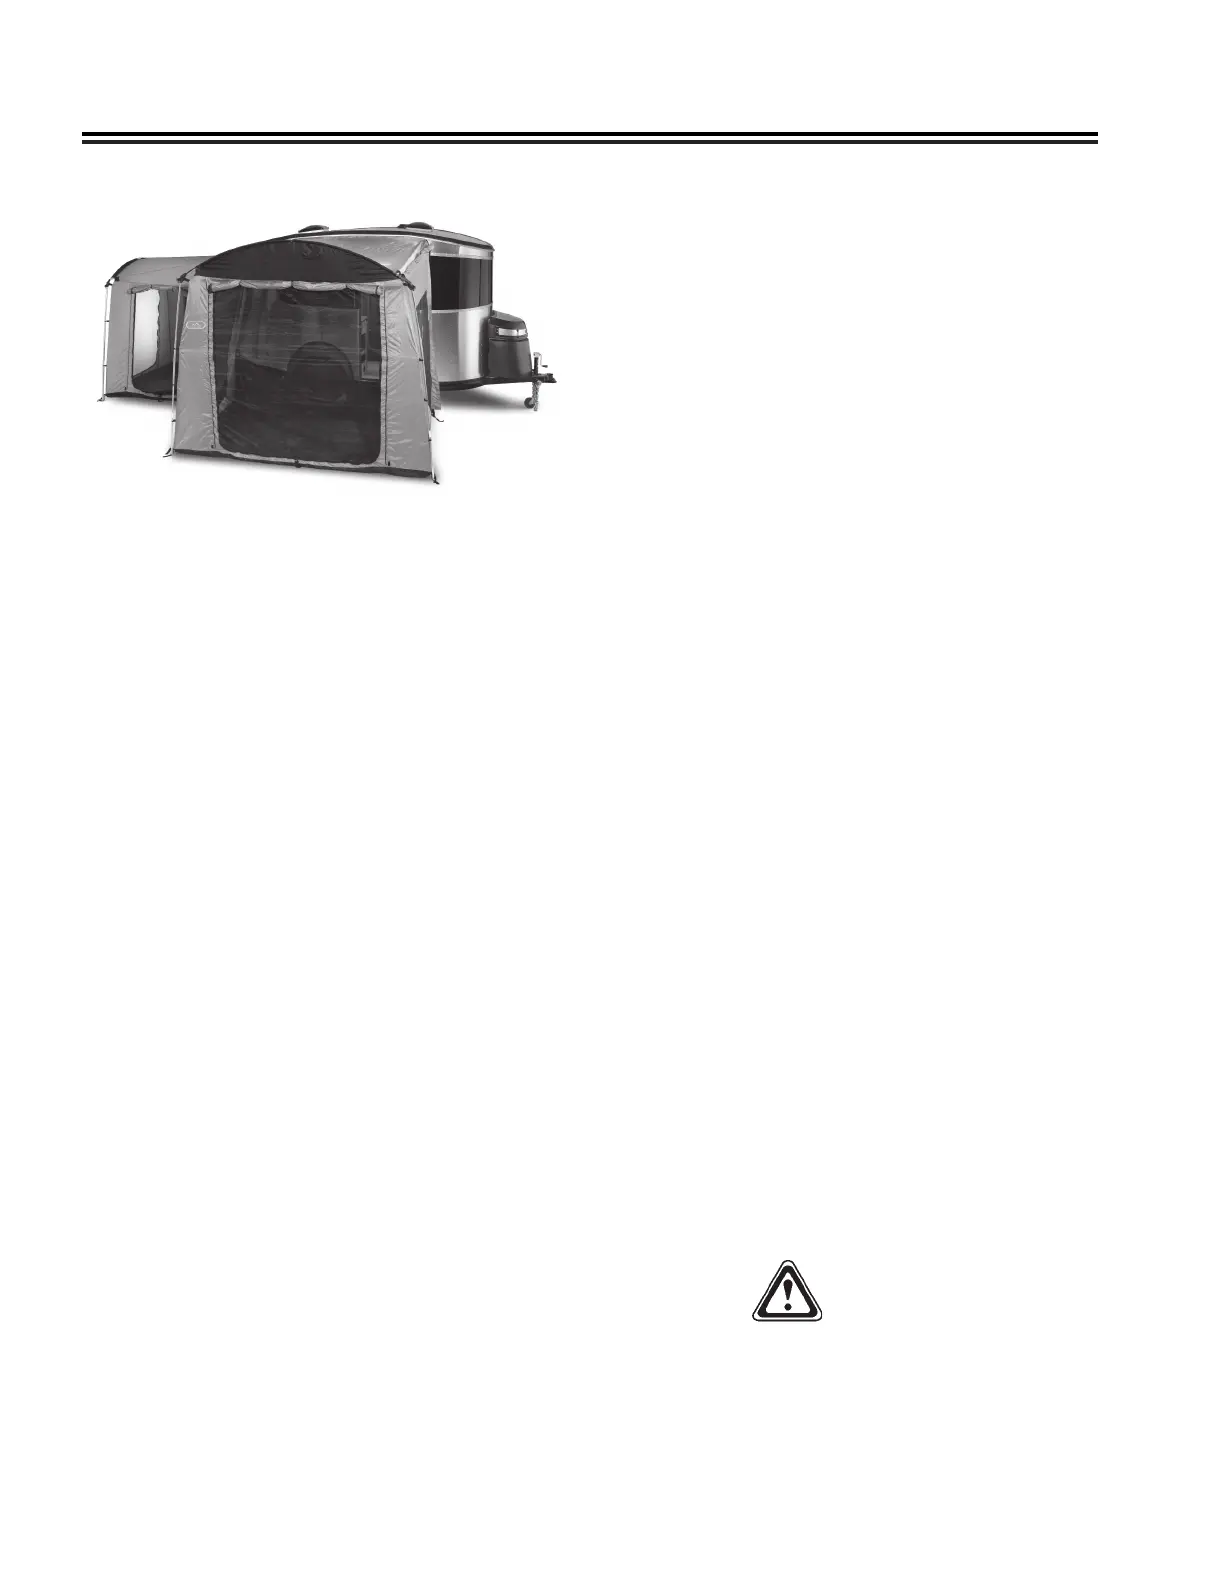
Rear and Curbside Tents
Your Airstream Basecamp offers optional tents with a
versatile design that allows for numerous options in
set-up and function� The tents attach directly to the
trailers keder rail, and creates a completely enclosed
and roomy space� The side tent features a large
U-shaped front door with zippered mesh and solid
door panels� The outer, solid-fabric door panel can be
extended out as an awning over the doorway using the
enclosed awning pole set� The front end of the side tent
has a large, zippered window, while the rear of the tent
has a door of the same design as the main door� This
gives a wide-open feeling when the doors and windows
are opened, and provides excellent visibility around the
camp site� The tents use a hybrid pole set that includes
aluminum vertical corner poles, and a berglass front
arch pole� The corner and roof poles connect via a
molded arch-connector which is designed to closely
match the shape of the trailer� Three adjustable-length
roof peak poles are used and provide support while
also allowing for proper drainage� The rear tent is
designed to include many of the same design features
as the side tent� The roadside of the rear tent includes
a large window, while the curbside of the rear tent has
another large main door�
NOTE
Refer to the set up instructions provided in your
owners packet for complete details on how to
setup and care for your Basecamp tent and visor.
NOTE
The rear tent can be used in conjunction with the
curbside tent or visor. The Curbside tent can be
used in conjunction with the rear tent but can not
be used with the visor installed.
Setting Up Your Rear Or Side Tent
1� Assemble all of the poles� DO NOT allow the shock
cord to snap the pole sections together, as this can
damage the poles�
2� Spread the Basecamp tent body on the ground
making sure the tent is right-side-up (shiny side
facing downward)�
3� Starting at the rear of the trailer, slide the tent
keder cord into the keder rail on the passenger
side, or rear depending on the tent, of the trailer�
Make sure that the tents keder cord is able to feed
freely into the rail as you pull the tent along the
keder rail. The keder cord should t completely
into the rail, with little or no excess hanging out of
either end�
4� Carefully insert the berglass pole into the pole
sleeve on the outer top edge of the tent and into
the two elbow connectors on either side of the tent�
5� Insert both ends of the middle roof pole into the
roof pockets located at the front center and rear
center of the keder edge against the trailer� Repeat
with the remaining two roof poles on both sides of
the tent�
6� Insert the non-peg end of the vertical aluminum
corner poles into the elbow connectors and the
pegs into the grommets at the lower front corners
of the tent�
7� Pull the tent out and away from the trailer� Using
two ground stakes and the two adjustable webbing
straps located at the front of the tent on either side,
secure the tent in place, and adjust the webbing
straps as needed to get a tight pitch� Stake the tent
down using all ground loops�
8� Secure the tent skirt to the trailer by sliding the
grommets over the rotating clasps attached to the
trailer belt line (3 for the rear tent and 4 for the
curbside tent)�
NOTE
For take down, simply reverse the set-up
sequence.
WARNING
Keep all ame and heat sources away from the
tent fabric. The tent is made with ame-resistant
fabric which meets CPAI-84 specications. IT IS
NOT FIREPROOF. The fabric will burn if left in
continuous contact with any ame source.





 To Next Page