21
Installation Procedures
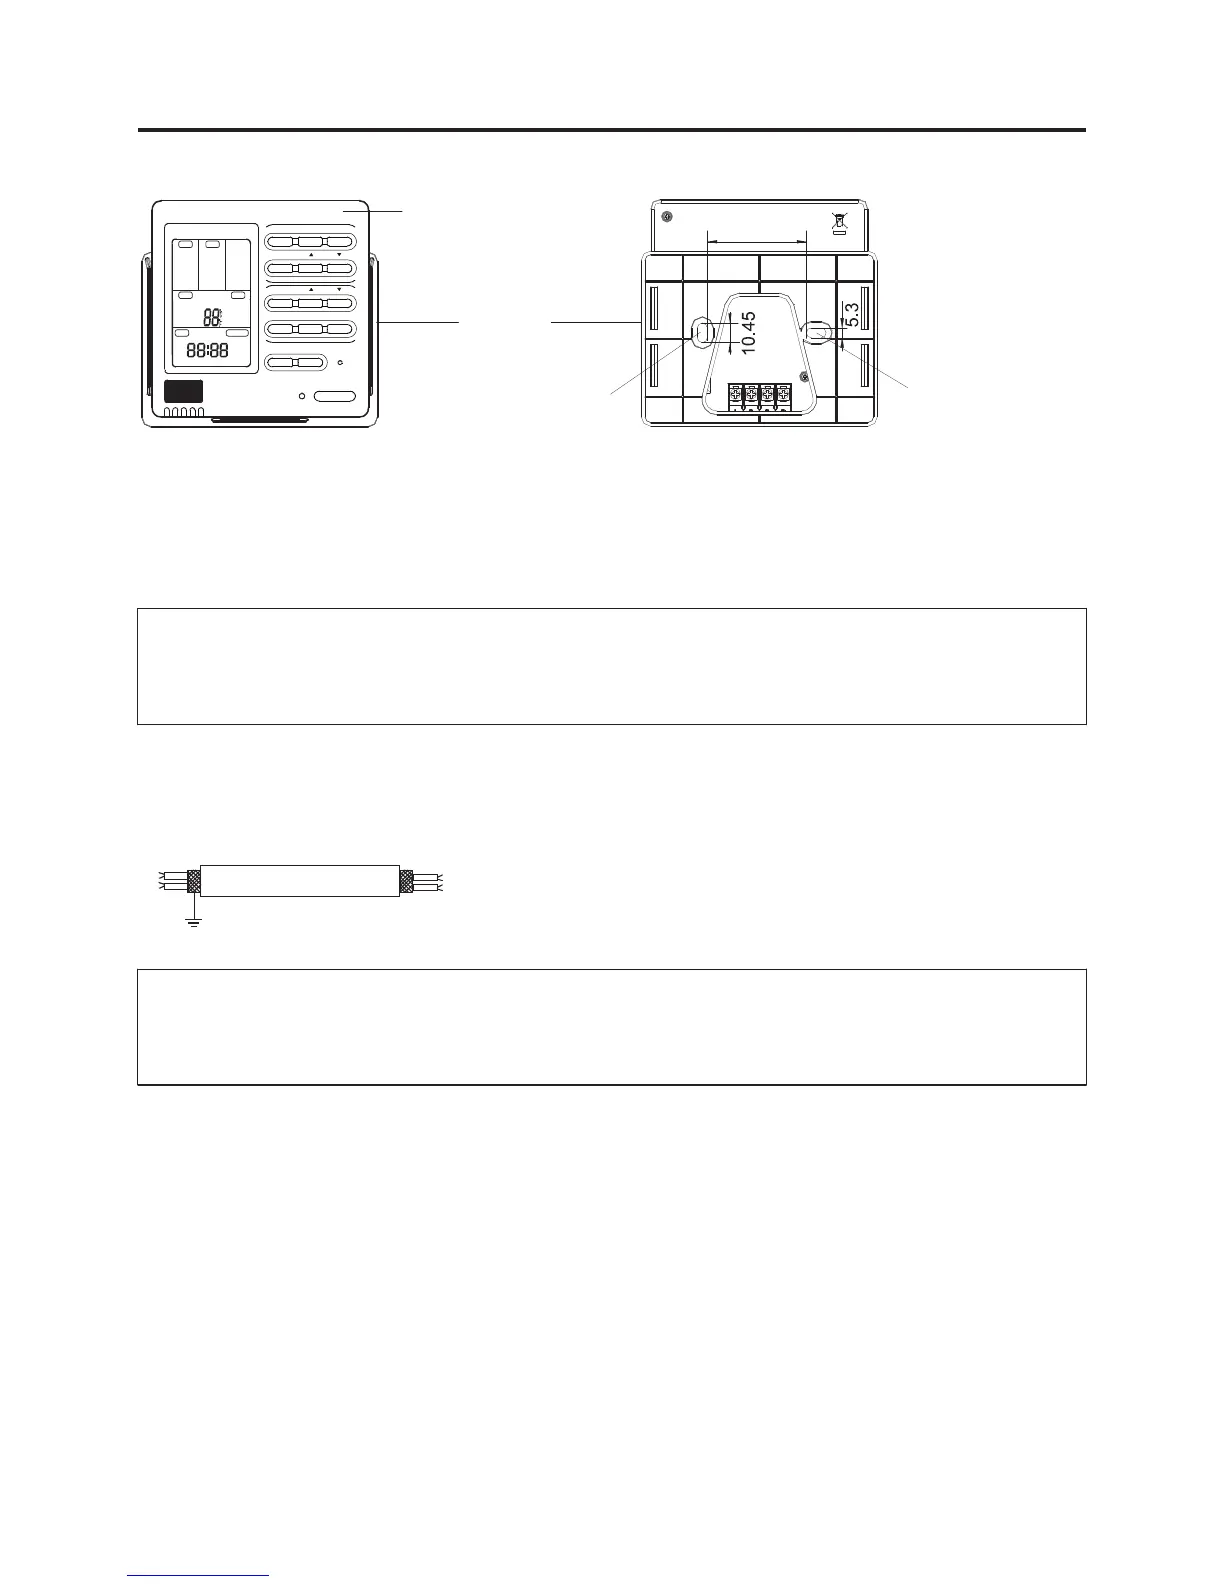
1. Take down wire controller from the holder
2. Install the controller holder
According to the position of 2 screw holes on the holder, drill 2 holes on the wall, and strike the
wood stopper to the holes respectively.
Then align the 2 screw holes of wired controller holder to the wood stopper, fix the holder on the
wall with wood screw.
Note:
Try a wall as flat as possible for installation. Don't use excessive force to tighten screws,
otherwise, the holder will be damaged.
3.Wiring instruction
Use shielded wire between indoor and wire controller. And be earthed on one side, or the unit
will not work normally because of interference.
Note:
Confirm the terminal connection firmly, and do not get in tough with shielded wire.
Don’t touch the PC panel with your hands.
shielded wire
grounding
Screw holes
Bracket
Wire controller
52#0.2
Screw holes
AUTO
FAN O NLY
COOL
DRY
HEAT
TES
FAN
AUTO
HIGH
LOW
FIX
CEN TRAL
OPE RATION
STAND BY
PRE -HEAT
DEF ROST
FILTER
MODE
HEALT H
SWINGCHEC K
UNIT N O. DEMAN D
CEN. AD D.
SYS . ADD.
MAN UAL
ROOM TEMP.
SET T EMP.
TIM ER
VENTILATION
CLO CK U P DOW N
ON
OFF
DAI LY
AUTO
REC OVERY
NOR MAL
MODE FAN SWING
HEALTH
CLOCK
TIMER
CHECK FILTER
RESET
ON/OFF
SET RECOVERY
TEMP
TIME
MED
4.Place wire controller on the holder, and pay attention not to pressing any wires.
 Loading...