Do you have a question about the Aiwa XP-V731 and is the answer not in the manual?
Avoid extreme environments, direct sunlight, strong magnetism, and vibration.
Use supplied AC adaptor, avoid disassembly, keep pins out, handle with care, close lid.
Replace batteries when indicator changes or "Lo-bAtt" appears.
Recharge when indicator lights or "Lo-bAtt" appears.
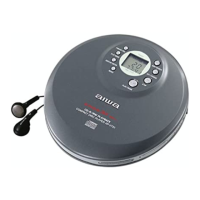
Connect headphones to PHONES/LINE OUT, use VOLUME +/- and DSL.
Reduces skipping by buffering playback sound, offers 12 or 48 sec buffer.
Clean with blower/brush for dust, or lens cleaning solution on swab for fingerprints.
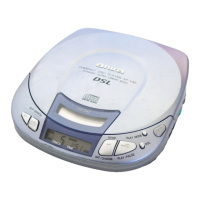
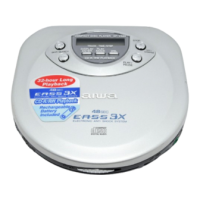
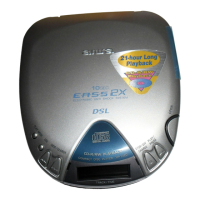
This document describes the Aiwa XP-V731 / XP-V731C Compact Disc Player, a portable audio device designed for playing CDs. It offers various playback modes, sound enhancements, and power options, making it versatile for different listening environments.
The primary function of this device is to play compact discs. It supports standard audio CDs and may play some CD-R/RW discs, though compatibility with discs recorded on personal computers or certain CD-R/RW recorders is not guaranteed due to recording platform differences.
The player features a HOLD switch to prevent accidental button presses. When engaged, the unit will display "HOLd" if any button is pressed, indicating that the controls are locked. To operate the device, the HOLD switch must be released.
Powering the device on is achieved by pressing the PLAY/PAUSE button, which also initiates playback. If no disc is present or if a defective/upside-down disc is inserted, "Err" will be displayed. The unit enters a standby mode after an operation finishes, and an auto power off function will automatically turn off the power after 30 seconds of inactivity from the end of the last operation. To manually turn off the power from standby mode, the STOP/OFF/CHARGE button should be pressed.
The player includes a PHONES/LINE OUT jack for connecting headphones (supplied) or an amplified speaker system. Volume can be adjusted using the VOLUME+ and - buttons. A DSL (Dynamic Super Linear Bass) feature is available for a more powerful sound and deeper bass. This can be activated by holding down the PHRASE/DSL button, and the DSL indicator will light up. Holding the button again returns to normal playback.
The device offers several playback modes, selectable by repeatedly pressing the PLAY MODE button:
During playback, pressing the PHRASE/DSL button will return playback to 5 seconds earlier. This feature allows for easy re-listening to specific segments.
When the HOLD switch is set to "RESUME," the player can resume playback from the exact point where it was stopped, even if the unit was turned off. "RESUME" will appear on the display, and all-track repeat is automatically selected. To cancel this function, the HOLD switch should be set to "OFF." Note that resume play may not operate if stopped within the last 30 seconds of the final track or if the disc compartment is opened.
Users can program up to 24 tracks to play in a desired order. This involves selecting tracks using the SKIP/SEARCH buttons and confirming each selection with the DISPLAY/ENTER button. The program can be started by pressing PLAY/PAUSE and stopped with STOP/OFF/CHARGE. Tracks can be added to an existing program, and the program can be erased by pressing STOP/OFF/CHARGE in standby mode. Programmed tracks can be reviewed by pressing DISPLAY/ENTER repeatedly in standby mode.
The player includes several additional features accessible via the MENU button:
The player can be powered by two size AA (LR6) alkaline batteries or two optional Ni-Cd 1.2 V 700 mAh rechargeable batteries. It can also be powered by AC house current using the supplied AC adaptor.
During playback, the DISPLAY/ENTER button can be pressed repeatedly to cycle through different display modes:
Always listen at moderate volumes to prevent hearing damage. Avoid wearing headphones while driving or cycling due to traffic hazards. Exercise caution in potentially hazardous situations. Ensure correct wear: L for left, R for right.
If the unit is moved from a cold to a warm place, condensation may form on the pickup lens, leading to malfunction. If this occurs, leave the unit for a few hours before attempting playback again.
A dirty pickup lens can cause skipping or prevent playback. To clean it:
Before and after playing, wipe the disc from the center outwards with a cleaning cloth. Store discs in their cases after use.
Do not attach any adhesive labels to either side of a CD-R/RW disc, as this may cause malfunction.
| Type | Portable CD Player |
|---|---|
| Disc Capacity | 1 |
| Anti-Shock Memory | 45 seconds |
| Frequency Response | 20 Hz - 20 kHz |
| Signal-to-Noise Ratio | 90 dB |
| Dynamic Range | 85 dB |
| Channel Separation | 85 dB |
| Output | Headphone Jack |
| Playback Formats | CD, CD-R |
| Playback Modes | Shuffle, Repeat |
| Power Source | 2 x AA batteries or AC adapter |
| Output Level | 0.7V (RMS) |
| Features | Anti-shock system |