6
Table 1. Selection Matrix For Switches 6, 7 and 8
The following table shows the combinations of DIP switch settings required to configure
various formats. To use the table, first locate the video format you want in the colored
columns and then set switches as shown in the corresponding left hand gray column.
Note: the switches numbers and labels are both shown on the chart, with the labels in
parentheses (for example, switch 4 is labelled “FORMAT” and switch 8 is labelled “S3”).
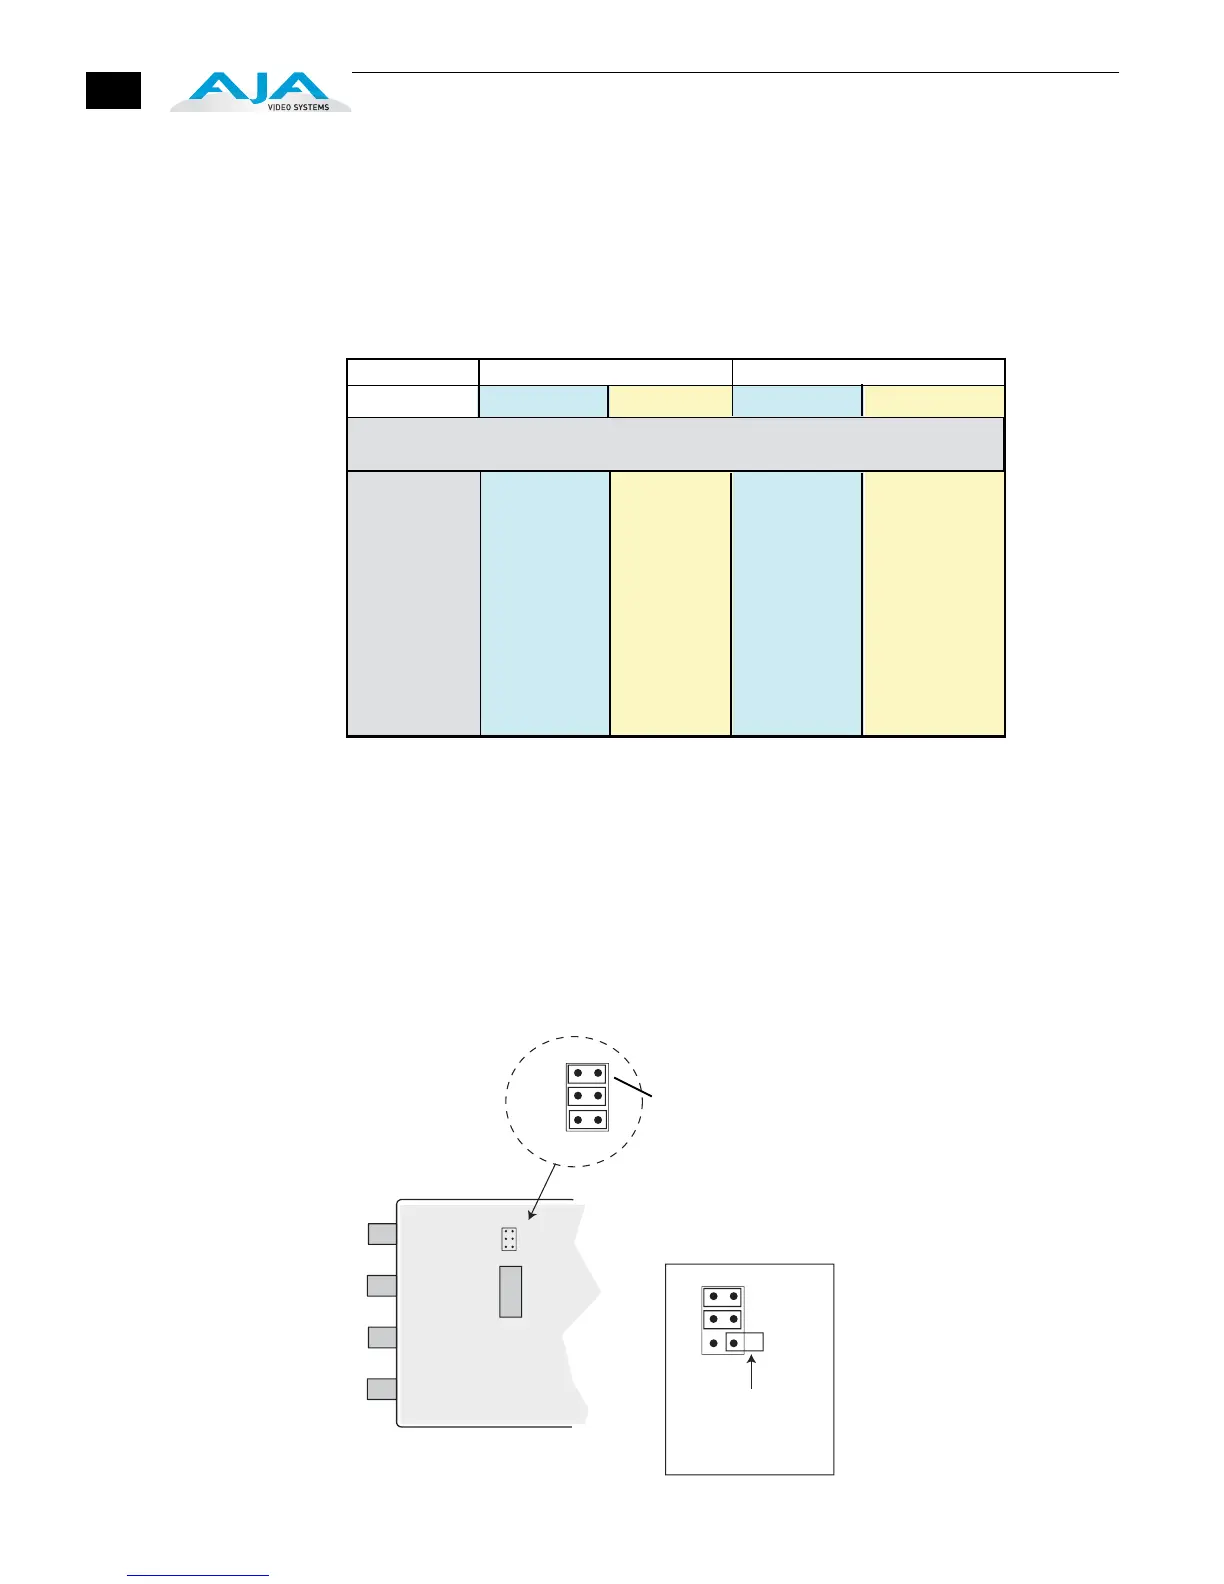
Internal Jumper
An internal jumper block with 3 jumpers determines the offset to Pedestal for NTSC. For
most instances, the factory default (all jumpers in place) will be the proper setting.
•
Jumper 1 installed (default): NTSC with Setup (54 mV pedestal offset)
•
Jumper 1 removed : NTSC without Setup (no offset)
Note:
Jumpers 2 and 3 are ignored—installed or not, they do not affect operation.
GEN10 Internal Jumper (remove back of case to access)
Note: for 1080psf29.97 use 1080i59.94
for 1080psf30 use 1080i60
for 1080
sf25 use 1080i50
SW 4 (FORMAT)
SW 5 (HD FMT)
000
001
010
011
100
101
110
111
1080i59.94
1080psf23.98
1080p23.98
1080p29.97
1080i60
1080psf24
1080p24
1080p30
720p50
720p25
720p25
720p25
720p50
720p25
720p25
720p25
720p59.94
720p23.98
720p23.98
720p29.97
720p60
720p24
720p24
720p30
1080i50
1080i50
1080p25
1080p25
1080i50
1080i50
1080p25
1080p25
SW8 (S3) - SW7 (S2) -SW6 (S1): These three switches form a binary value
shown in the left hand column below. A “0” = switch LEFT, a “1” = switch RIGHT.
59.94 50
1080 720 1080 720
SW8-SW7-SW6
(S3) (S2) (S1)
1
2
3
1
2
3
4
5
6
7
8
DIP
Switches
1
2
3
Defaults Shown Here
1=ON, 2=ON, 3=ON
To keep an
“uninstalled” jumper
for future use, you
can place it over only
a single pin
JUMPER 1
Back of GEN10
(where DIP switch
access can be seen)
 Loading...