EasyManuals Logo

Akai EWV2000 Manual

Akai EWV2000
29 pages
To Next Page IconTo Next Page
To Previous Page IconTo Previous Page
Page #2 background imageLoading...
Page #2 background image
I.
CONTROL
1-1.
CONTROL
PANEL
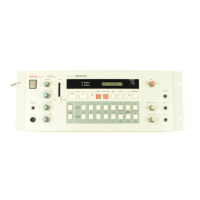
Fig.
1-1
(D
(D
<D
POWER:
Power
Switch
@
A
Use
this
switch
to
turn
the
power
of
the
EWV2000
on
and
off.
(2)
PROGRAM
UP/DOWN:
Program
Up/Down
Jack
Use
this
jack
to
connect
a
foot
switch.
The
memory
bank
number
can
be
switched
using
the
foot
switch.
($)
INSTRUMENT:
Controller
Connection
Jack
<Q>
Use
this
jack
to
connect
the exclusive
EWI
1000
or
EVI
1000
wind
instru
ment
style
controller.
<D
VIBRATE:
Vibration
Control
Knob
tg>
This
knob
adjusts
the
level
of
the
vibrato
(VCO),
pulse
width
modulation
(PWM),
growl
and
wow-wow
(VCF), and
tremolo
(VCA)
for
ihe
lip
sensor
on
the
EWI
1000
or
the
vibration
lever
on
the
EVI
1000.
The
func
tion
of
this
knob
depends
on
the
mode
selected
with
the
VIB
button
de-
©
scribed
below.
®
BEND:
Bend
Control
Knob
This
knob
is
used
lo
manually
adjust
the
bend
width
for
the
bender
plate/
(ft,
touch
sensor
on
the
EWI1000
or
EVI1000.
Use
it
to
move
the
pitch
up
or
down.
The
outer,
large
knob
is
the
adjuster
for
properly
operating
Ihe
bender
plate's
touch
sensor.
Turn
this
knob
clockwise
without
touching
ft)
the
bender
plate
until
the
LED
tights,
then
turn
it
back
a
little
counterclock-
wise
so
that
the
LED
turns
off.
The
adjustment
is
now
complete.
GLIDE:
Glide
Control
Knob
ft*
Use
this
knob
to
obtain
a
glide
effect
(soft
rising
or
falling
of
the
pitch)
with
the
glide
plate/touch
sensor
on
the
EWI
1000
or
EVI
1000.
If
you
use
this
with
skill
you
can
achieve
portamento.
Adjust
the
outer
adjust
knob
in
Ihe
same
way
as
for
the
BEND
knob.
BREATH:
Breath
Control
Knob
Adjust
this
knob
so
that
the
VCO,
PWM,
VCF,
and
VCA
function
smoothly
according
to
the
strength
of
the
breath
blown
into
the
mouth-
(\i>
piece
on
the
EWI1000
or
EVI
1000.
The
outer,
large
knob
is
the
adjuster
for
properly
operating
the
breath
sensor
for
the
mouthpiece.
Adjust
il
in
the
same
way
as
for
the
BEND
and
GLIDE
knobs,
without
blowing
into
Ihe
mouthpiece.
&,,
(!)
VALUE:
Value
Slide
Controller
^
This
controller
is
used
in
the
EDIT
mode
when
editing
lo
increase
or
de
crease,
select,
turn
on
or
off,
and
choose
letters,
etc.
for
the
parameters.
<D
VALUE
UP/DOWN:
Value
Up/Down
Keys
<8)
These
keys
are
used
in
the
PLAY
mode
to
increase
or
decrease
the
number
of
the
memory
banks.
Also,
in
the
EDIT
mode,
they
can
be
used
increase
or
decrease,
select,
turn
on
or
off,
or
change
tellers
or
codes
for
ihe
parameters
one
step
at
a
time
(by
pressing
the
desired
key
once).
©
DISPLAY:
Display
Section
LED
SOURCE
1
In
the
PLAY
mode,
this
LED
lights
for
a
voice
whose
source
I
level
is
"I"
or
greater.
In
the
EDIT
mode,
it
lights
when
setting
the
various
parameters
for
source
I.
LED
SOURCE
2—
In
the
PLAY
mode,
this
LED
lights
for
a
voice
whose
source
2
level
is
"1"
or
greater.
In
the
EDIT
mode,
it
lights
when
setting
the
various
parameters
for
source
2.
THE
LIQUID
CRYSTAL
DISPLAY
(LCD)
indicates
various
messages,
voice
names,
and
parameters
for
the
EWV2000
in
16
characters.
The
dis
play
is
equipped
with
a
backlight,
so
it
can
be
seen
even
in
dark
places.
The
CONTRAST
knob
adjusts
the
contrast
of
the
LCD.
Adjust
it
according
to
Ihe
place
in
which
you
are
using
the
EWV2000
to
the
position
in
which
you
can
see
the
display
more
clearly.
(Q)
WRITE:
Memory
Write
Button
This
button
is
used
to
store
voices
thai
you
created
or
edited
into
the
memory
bank.
Il
is
also
used
lo
copy
a
memory
bank
which
has
been
re
called
onto
another
bank
number.
AUTOTUNE:
Auto
Tune
Button
When
this
button
is
pressed,
the
VCOs
and
VCFs
of
the
EWV2000
are
au
tomatically
set
to
the
optimum
tuning.
Make
a
habit
of
pressing
this
button
before
performances
and
before
edit
ing
or
creating
new
sounds.
MIDI:
MIDI
Button
This
button
is
used
to
set
the
MIDI
channels
(1
through
16),
select
the
breath
control
sending
mode,
and
set
the
breath
control
sending
threshold.
TAPE:
Tape
Memory
Button
This
button
is
used
to
save
the
data
for
memory
banks
onto
a
cassette
tape,
all
banks
at
once
or
one
bank
at
a
lime,
as
well
as
to
load data
into
the
EWV2000fromatape.
TRANSPOSE:
Transpose
Button
This
button
is
used
to
change
the
pilch.
It
is
possible
to
transpose the
pitch
within the
range
D"—C--+D#.
TUNE:
Tuning
Button
This
button
is
used
lo
tune
the
pitch
of
the
EWV2000
to
match
that
of
other
instruments.
Tuning
is
possible
within
a
range
of
±
100
cents.
PHONES:
Headphones
Jack
Use
this
jack
to
monitor over
headphones.
Adjust
ihe
volume
with
the
LINE
OUT
knob.
EDIT:
Edit
Mode
Button
Use
this
button
when
creating
or
editing
voices.
After
pressed,
memory
bank
buttons
I
through
8
and
memory
number
buttons
I
through
8
arc
used
lo
select
ihe
parameters,
the
EWV2000
is
set
to
the
EDIT
mode,
and
the
parameters
appear
on
the
LCD.
When
pressed
again,
the
EDIT
mode
is
cancelled,
the
EWV2000
returns
to
the
PLAY
mode,
and
the
bank
number
and
voice
name
are
displayed
on
the
LCD.
BACKWARD:
Backward
Button
When
selling
parameters
in
the
EDIT
mode,
if
this
button
is
pressed,
the
parameter
being
edited
is
moved
backward
to
the
previous parameter.
Each
time
the
button
is
pressed
the
parameter
switches
back
one
step.
BANK
(l-8)/SOURCE
I:
Memory
Bank/Source
I
Parameter
Select
Buttons
In
the
PLAY
mode,
these
buttons
select
the
memory
bank
(I
through
8),
and
in
Ihe
EDIT
mode,
they
select
the
source
1
parameters.
NUMBER
(l-8)/SOURCE
2:
Memory
Number/Source
2
Parameter
Select
Buttons
In
Ihe
PLAY
mode,
these
buttons
select
the
memory
numbers
(I
through
8)
together
with
the
memory
bank
(1
through
8)
select
buttons
(20).
In
the
EDIT
mode,
they
select
the
source
2
parameters.
Parameter
Select
Buttons
Buttons
2
through
S
are
the
same
parameters
for
sources
I
and
2.
LH-
OSC:
Used
lo
scieel
the
VCO
parameters.
3h
VCF:
Used
lo
select
ihe
VCF
parameters.
[J]~
VCF
EG—
Used
lo
select
the
parameters
for
the
VCF
envelope
generator.
3]-
VCA
EG--
Used
lo
select
the
parameters
for
the
VCA
envelope
generator.
[S-
LEVEL:
Used
to
set
up
ihe absolute
values
of
the
source
I
and
2
pitches.
Buttons
6
through
8
are
used
for
both
source
1
and
2.
Scan by Manual Manor
http://www.markglinsky.com/ManualManor.html

Other manuals for Akai EWV2000

Questions and Answers:

Question and Answer IconNeed help?

Do you have a question about the Akai EWV2000 and is the answer not in the manual?

Akai EWV2000 Specifications

General IconGeneral
BrandAkai
ModelEWV2000
CategoryRecording Equipment
LanguageEnglish

Related product manuals