INSTALLATION
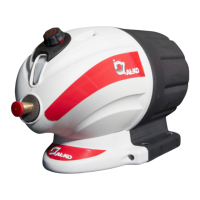
Actuator
! IMPORTANT
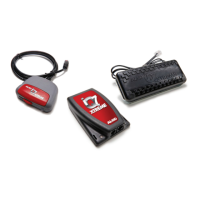
Under no circumstances should any control system, other than approved AL-KO iQ7
controllers, be used in conjunction with the AL-KO iQ7 Actuator.
Mounting Bracket
The AL-KO iQ7 actuator incorporates four mounting holes on the base of the unit (Refer
gure 3, below). In order to attach the unit securely to the trailer and to minimise vibration,
a sturdy mounting bracket must be fabricated.
Use a 6mm or 1/4” bolt with a suitable locking nut to x the actuator to the trailer.
It is important to ensure the mounting bolts are not over tightened during installation.
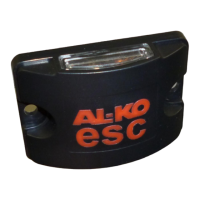
If the rubber mounting grommet appears oval shaped (Refer gure 2, below) it has become
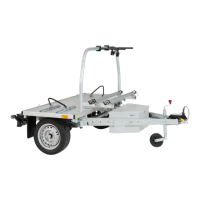
over tightened. When choosing a location for the mounting bracket, consider positioning of
additional trailer accessories, such as a winch etc.
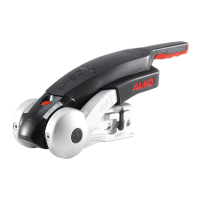
Figure 1. Mounting Position Actuator Bow post Figure 2. Mounting Bush
Actuator
Bow Post
Mounting bush
Rubber grommet
Over tightened Correct
Brake Fluid
Reservoir
Master
Cylinder
Port
Pressure
Dump Valve
100mm
140mm
168mm
281mm
Diameter: 6.0mm of 1/4”
Maximum Fluid Level
Minimum Fluid Level
Diagram 1.
Attaching the
bleed gun to
the actuator.
Bleeding
(Diagram 2)
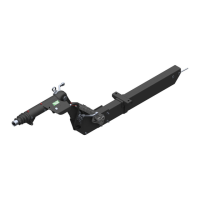
Figure 3. Mounting Bracket Figure 4. Actuator
Actuator
Actuator
Bow Post
Mounting bush
Rubber grommet
Over tightened Correct
Brake Fluid
Reservoir
Master
Cylinder
Port
Pressure
Dump Valve
100mm
140mm
168mm
281mm
Diameter: 6.0mm of 1/4”
Maximum Fluid Level
Minimum Fluid Level
Diagram 1.
Attaching the
bleed gun to
the actuator.
Bleeding
(Diagram 2)
2
Actuator
Actuator
Bow Post
Mounting bush
Rubber grommet
Over tightened Correct
Brake Fluid
Reservoir
Master
Cylinder
Port
Pressure
Dump Valve
100mm
140mm
168mm
281mm
Diameter: 6.0mm of 1/4”
Maximum Fluid Level
Minimum Fluid Level
Diagram 1.
Attaching the
bleed gun to
the actuator.
Bleeding
(Diagram 2)
Actuator
Actuator
Bow Post
Mounting bush
Rubber grommet
Over tightened Correct
Brake Fluid
Reservoir
Master
Cylinder
Port
Pressure
Dump Valve
100mm
140mm
168mm
281mm
Diameter: 6.0mm of 1/4”
Maximum Fluid Level
Minimum Fluid Level
Diagram 1.
Attaching the
bleed gun to
the actuator.
Bleeding
(Diagram 2)
iQ7 Installation & Operation Instruction
 Loading...