4 | Alarm.com Hub Install Guide Alarm.com Hub Install Guide | 5
With the Alarm.com Hub as your home’s command
center, you’ll gain remote control of your key
devices using our reliable and secure cloud service.
Create automated lighting, thermostat and video
recording rules, and get customized alerts to
always know what’s going on at home.
Alarm.com Hub Overview Installation
Step 1: Powering Up the Hub
• Plug the AC adapter into an unswitched outlet.
(This is an outlet that is always “on,” and can’t be
controlled by an on/o light switch or dimmer
switch.) Connect the other end of the AC adapter
to the Hub’s DC IN port (
).
• The Hub’s Status Light will change colors during
the rst few seconds. Once the Status Light stays
solid white or continues to ash white, you can
continue the setup process.
• Once the Hub is powered up, it will automatically
communicate with the Alarm.com cloud and
connect to your customer account.
NOTE: It may take up to ve minutes for the
Hub to complete this process. During this
time, you may unplug the Hub and start
pairing devices.
Step 2: Pairing Z-Wave Devices with the Hub
If your Z-Wave devices have ever been used
previously, rst see the Unpairing Z-Wave
Devices section on the next page.
• For best results, bring the Hub into the room
where your Z-Wave device is installed. The Hub’s
battery enables cordless pairing, so you can move
the Hub around your home as you pair it with
devices.
• To put the Hub in Pairing Mode, press the Pairing
button once (
). The Status Light will start
ashing green slowly and the Hub will beep once.
• To put your Z-Wave device into Pairing Mode,
follow the instructions that came with the device.
Most devices have a Z-Wave action button.
• When the device and the Hub begin to
communicate, the Hub’s Status Light will ash
quickly. If pairing is successful, the Hub will beep
for one second, and the Status Light will stay solid
green for 120 seconds.
• After a device is paired, the Hub automatically exits
Pairing Mode. To pair another device with the Hub,
place the Hub in Pairing Mode again and follow
the steps above.
• If pairing is unsuccessful, follow the steps on
the next page to unpair the device, and then try
pairing it again.
• To exit Pairing Mode, press and quickly release the
Pairing button (
). Alternatively, the Hub will exit
automatically after 120 seconds of inactivity.
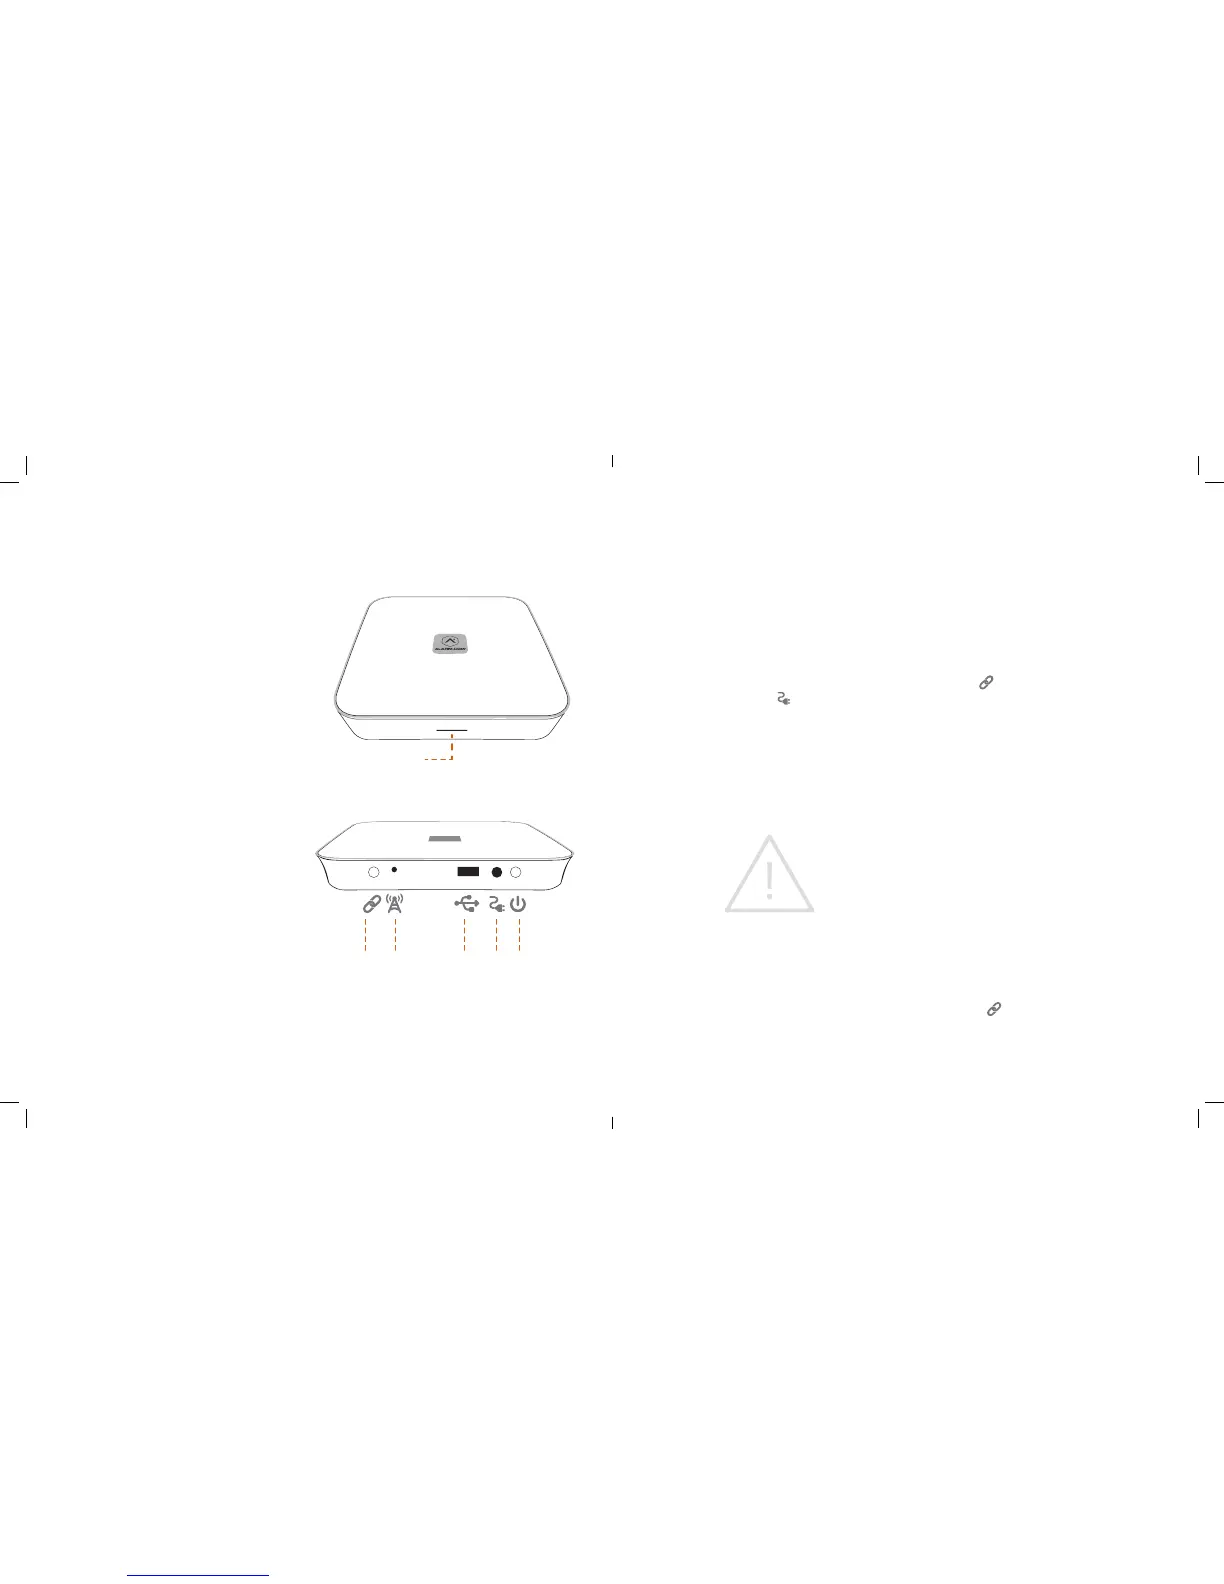
STATUS LIGHT
PAIRING
BUTTON
POWER
BUTTON
DC IN
PORT
EXTERNAL
ANTENNA
OPTIONAL
SERVICE
USB PORT
 Loading...