2 - Install Hardware
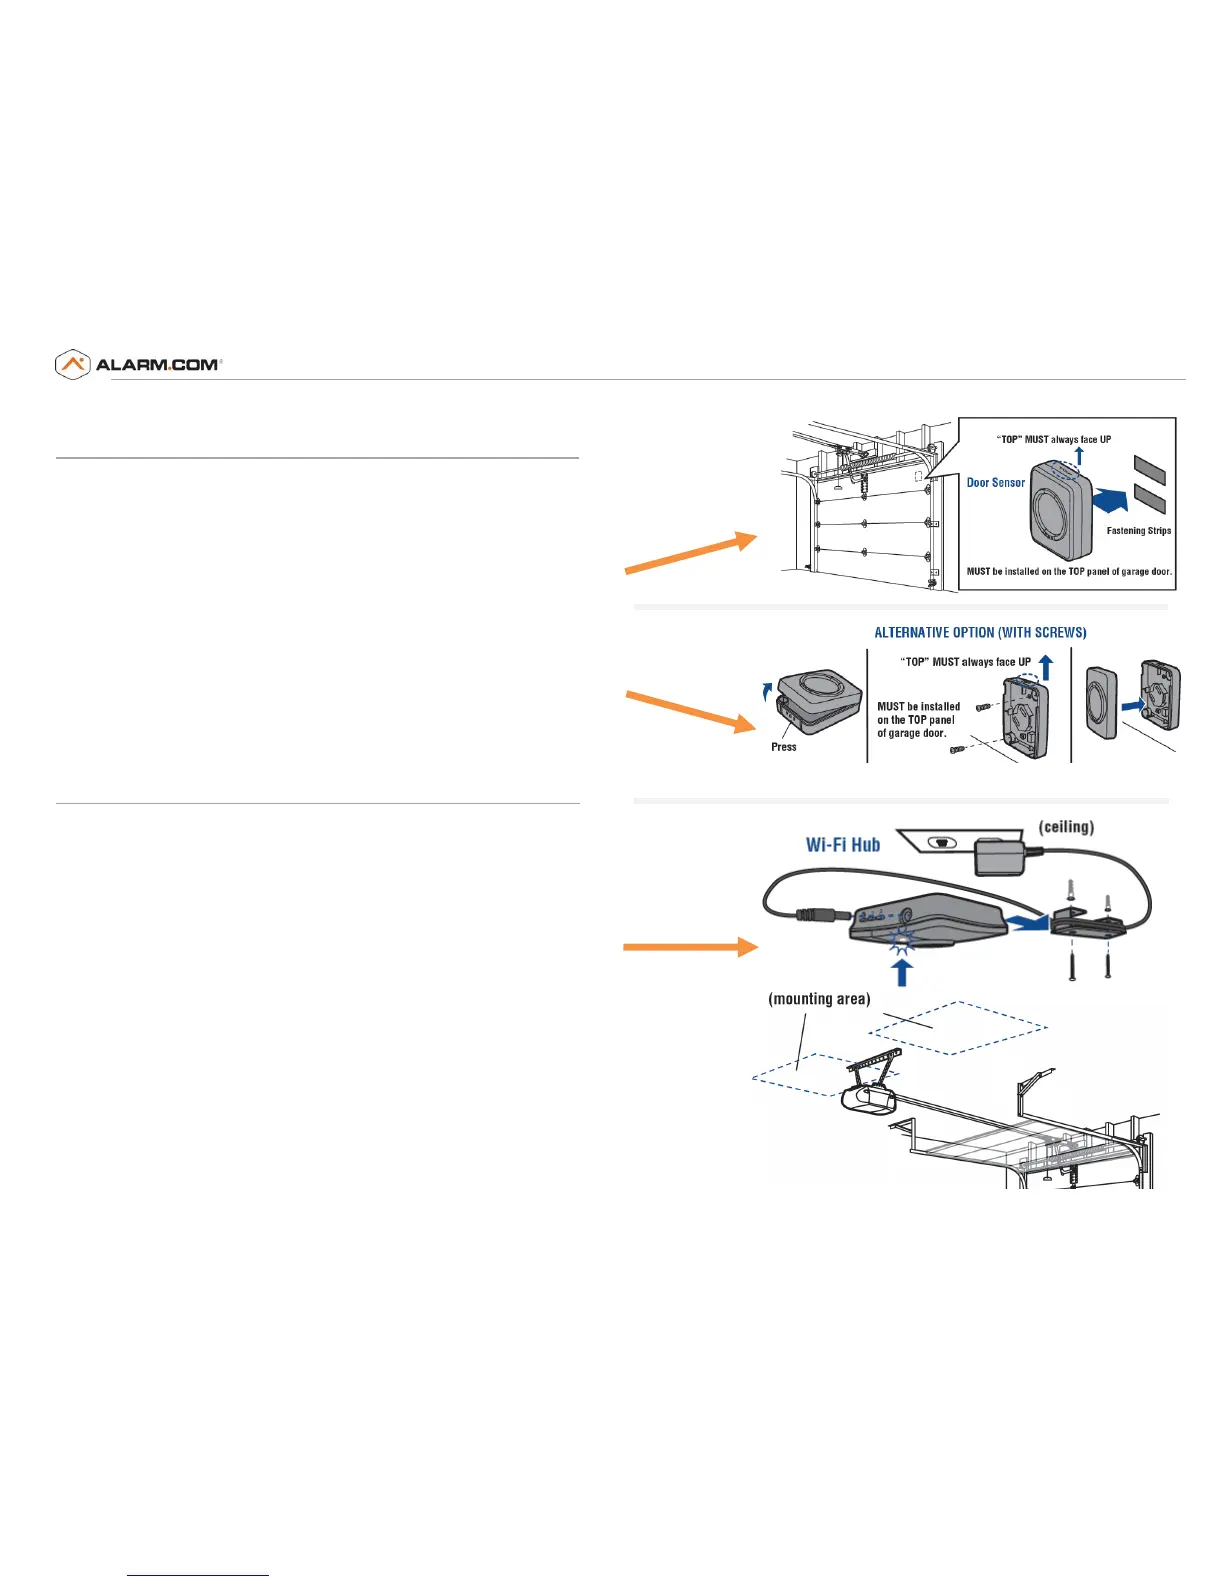
Install Door Sensor
This device will communicate the state of the door (open or closed) to the
Wi-Fi Hub and must be mounted prior to step 4.
A) To install, position the door sensor vertically and attach to a clean,
dry location on the top panel of the garage door with fastening
strips (provided).
OR
B) Press in the bottom of the door sensor and remove the front cover.
Position the door sensor vertically and attach to the top panel of the
garage door with screws (provided). Replace the front cover.
Mount the Wi-Fi Hub
Optional: Final positioning can wait until after setup is
complete.
1) Install the bracket for Wi-Fi Hub on the ceiling near the garage door
opener. Use the bracket as a template and mark holes for the bracket. Be
sure the Wi-Fi Hub is visible when standing in the doorway of the garage,
so that users can see the flashing light when the door is closing.
2) Slide the Wi-Fi Hub on to the bracket.
3) Connect to AC power.
4) The LEDs will blink momentarily indicating a successful power up.
Note: MyQ® technology has a range of 1,500 feet (open field).
 Loading...