Appendix
Connect to Alarm.com using Dealer Site
Note: You cannot register MyQ® Garage through Alarm.com if it is already
registered through MyQ®/Liftmaster/Chamberlain or other similar apps. (See
“Additional Resources”)
1)
Make sure the LED on the Hub is green before registering through the
Alarm.com Dealer Site.
2)
Login to www.alarm.com/dealer.
3)
Find and select the customer you’d like to connect with the Wi-Fi Hub.
4)
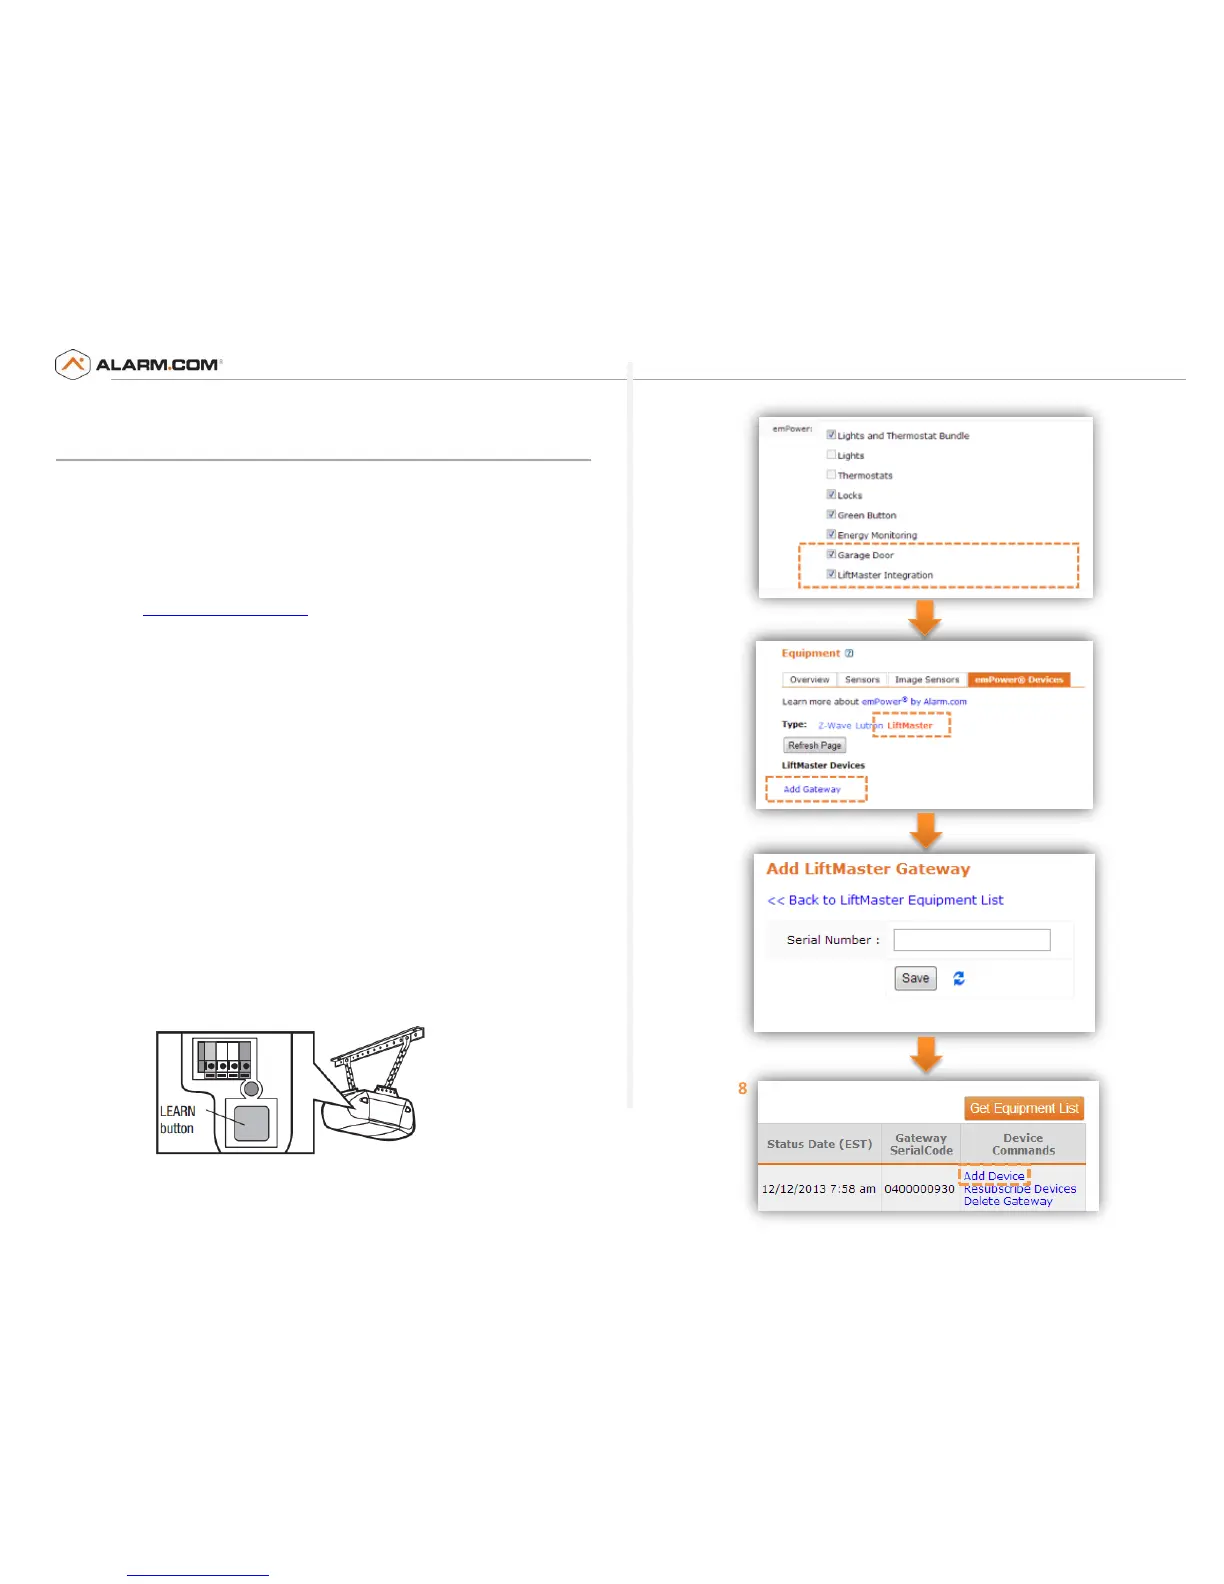
Select service plan on the left and add the “Garage Door Control” and
“LiftMaster Integration” add-ons to the account’s service plan (Service
Plan -> Change Service Plan).
5) Use the tabs to navigate to the emPower equipment page (Equipment ->
emPower Devices) and select the LiftMaster section.
6) Select “Add Gateway” and enter the Wi-Fi Hub’s serial number.
The serial number can be found at the back of the Hub below the
barcode. Please wait patiently as this process may take several minutes.
7) After a few minutes, the equipment page should show the LiftMaster
Gateway in the equipment list.
8) Select “Add Device” for the Wi-Fi Hub that was just added. You may need
to refresh the page first.
9) Follow the instructions presented to add door sensor(s) and garage door
opener(s) to the system.
 Loading...