Assembly
Before using your chainsaw, the following assembly is required to be
undertaken including assembling the guide bar (18) and chain (19),
and fitting the chain drive side cover (22).
Assembly / Installation of the Guide Bar and Chain
WARNING: The chain has sharp edges. Use work gloves for safety.
WARNING: Ensure the engine is switched o when making any
adjustments to the chain and bar.
IMPORTANT: The front guard / chain brake (12) must be disengaged
when installing the guide bar (18) and chain (19).
NOTE: The chain drive side cover (22) is not assembled on the chainsaw
for rst use. The instructions below detail the assembly based on
the chain drive side cover being assembled on the chainsaw (for
replacement in future). For FIRST time assembly, start at point 6.
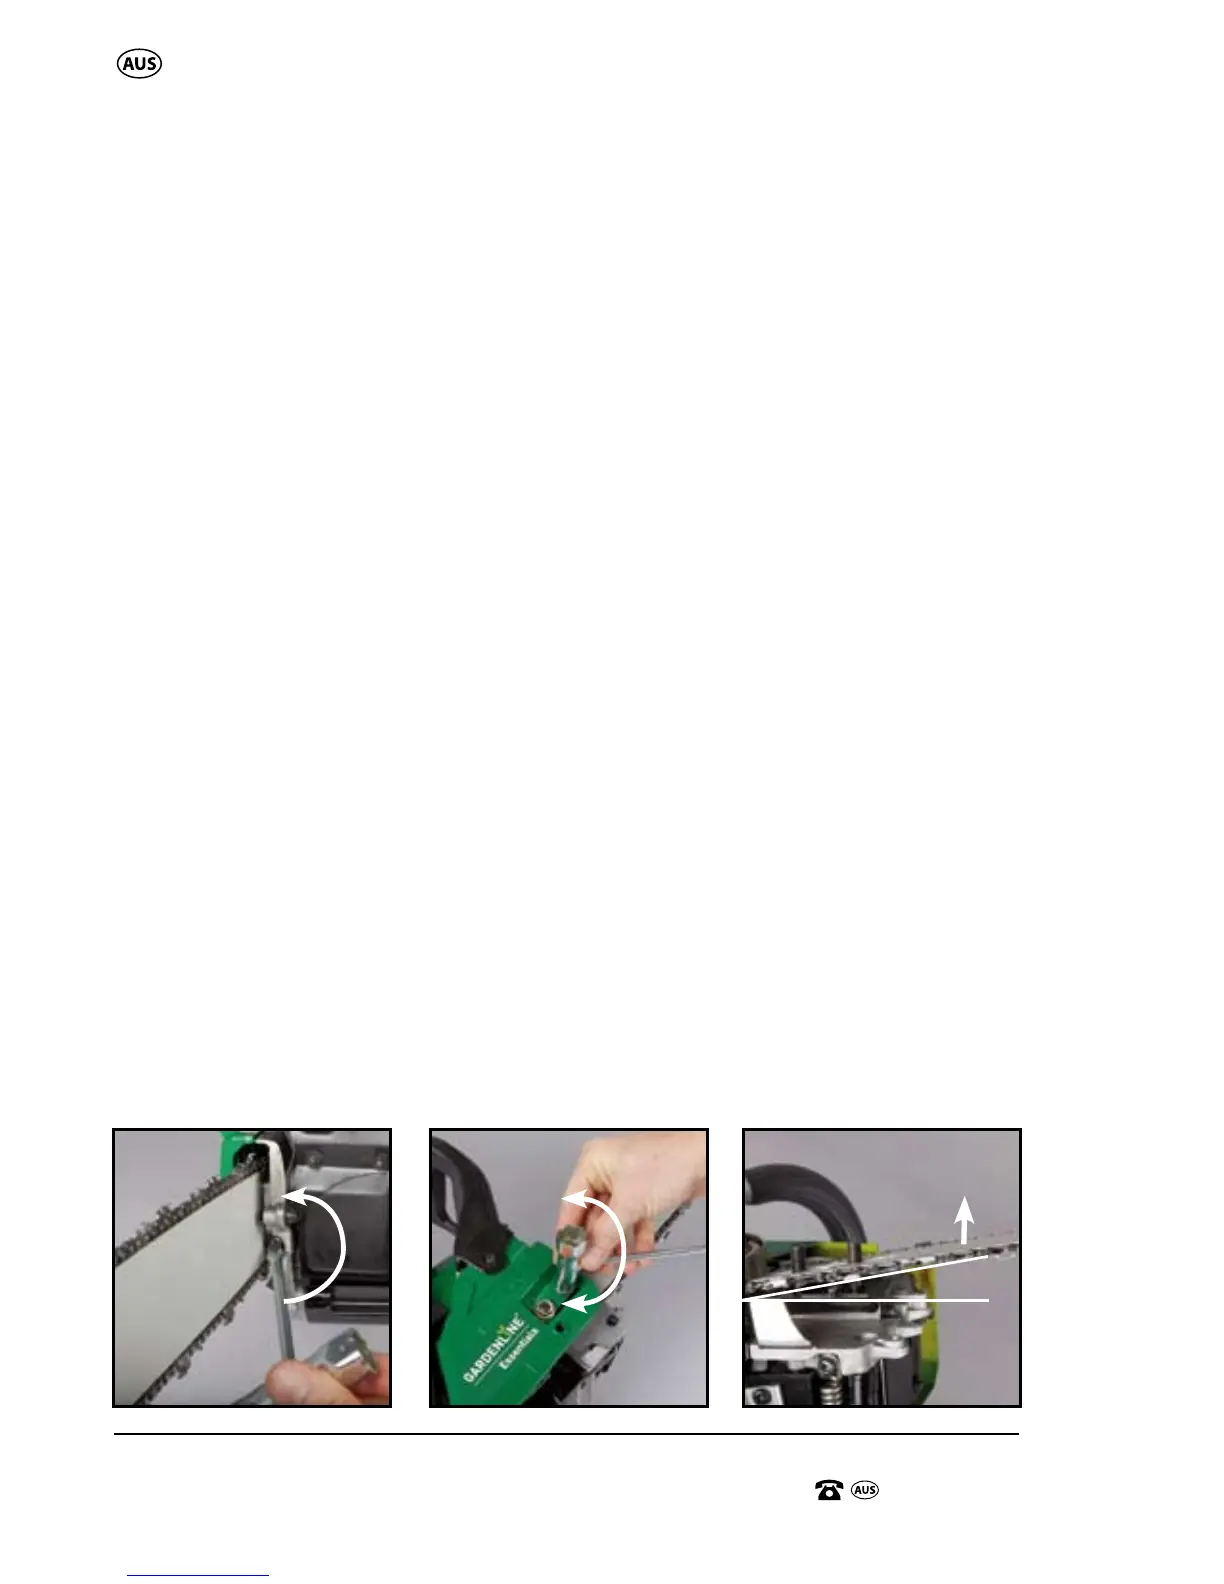
1. Fully loosen the chain (19) tensioning screw (21) by turning in an
anticlockwise direction. This loosens the fit of the chain (19) on the guide
bar (18) for easier removal. (Fig A)
2. Remove the chain drive side cover by using the supplied spark plug /
screwdriver wrench (32) to loosen the chain drive side cover nuts (23).
Remove the chain drive side cover nuts (23) and remove the chain drive
side cover (22). (Fig B) Ensure the chain brake (12) is NOT engaged.
3. Raise the guide bar (18) and chain (19) slightly in an upwards angle, of
approximately 15°, releasing the chain tensioning pin from the bottom
hole in the guide bar (18). (Fig C)
A.
LOOSEN
B.
TIGHTEN
LOOSEN
C.
15°
NOTE: SIDE VIEW
Assembly