EasyManua.ls Logo

ALDI FERREX GLM44A - User Manual

ALDI FERREX GLM44A
22 pages
Print Icon
To Next Page IconTo Next Page
Loading...
PRODUCED IN CHINA FOR:
GB
IE
Great care has gone into the manufacture of this product and it should
therefore provide you with years of good service when used properly. In
the event of product failure within its intended use over the course of the
first 3 years after date of purchase, we will remedy the problem as quickly
as possible once it has been brought to our attention. In the unlikely event
of such an occurrence, or if you require any information about the product,
please contact us via our helpline support services, details of which are to be
found both in this manual and on the product itself.
ALDI STORES LTD. PO BOX 26, ATHERSTONE
WARWICKSHIRE, CV9 2SH
ALDI STORES (IRELAND) LTD.
PO BOX 726, NAAS, CO. KILDARE
Visit us at www.aldi.com
AFTER SALES SUPPORT
814142
GB IE
support@coreservice.co.uk
MODEL:
GLM44A
04/2022
+44(0) 1904727501
+353(0) 19022605
3
YEAR
WARRANTY
User Manual
Electric lawn mower
GLM44A
Original User Manual
Question and Answer IconNeed help?

Do you have a question about the ALDI FERREX GLM44A and is the answer not in the manual?

Overview

This document is a user manual for the FERREX GLM44A Electric Lawn Mower.

Function Description

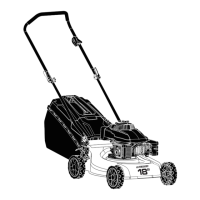
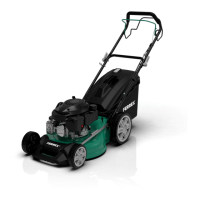
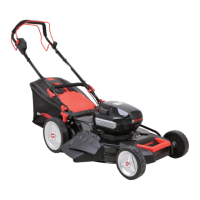
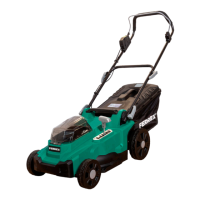
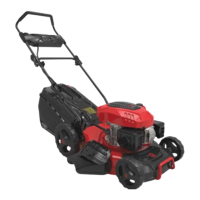
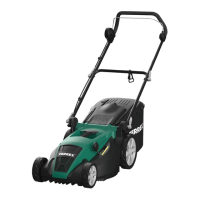
The FERREX GLM44A Electric Lawn Mower is designed for mowing private lawns. It is suitable for dry and level lawns, as well as wildflower meadows, uncultivated meadows, and strongly overgrown lawns with high weeds (such as thistles) that are not considered lawns. This device is intended for private use only and is not suitable for commercial use. The device operates with a rotating blade to cut grass. It includes a collecting bag for clippings. The device features a safety switch with a power cable and a safety bar for operation.

Important Technical Specifications

  • Model: GLM44A
  • Rated voltage/frequency: 230–240 V~/50 Hz
  • Rated power: 1800 W
  • Protection class: II
  • IP rating: IPX4 (protected from all sides against water splashes)
  • Max. rpm: 3500 min⁻¹
  • Weight (Net): 16.5 kg
  • Dimensions (H x L x W): 1160 × 1180 × 475 mm
  • Cutting width: 440 mm
  • Mowing length setting: 20–70 mm
  • Guaranteed sound power level LWA: 96 dB(A)
  • Sound power level LWA: 93.04 dB(A)
  • Uncertainty KWA: 1.2 dB(A)
  • Sound pressure level LPA: 83.0 dB(A)
  • Uncertainty KPA: 3 dB(A)
  • Vibration emission value: 2.887 m/s² (K = 1.5 m/s²)
  • Blade type: SMV 1253482000
  • Item number: 814142

Usage Features

The lawn mower is equipped with several features to facilitate its use:

  • Handle Grip (top): For comfortable handling during operation.
  • Pull Relief (for the power cable): Helps secure the power cable.
  • Quick-Release Lever (handle joint) (2x): Allows for easy adjustment and folding of the handle.
  • Bottom Part of Handle: Forms the lower section of the handle assembly.
  • Collecting Bag: Gathers grass clippings during mowing.
  • Connecting Piece (2x): Used in the handle assembly.
  • Carry Handle: For transporting the device.
  • Cutting Height Lever: Allows adjustment of the mowing height between 20–70 mm in 7 positions.
  • Motor Unit: The main power component of the mower.
  • Connection Cable: For connecting to the power supply.
  • Handle Mount: Secures the handle to the motor unit.
  • Discharge Flap: Covers the opening where grass clippings exit into the collecting bag.
  • Fill Level Indicator: Shows when the collecting bag is full.
  • Cable Clamps (2x): For managing the power cable.
  • Safety Switch with Power Cable: Ensures safe operation by requiring activation to start the motor.
  • Safety Bar: Must be pressed to start the motor.
  • Collecting Bag Handle: For easy removal and emptying of the collecting bag.

Before First Use: The device requires assembly of the handle and attachment of the collecting bag.

  1. Mounting the handle: The handle is assembled by connecting the pull relief, quick-release levers, and connecting pieces to the bottom part of the handle and then to the handle mount on the motor unit. The handle position can be adjusted for comfortable working height.
  2. Preparing the collecting bag: The collecting bag is partially assembled on delivery. It needs to be inserted into the recesses on the top of the collecting bag, and the plastic rims must be placed properly on all sides.

Operation:

  • Rules of operation: Always observe safety rules. Do not adjust or rectify the device when it stands still. Only lift the device on the grip and handle. Never reach underneath the device to lift it. Let the blade run to a stop before touching the device or the collecting bag again. Never reach beneath the discharge flap or into the discharge chute. Stop the motor immediately if you notice unusual mowing sounds or vibrations. Check and rectify the cause of the fault before resuming mowing. Never put a damaged device into operation. Any damage to the blade and the device must be repaired by the manufacturer's customer service or qualified personnel. Mow diagonally to inclinations.
  • Mowing and mulching: The device can be operated with or without the collecting bag. When trimming the lawn just a little shorter (max. 2 cm), it can be operated without the collecting bag for mulching.
  • Adjusting the handle position: The handle can be adjusted to a comfortable working height using the quick-release levers.
  • Adjusting the cutting height: The cutting height can be set between approximately 20 and 70 mm in 7 positions using the cutting height lever.
  • Turning the motor on and off: The motor is activated by means of a safety switch. To start, place the device on the grass, press and hold the button of the safety switch, and pull the safety bar towards the handle. The motor starts. To stop, let go of the safety switch button and keep the safety bar pressed to the handle as long as you operate the motor.
  • Emptying the collecting bag: The collecting bag has a fill level indicator. When the indicator rises, the collecting bag is full and needs to be emptied. To empty, stop the motor, lift the discharge flap, remove the collecting bag, and dispose of the clippings.

Maintenance Features

  • Cleaning:

    • Risk of electric shock: Moisture in the device may cause a short circuit or electric shock. Before cleaning, disconnect the power cable from the socket. Make sure that no water or other liquid gets inside the housing. Never clean the device with running water (e.g., a garden hose).
    • Improper cleaning can damage the device: Do not use any harsh cleaning products, brushes with metal or nylon bristles, or sharp or metallic cleaning materials such as knives, hard scrapers, or similar. They may damage the surfaces.
    • Remove wet cuttings immediately. Residues of wet cuttings on and in the device may harden and cause mould.
    • Cleaning and inspection after each use: Regular cleaning and inspection are necessary to keep the device in perfect state.
    • Stop the motor and wait until the blade stands still.
    • Disconnect the device by unplugging the power cable and remove the power cable from the pull relief.
    • Thoroughly empty the collecting bag.
    • Remove cuttings from the device and the collecting bag with a hand brush.
    • Tip the device on its side and remove cuttings from the discharge chute and blade compartment with a hand brush or a brush.
    • Check the blade for damaged spots and wear.
    • Do not operate the device with a damaged or worn blade! If necessary, have the blade sharpened or exchanged in a specialist workshop.
    • Set the device upright again.
    • Check all connections (handle, collecting bag) for tight fit.
    • The device is ready for storage.
  • Maintenance:

    • Apart from the measures described in the section "Cleaning and inspection after each use", the device is principally maintenance-free.
    • Do not lubricate or readjust any parts.
    • In addition, check the following once a year:
      • Free wheel movement.
      • Function and free movement of the cutting height adjuster.
      • Function and free movement of the discharge flap.
      • Damage to the device, such as broken housing parts or worn collecting bag.
    • If you detect any defects, contact customer service or a specialist workshop. Do not operate the device with a detected defect.
  • Storage:

    • Improper storage of the device can result in damage: Let the device dry before storing it. Residual moisture and cuttings remaining in the device can lead to mould formation.
    • Optionally, the handle can be folded in to save space during storage or transport.
    • Folding the handle: Release the quick-release levers on the handle mount and take the serrations of the locking washer out of the handle mount by lifting it slightly and then set down the handle on the device. Release the quick-release levers in the centre of the handle. Carefully fold the handle. Watch out for the connection cable. It must not be pinched between the handle parts. The device is ready for storage.
    • Storage conditions:
      • Thoroughly clean the device.
      • Store the device in a clean, dry, frost-protected place out of the reach of children.
      • Store the device in a location away from sunlight and other heat sources.
      • Always store device parts and accessories together with the device.
      • Store the device and accessories at a temperature between +5 °C and +20 °C.
  • Transport instructions:

    • Always transport the device with the handle folded in.
    • Only lift the device by the carry handle.
    • Exclusively transport the device in normal position; prevent tilting while transporting.
    • When transporting the device in vehicles, the device must be secured in accordance with the applicable regulations (load securing).

ALDI FERREX GLM44A Specifications

General IconGeneral
BrandALDI
ModelFERREX GLM44A
CategoryLawn Mower
LanguageEnglish

Related product manuals