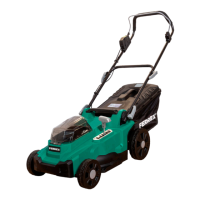
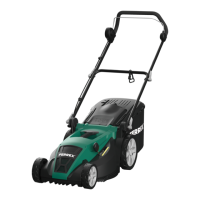
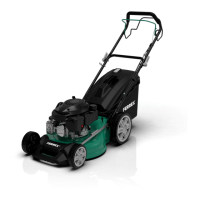
This document describes the Ferrex Cordless Lawnmower, a device designed for cutting small to medium-sized lawns in private household gardens and allotments. It is intended exclusively for private use and not for commercial purposes. The manual emphasizes safe and proper operation, maintenance, and storage of the lawnmower.
Function Description
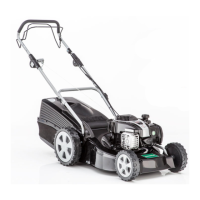
The Ferrex Cordless Lawnmower is a battery-powered device equipped with a cutting blade that rotates to cut grass. It features a safety bar and a safety button for operation, ensuring that the motor only starts when these controls are engaged. The device can be used with or without a grass collection box. When the grass collection box is attached, mown grass is collected, and a fill level indicator signals when the box is full. Alternatively, a mulch kit can be inserted to prevent grass discharge, allowing the cut grass to be distributed back onto the lawn as mulch. The lawnmower is designed to be easily assembled, with a foldable guide bar for convenient transport and storage. It requires Active Energy® batteries and chargers, which are not included in the delivery and must be purchased separately.
Usage Features
Assembly and Initial Setup:
Before first use, the lawnmower requires assembly of its guide bar frame. This involves attaching the guide bar to the frame using quick-release fasteners, washers, and pins. The cable needs to be connected to the guide bar frame and secured with cable clamps. The guide bar's angle can be adjusted and secured. A crucial step before operation is to open the safety cover, remove the safety key, and then re-close the cover. The safety key must be pushed together slightly to remove it.
Battery Insertion and Removal:
To operate the lawnmower, a rechargeable battery must be inserted into the battery compartment. This involves lifting the locking mechanism and folding the safety cover upwards, guiding the battery into the insertion shaft until it locks in place with contacts pointing downwards, and then folding the safety cover shut. To remove the battery, the unlocking mechanism must be pressed.
Adjusting Cutting Height:
The lawnmower offers adjustable cutting heights, ranging from 25 mm (position 1 for short grass) to 75 mm (position 6 for long grass). To adjust the cutting height, the safety key must first be removed. The cutting height adjuster is then pushed towards the housing and set to the desired position. The lawnmower may need to be lifted slightly during this process. Once the desired position is selected, the adjuster is pushed outwards to lock it in place.
Switching On/Off:
To switch on the lawnmower, the safety key must be inserted into its opening until it locks. It's important to ensure the lawnmower is in a suitable location where the cutting blades will not cause injury or damage. The safety button is then pressed and held, and the safety bar is lifted. The motor will start, and the cutting blades will begin to rotate. The motor continues to run as long as the safety bar is raised. The lock button can be released once the motor is running. To switch off the lawnmower, the safety bar is released, allowing it to return to its normal position, which stops the motor. It is essential to wait until all rotating parts have come to a complete standstill before any further action.
Using the Grass Collection Box:
The grass collection box is assembled by putting its plastic straps over the grass catcher frame. With the safety key removed, the safety flap above the grass discharge is opened, and the grass collection box is placed onto the grass discharge, ensuring it is tight. Once the lawnmower is switched on, mown grass is collected in the box. The fill level indicator, which opens due to air flow during operation, signals when the box is full by remaining closed.
Emptying the Grass Collection Box:
When the grass collection box is full, mowing should be stopped, and the lawnmower switched off. After all rotating parts have come to a complete standstill and the lawnmower has cooled down, and the safety key is removed, the grass collection box can be removed and emptied. The lawnmower can also be used without the grass collection box, in which case the mown grass is spread directly onto the lawn. The safety flap should not be opened during operation when the box is not attached.
Using the Mulch Kit:
The mulch kit allows for mulching, where cut grass is distributed back onto the lawn. To use it, the rear protective cover is opened and held in position, and the mulch kit is slid into the rear discharge chute until it latches. To remove the mulch kit, the bottom part of its handle is pressed inwards to release it.
Maintenance Features
General Cleaning:
Regular cleaning is crucial for the lawnmower's longevity and efficiency. Before cleaning, the battery must be removed. The housing and grass discharge should be thoroughly cleaned after each use and allowed to dry properly to prevent grass residues from hardening or moulding. A brush can be used to remove grass residues. All smooth surfaces should be cleaned with a damp cloth.
Lubrication:
All moving parts should be treated with environmentally friendly oil to ensure smooth operation.
Inspections and Checks:
The grass collection box should be regularly checked for wear or loss of efficiency. All nuts, bolts, and screws must be firmly tightened, and the lawnmower should be in a safe working condition. Any worn out or damaged parts should be replaced.
Replacing the Cutting Blade:
The cutting blade should be regularly checked for bluntness or damage. If replacement is necessary, only original spare parts should be used. Before replacing the blade, ensure all rotating parts have come to a complete standstill, the lawnmower has cooled down, the safety key is removed, and the battery is taken out. The lawnmower is then turned onto its side. The fastening screw and washer holding the cutting blade are unscrewed and removed. The old cutting blade is then removed, and a new one is placed on the drive plate. The washer and fastening screw are put back and tightened. It is essential to ensure the new cutting blade is correctly attached and tight before using the lawnmower again. Safety gloves should always be worn when handling the cutting blade.
Troubleshooting:
The manual provides a troubleshooting guide for common issues such as the motor not starting (due to an empty or faulty battery, or missing safety key), jerky operation or heavy vibrations (due to a damaged or loose cutting blade), poor mowing performance (blunt or faulty battery, incorrect cutting height), and grass not being collected correctly (blocked collection box or discharge, or wet grass). Rectifications include charging/replacing the battery, inserting the safety key, pressing the safety button, replacing/tightening the cutting blade, adjusting cutting height, cleaning blockages, and mowing dry grass.
Storage:
For transport and storage, all parts must be completely dry. The guide bar can be folded by undoing the quick snaps. The lawnmower and battery should be stored in a dry place, away from direct sunlight, out of reach of children, and at a temperature between +5 °C and +20 °C. For longer storage periods, the battery should be fully charged to protect against deep discharge. When transporting or storing the battery, a strip of adhesive should be placed onto the contacts, or it should be packed in a plastic bag or box.