23
AFTER SALES SUPPORT
1300 855 831
support@scheppach.com.au
MODEL: HBS20 PRODUCT CODE: 60339 04/2018
AUS
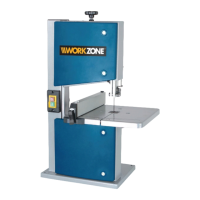
HBS20 Attachment
Which saw band to use
• The saw band supplied in the bandsaw is intended for universal use. The following
criteria should be considered when selecting the saw band:
• It is possible to cut tighter radii with a narrow saw band than with a wide saw band.
• A wide saw band is used if a straight cut is required. This is important in particular
when cutting wood. The saw band has a tendency to follow the wood grain and
therefore deviates easily from the desired cutting line.
• Fine-toothed saw bands cut more smoothly, but also more slowly than coarse
saw bands.
• AT TENTION! Never use bent or torn saw bands!
Replacing the saw band (Fig. 1a+1b+14)
• Set the top saw band guide (5) at approx. half height between the saw table (7)
and machine frame (15).
• Undo the cover locking mechanisms (10) and open the side covers (11).
• Remove the U-reinforcement (34).
• Relieve the saw band (21) tension by turning the clamping screw (1) anti-clockwise.
• Remove the saw band (21) from the saw band rollers (2+8) and through the slot
in the saw table (7).
• Place the new saw band (21) centrally on both saw band rollers (2+8). The teeth
of the saw band (21) must point downwards in the direction of the saw table.
• Tension the saw band (21).
• Close the side cover (11) again.
• Re-install the U-reinforcement (34).
Replacing the table insert (Fig. 13)
• In case of wear or damage, the table insert (6) must be replaced; otherwise there
is an increased risk of injury.
• Remove the worn table insert (6) by lifting it up and out.
• Installation of the new table insert takes place in reverse order.
Extraction nozzle (Fig. 1b)
• The bandsaw is equipped with an extraction nozzle (19) Ø 40mm for chips.
• Only operate the device with a suitable extraction system. Check and clean the
suction channels at regular intervals.
Push rod retainer (Fig. 12)
• The push stick retainer (48) is pre-mounted on the machine frame. If unused, the
push stick (26) must always be stowed in the push stick retainer.