-56-
4. INSTALLATION
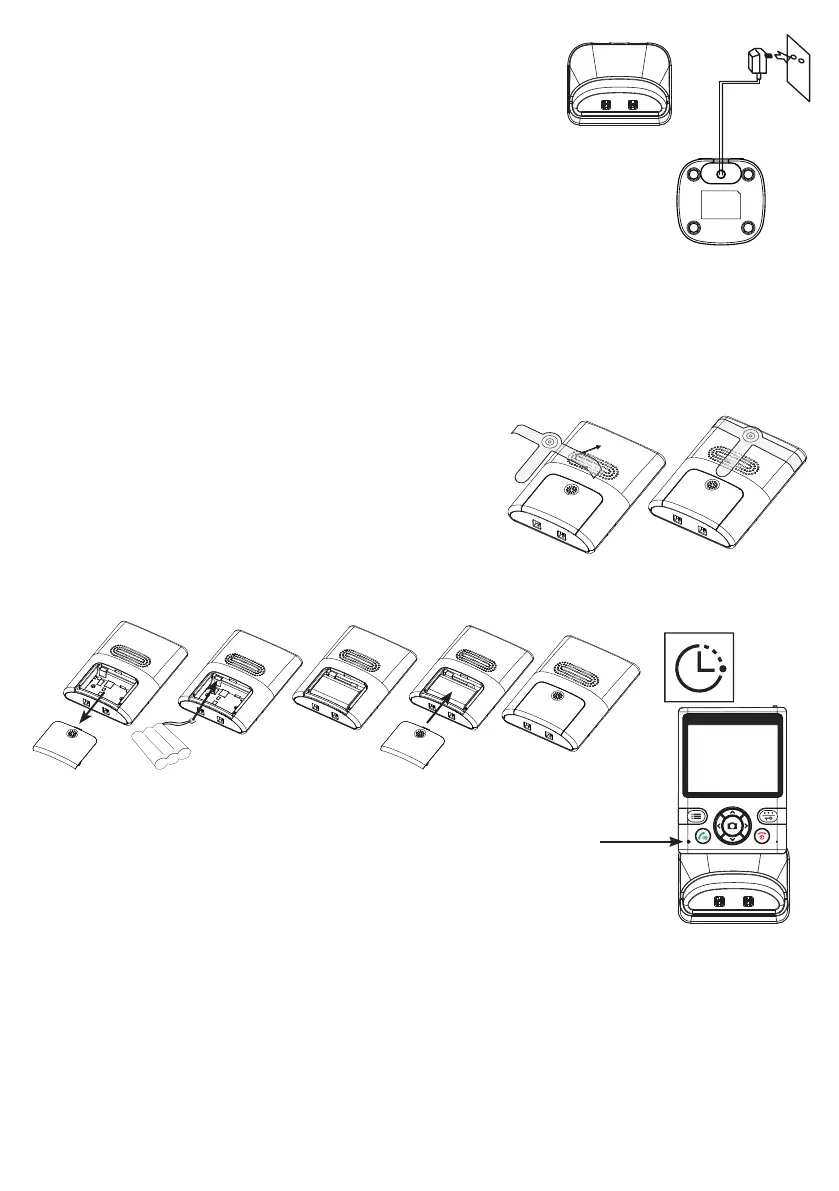
4.1 Charger:
1. Insert the small plug of the adaptor cable into the
bottom of the adaptor and plug the adaptor into a 230V wall
socket.
2. You may choose to place the charger into a table or to use the
2 screws for wall-mounting.
The adaptor for the charger is included.
4.2 Indoor unit:
1. Slide the battery cover at the rear of the indoor unit down and off the indoor unit.
2. Install the supplied battery pack in the indoor unit, connecting the plug to the bat-
tery input.
3. Slide the battery cover back onto the indoor
unit.
4. You may also place the belt clip.
5. Place the indoor unit into the charger and
leave it there for 10-15 hours to properly
charge the battery pack.
The charge indicator will remain lit while charging
(attention: this indicator will NOT switch off when
the battery pack is charged).
4.3 Outdoor unit:
You may choose to have the outdoor unit run on batteries or power it via a power
adaptor. When powered by batteries, the monitor function will be unavailable. Batter-
ies or a power adaptor for the outdoor unit are NOT included. You may also choose
to use the standard doorbell transformer; the current doorbell and bell pusher will
then be excluded.
10 to
15 hours