3
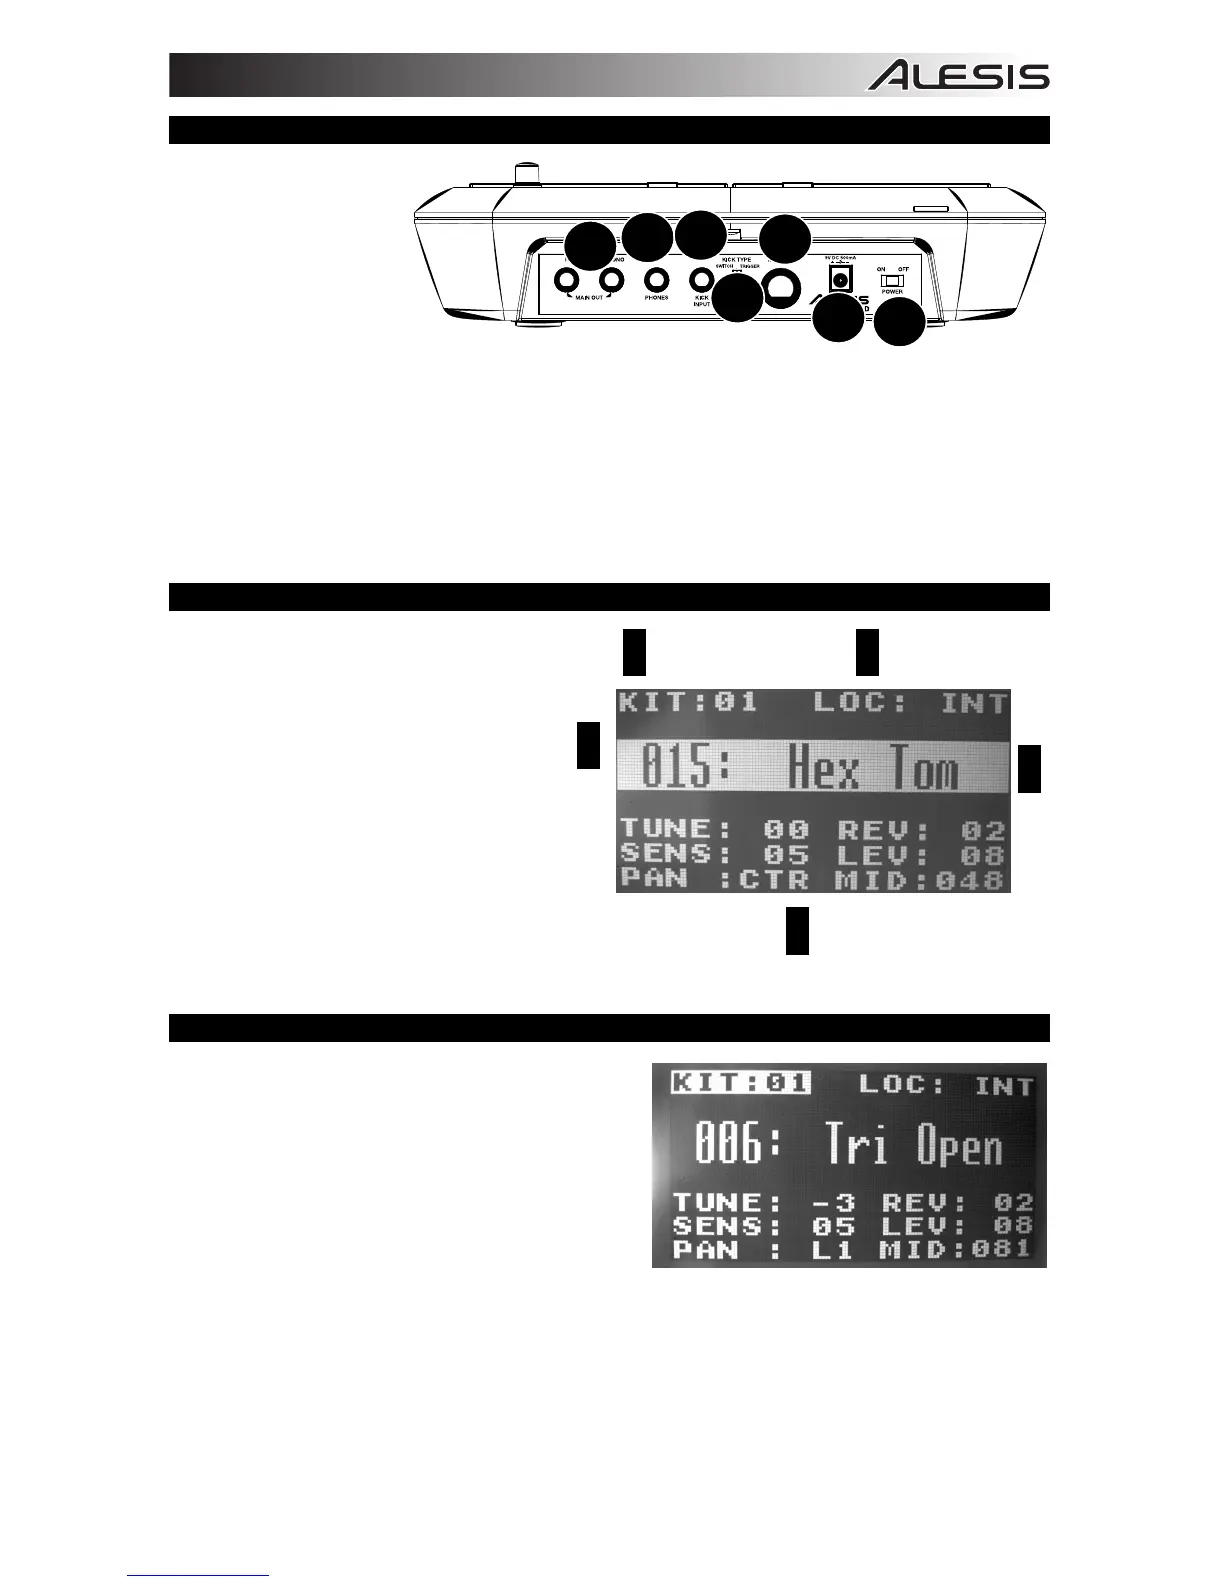
REAR PANEL FEATURES
1. DC INPUT – Connect
the included power
adapter here, then
connect the adapter to
wall power.
2. POWER SWITCH –
Turns the SamplePad
on and off.
3. MAIN OUT – Use
standard 1/4" cables to
connect this output to a speaker or amplifier system. The level of this output is controlled by the VOL knob. (For
mono sound, connect a cable only to the Left output.)
4. HEADPHONES – Connect a pair of 1/4" headphones to this input.
5. KICK PEDAL INPUT – Connect an optional footswitch here with a 1/4" mono cable to use as a bass drum
trigger while playing.
6. KICK TYPE SWITCH – Set this switch to select the type of external kick trigger (sold separately) you are using
with the unit. Select "SWITCH" if you are using a switch pedal or footswitch. Select "TRIGGER" if you are using
a velocity-sensitive pedal, pad, or acoustic drum trigger.
7. MIDI OUT – Use a standard five-pin MIDI cable to connect this output to the MIDI IN of an external MIDI
device.
LCD SCREEN
1. KIT – Displays the preset number.
2. SOUND LOCATION – Displays the sound
location; either internal or on the SD card.
3. WARNING MESSAGE – Displays a
warning message or tips.
4. SOUND NAME – Displays the name of
the selected sound from the
internal sound library or an inserted
SD card (sold separately).
5. OTHER PARAMETERS – Displays the
tuning, sensitivity, panning, reverb, level,
and MIDI note.
BASIC OPERATIONS
SELECTING THE KIT
Move the Cursor to the kit area by pressing [SELECT -]
button continuously. Press the [VALUE +] or [VALUE -]
button to scroll through the 8 kit numbers. Hold down the
[VALUE +] or [VALUE -] buttons to rapidly scroll through the
kits. The kit will automatically load when you stay on the
preset for a few seconds. Edits made to a kit will be
automatically saved.
Note: The kit setting includes each pad’s sound location,
sound name or number, level, tune, reverb, pan, MIDI note,
and sensitivity.
1
2
3
4
5
6
7
1 2
3
4
5