3Installation
Studytheinstructionscarefullyandpayspecialattentiontothewarnings!AlwayschecktheAgitatorbeforeoperation.The
Agitatorisonlydesignedtooperateaccordingtodatagiveninchapter2.3Intendeduse,6.2Mountingangleforsidemounted
AgitatortypeALSand6.3MountingangleforbottommountedAgitatortypeALB.Checktherotationdirectionbeforeoperation.
Step Step
Step
6 6
6
Seal Seal
Seal
T T
T
ype ype
ype
D D
D
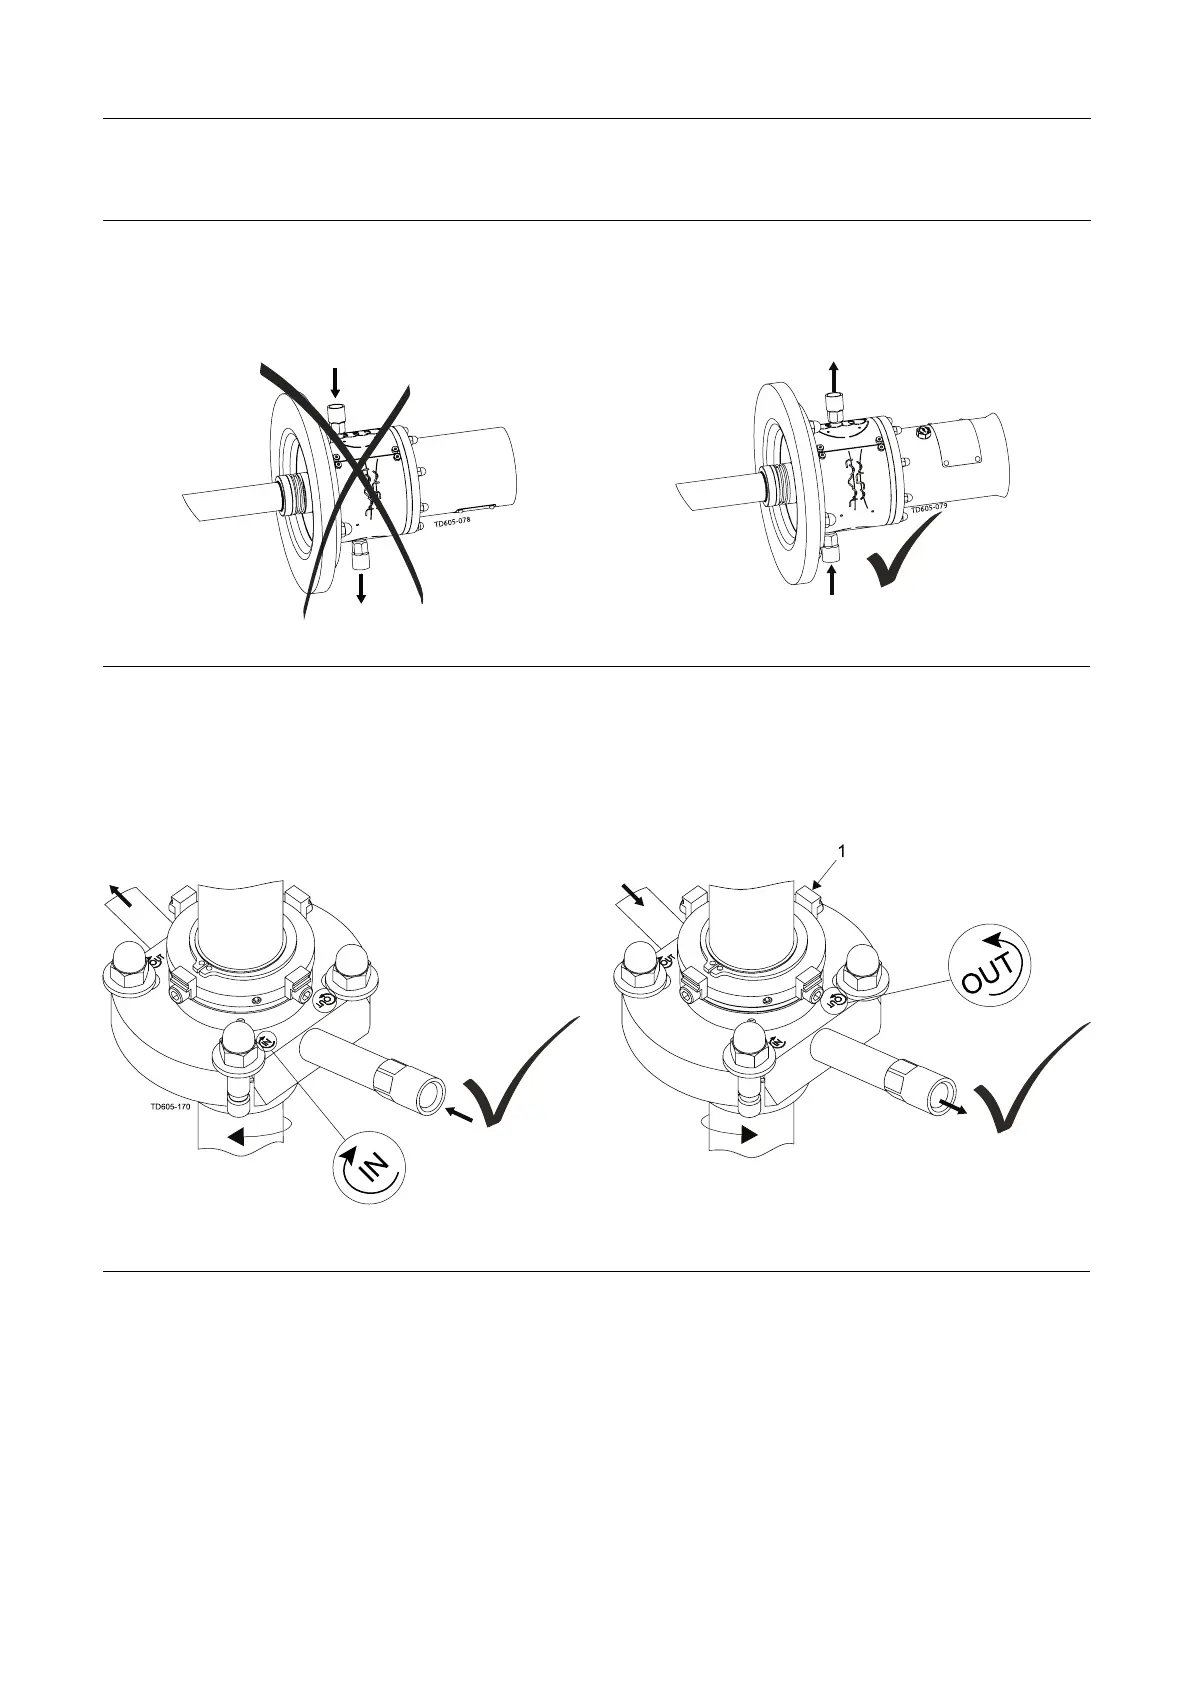
Ensurethesealingsurfacesarenotstucktogether,byslowlyturningshaftbyhand.
Ensurethatthesealneverrunsdry.
Ensureflushconnectionsareinstalledinsuchwaythatairpocketsareavoided.
Step Step
Step
7 7
7
Seal Seal
Seal
T T
T
ype ype
ype
DC DC
DC
Ensurethesealingsurfacesarenotstucktogether,byslowlyturningshaftbyhand.
Ensurethatthesealneverrunsdry.
Ensureflushconnectionsareinstalledinsuchwaythatairpocketsareavoided.
Ensurethatthedistancepieces(1)onthesealaremountedasshownonillustration.
24
 Loading...