5 Maintenance
Study the instructions carefully. The items refer to the parts list and service kits section. Handle scrap correctly.
NC = Normally closed.
NO = Normally open.
A/A = Air/air activated.
1d
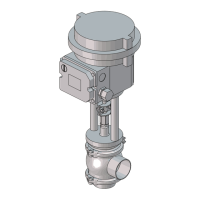
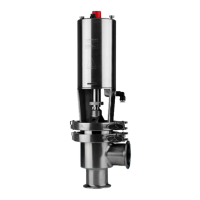
Change-over valve - Reverse Acting:
1. Loosen and remove lower clamp.
2. Remove lower bonnet and O-ring.
3. Loosen and remove clamp between lower and middle
valve body
4. Lift away the actuator and upper + middle valve body.
5. Supply compressed air to the actuator (only NC).
6. Unscrew and remove lower valve plug.
7. Release compressed air (only NC).
8. Remove lower seat and O-rings.
9. Supply compressed air to the actuator (only NO).
10. Loosen and remove clamp between middle and upper
valve body.
11. Remove middle valve body and upper seat with O-rings.
12. Release compressed air (only NO).
13. Loosen and remove upper clamp.
14. Remove upper valve body.
15. Unscrew and remove upper valve plug.
16. Remove O-ring, lip seal and bushing in bonnet.
(Use bushing tool and rubber mallet. See drawing, step
1a).
Note! Be careful not to damage the bushing.
Pay special attention to the warnings!
Note! For plug seal replacement please see page 21.
UP
UP
UP
TD 462-128_1
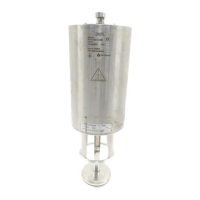
5.3 Elastomer seat ring replacement
1. Remove old seal ring using a knife, screwdriver or similar.
Be careful not to damage metal parts.
2. Pre-mount plug seal without pressing it into the groove.
3. Squeeze plug seal into the groove using opposite pressure points.
4. Release compressed air behind plug seal.
1
4
3
2
TD461309_3
1. Place the plug element on a firm support.
2. Using a utility knife, partially AND CAREFULLY cut through the upper ring
portion of the TR2 plug avoiding contact with stainless steel stem.
3. Force apart both cut ends of the plug for removal from stem.
4. TR2 plugs are installed by applying uniform pressure on all sides.
(Pressure can be applied by using the seat assembly tool.)
5. Using a piece of metal and a rubber mallet, place a precise tab to make
the TR2
plug snap on to the stem. Reverse the tool and tab again to secure
proper fit.
6. Examine seat assembly to be sure the TR2 plug is properly mounted,
holding the seat assembly in one hand - rotate the TR2 plug.
(For proper CIP cleaning the TR2 plug should turn freely on the stem.)
For more explicit instructions, please refer to the maintenance video.
21
 Loading...