8 www.Observint.com
© 2018 Observint Technologies. All rights reserved.
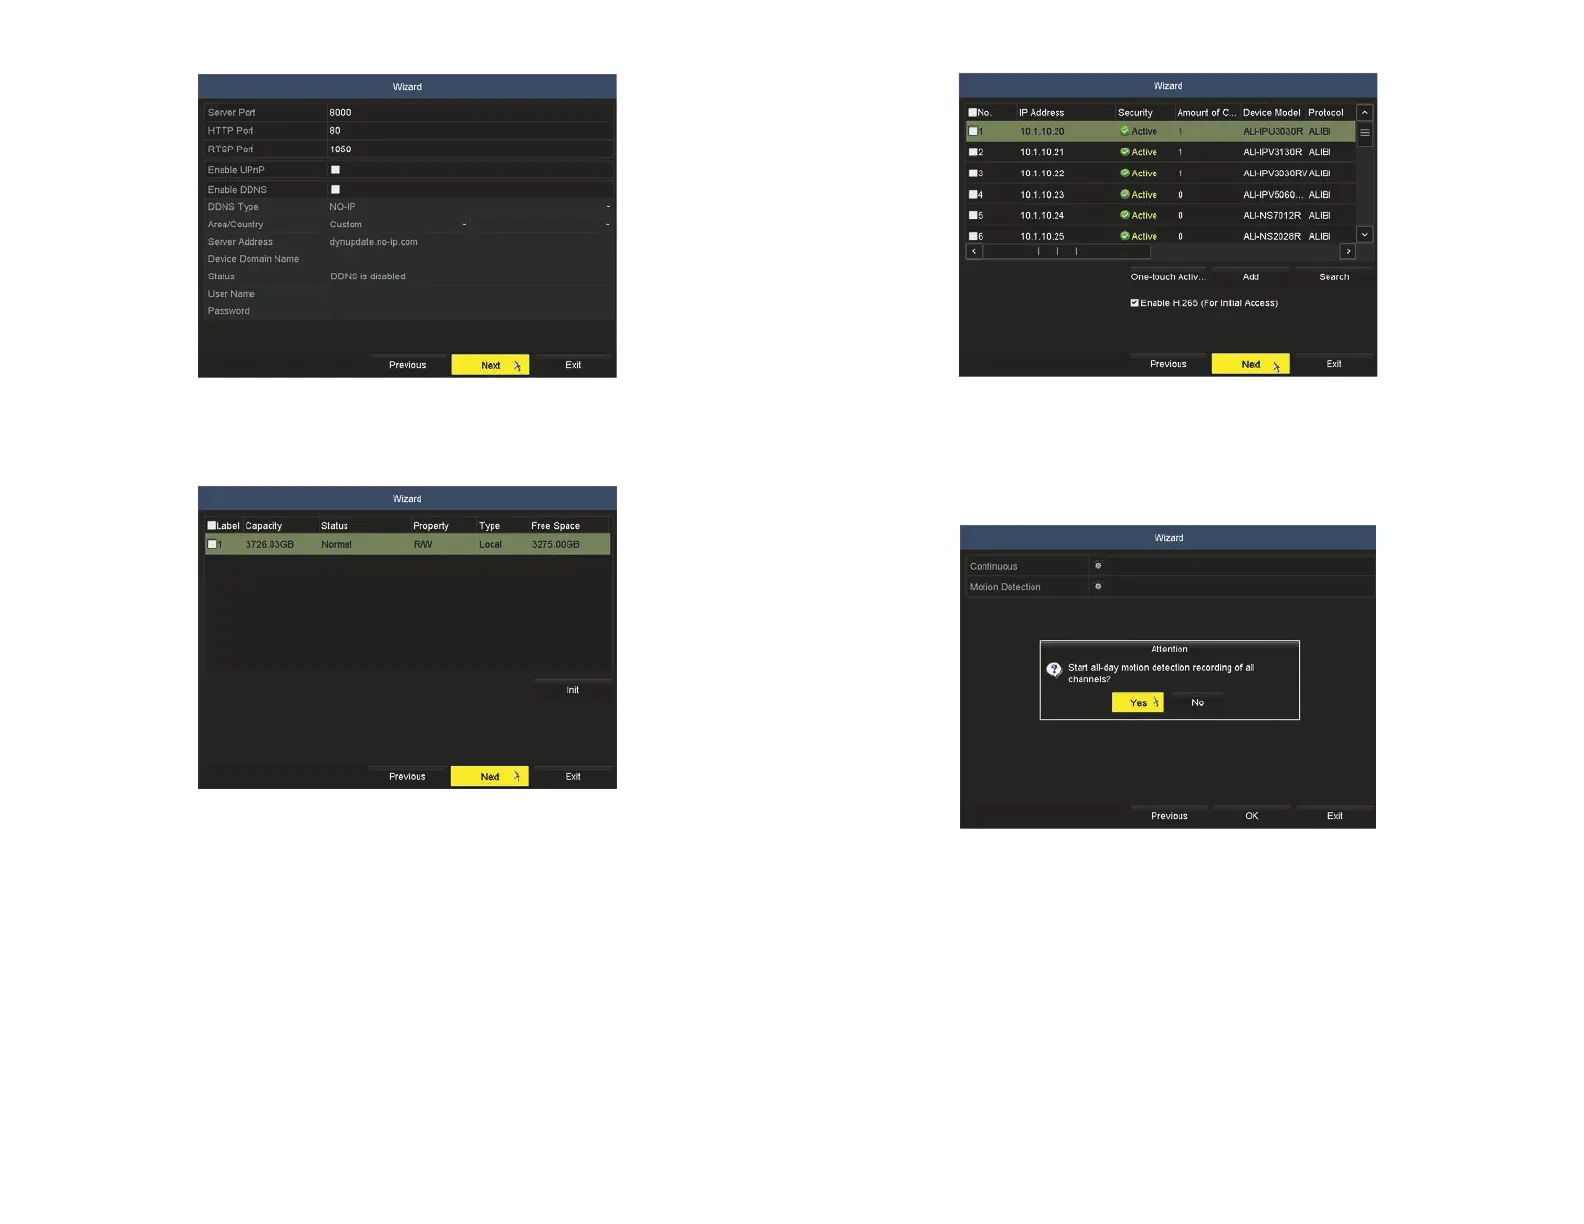
13. Check the select boxes for the cameras you want to add, then click the Add button or One-touch Activate. Click Next to continue.
14. In the next Wizard window, select the kind of recording mode to apply to all cameras added to your recorder, and then click Yes in
the Attention popup window to conrm the selection and close the Wizard. NOTE: You can adjust the recording mode of individual
cameras through other features of the rmware.
Click the star for Continuous or Motion Detection, click Yes in the Attention pop-up window, and then click OK to save the
settings. The Wizard will close and the NVR will present the Live View display. See the ALIBI™ Embedded Network Video
Recorder Firmware V3.4.95 (or later) User Manual for more information.
11. The HDD management Wizard window will open. If your NVR is a new NVR shipped with a pre-congured HDD, nothing needs to be
done in this window. If you installed an HDD or replaced the HDD in the NVR, you must initialize it before it can be used.
CAUTION: Initialization erases all information on the disk.
a. To initialize an HDD, select (check the box for) the HDD you want to initialize, and then click Init.
b. Wait until the initialization is complete, and then click Next to continue.
12. In the next window, click Search button to discover compatible cameras on the LAN to add to the system.