7 www.Observint.com
© 2018 Observint Technologies. All rights reserved.
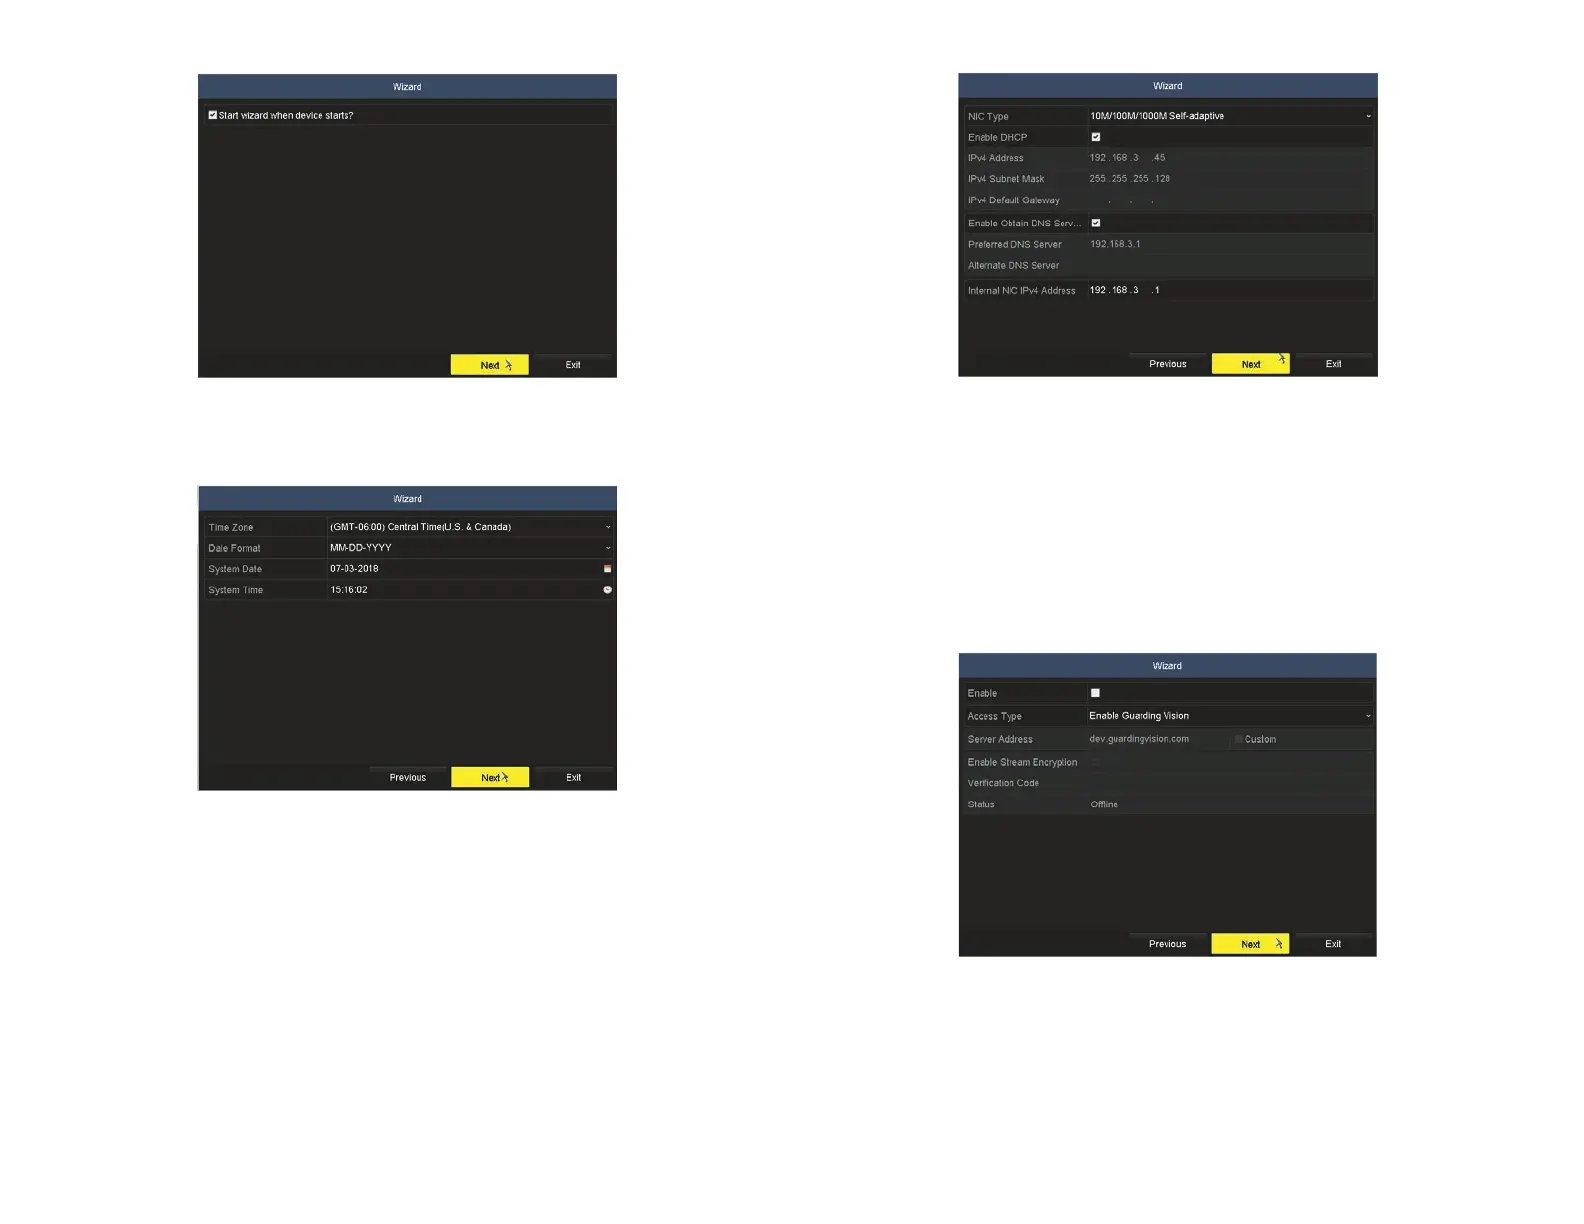
a. To enable xed network settings, rst, un-check the Enable DHCP box. If a DHCP server is active on your network, the IPv4
Address, IPv4 Subnet Mask, IPv4 Default Gateway elds will be populated with network settings assigned by the server. These
settings are compatible with your network. If the elds are not populated, they will be blank as shown above.
b. Enter (or modify, if necessary) the IPv4 Address, IPv4 Subnet Mask, IPv4 Default Gateway elds to settings compatible with
your network using the virtual keyboard. You can also enter a Preferred DNS Server address (optional, ex. 8.8.8.8 and 8.8.4.4
[Google] DNSs). Consult with your network administrator to determine the best network settings for your NVR.
8. In the screen above, click Next to open the Alibi-Connect Platform Access setup page. Guiding Vision access can be used for Alibi
Witness 2.0 smartphone app access by creating a direct peer to peer connection. It can also be used to download recorder rmware
updates.
9. To use the Guarding Vision service, check the Enable box, and then follow the on-screen instructions to setup this feature. For more
information about the Alibi Witness 2.0 smartphone app, refer to documentation available on AlibiSecurity.com/Resources.
10. Click Next to open the a menu for conguring the network ports you prefer to use and DDNS (Dynamic Domain Name System). For
more information about these settings, refer to the rmware user manual for your recorder, available on
AlibiSecurity.com/Resources. If unsure about how to setup ports and DDNS access, click Next to continue.
6. In the next screen, set the time zone and date format (using the drop down menus), and the date and clock in your recorder (using the
pop-up graphical menus, see below)). Since video data and capture les are timestamped by the recorder, It is very important that this
information be set precisely to produce valuable evidence from your recorder.
After conguring the date and time, click Next to start the clock at the time entered.
7. In the Network setup Wizard window, click the eld value you want to change, then use the pop-up aid to enter a new value. By
default, the NVR uses DHCP (Dynamic Host Conguration Protocol) to acquire compatible (dynamic, changeable) network settings
from a network DHCP server. Generally, it is preferable to setup the NVR with a xed network settings to assure the NVR has an
unchanging IP address, which is convenient for remote login.