Low and High (Inline) Pressure Regulators:
Clockwise (In or Down) lowers the air pressure
Counter Clockwise, (Out or Up) increases the air pressure
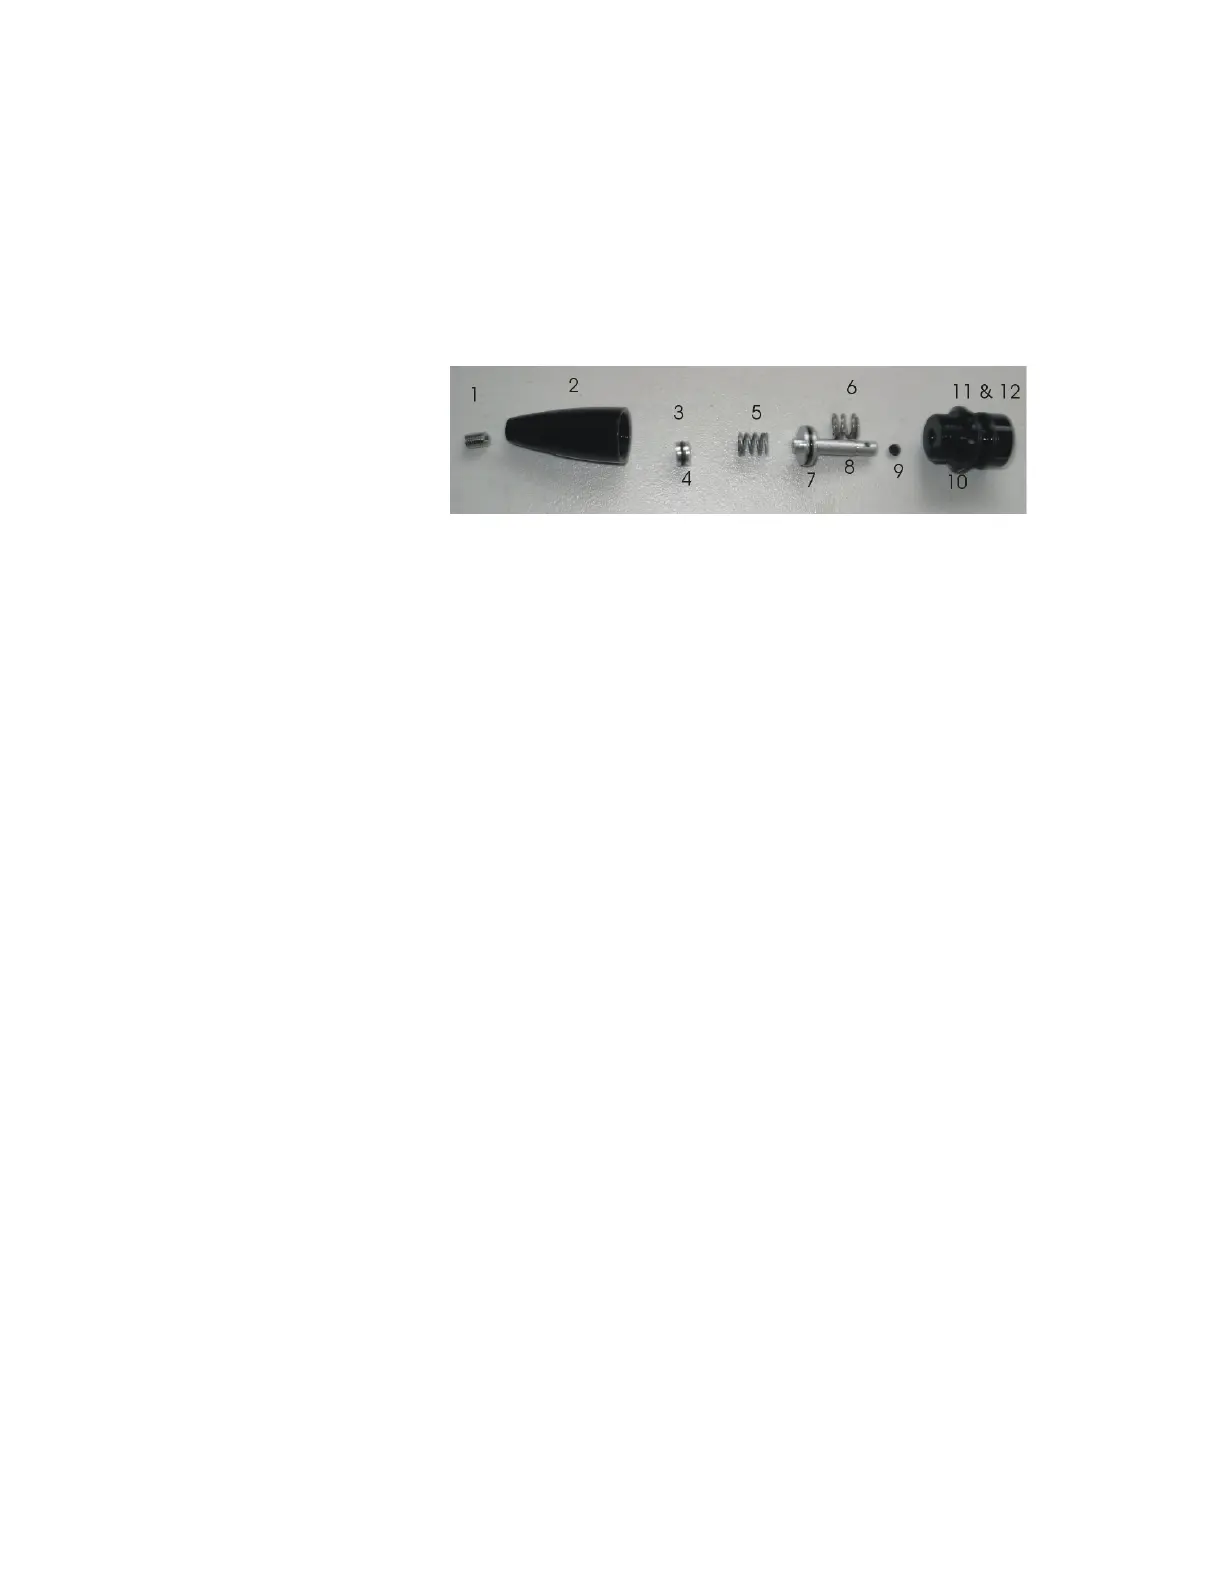
LPR
The Low Pressure
Regulator design is a
common one in high-
end paintball markers.
A floating piston (8) is
suspended between two O-Rings (7) and one inside LPR body (10). The floating
piston has a long appendage that both conducts air and holds a seal (9), which
blocks the incoming air. The spring (6) between the piston and the LPR body
pushes the Piston away from the LPR body to allow air to escape through the
LPR body (10). When the pressure between O-Rings 4 and 7 becomes great
enough that pressure overcomes the pressure of the spring (6) the piston seal is
pushed against a seat in the piston body and the airflow stops. A setscrew (1) in
the LPR cap pushes the second piston, the one holding the O-Ring (3) That
piston in turn pushes a lighter spring (5), which rests against the same piston (8)
as the stiffer spring. Screwing down the setscrew (1) increases the pressure on
the lighter spring, which lowers the LPR pressure. The balance between the two
springs plus the pressure of the inside the cap is what regulates (changes) the
operating pressure.
To service your LPR, remove the cap. It should unscrew easily, if it doesn’t there
is pressure in the cap. Purge the gun. Once the cap is removed, the “T” shaped
piston can slide out. Once the piston is removed the top spring easily falls out.
You can take the setscrew out of the cap and then press out the piston (3) and
re-grease that O-Ring (4). There is an additional O-Ring LPR housing that seals
on the piston (3). It can be removed and can be re-greased. Both are a number
010 O-ring and can be seen by looking into the LPR body once the piston has
been removed. The only service usually necessary is to re-lube the O-Rings. In
the event that you have LPR creep that is not fixed by lubing the O-Rings or
replacing the O-Rings then the 3/16
th
’s seal at the bottom of the “T” piston (9)
should be removed and replaced.
LPR creep is only possible if air is escaping past seal in the bottom of the “T”
piston. Air leaking past the piston O-Ring (5) will have an audible leak from the
surface between the LPR cap and the Front gun body. The same air leak is
heard if you remove the LPR body and find damage on the 018 O-rings sealing
the LPR body. Bad O-Ring seating on the cap piston (8) causes air to leak
between the LPR cap and the front setscrew.
11