Reassembly:
Trigger fame should be assembled with the
right side panel on, left panel off. Trigger and
spring stop in place; trigger spring tension
set, trigger travel set, setscrews loctited. The
On/Off pin is in place and the board pins are
seated. To make sure the trigger wires are
not broken, turn the board on and pull the
trigger. Because the eye harness is not
connected the LED should be green or blue.
Pulling the trigger should change the LED
color, as the eyes do not see ball dropping
down and being fired.
Gun body should be assembled. The cup seal valve’s setscrew is tightened.
Valve pin should open with light pressure. Ball detents are in place. The LPR
inspected to see that both springs are in place and the LPR’s piston is lubed on
both ends with the seat in place.
Inspect Ram to see that the cap in on and the screws holding down the solenoid
are tight. The screws are small however and most anyone can strip the body with
too much force. Snug and locktited!
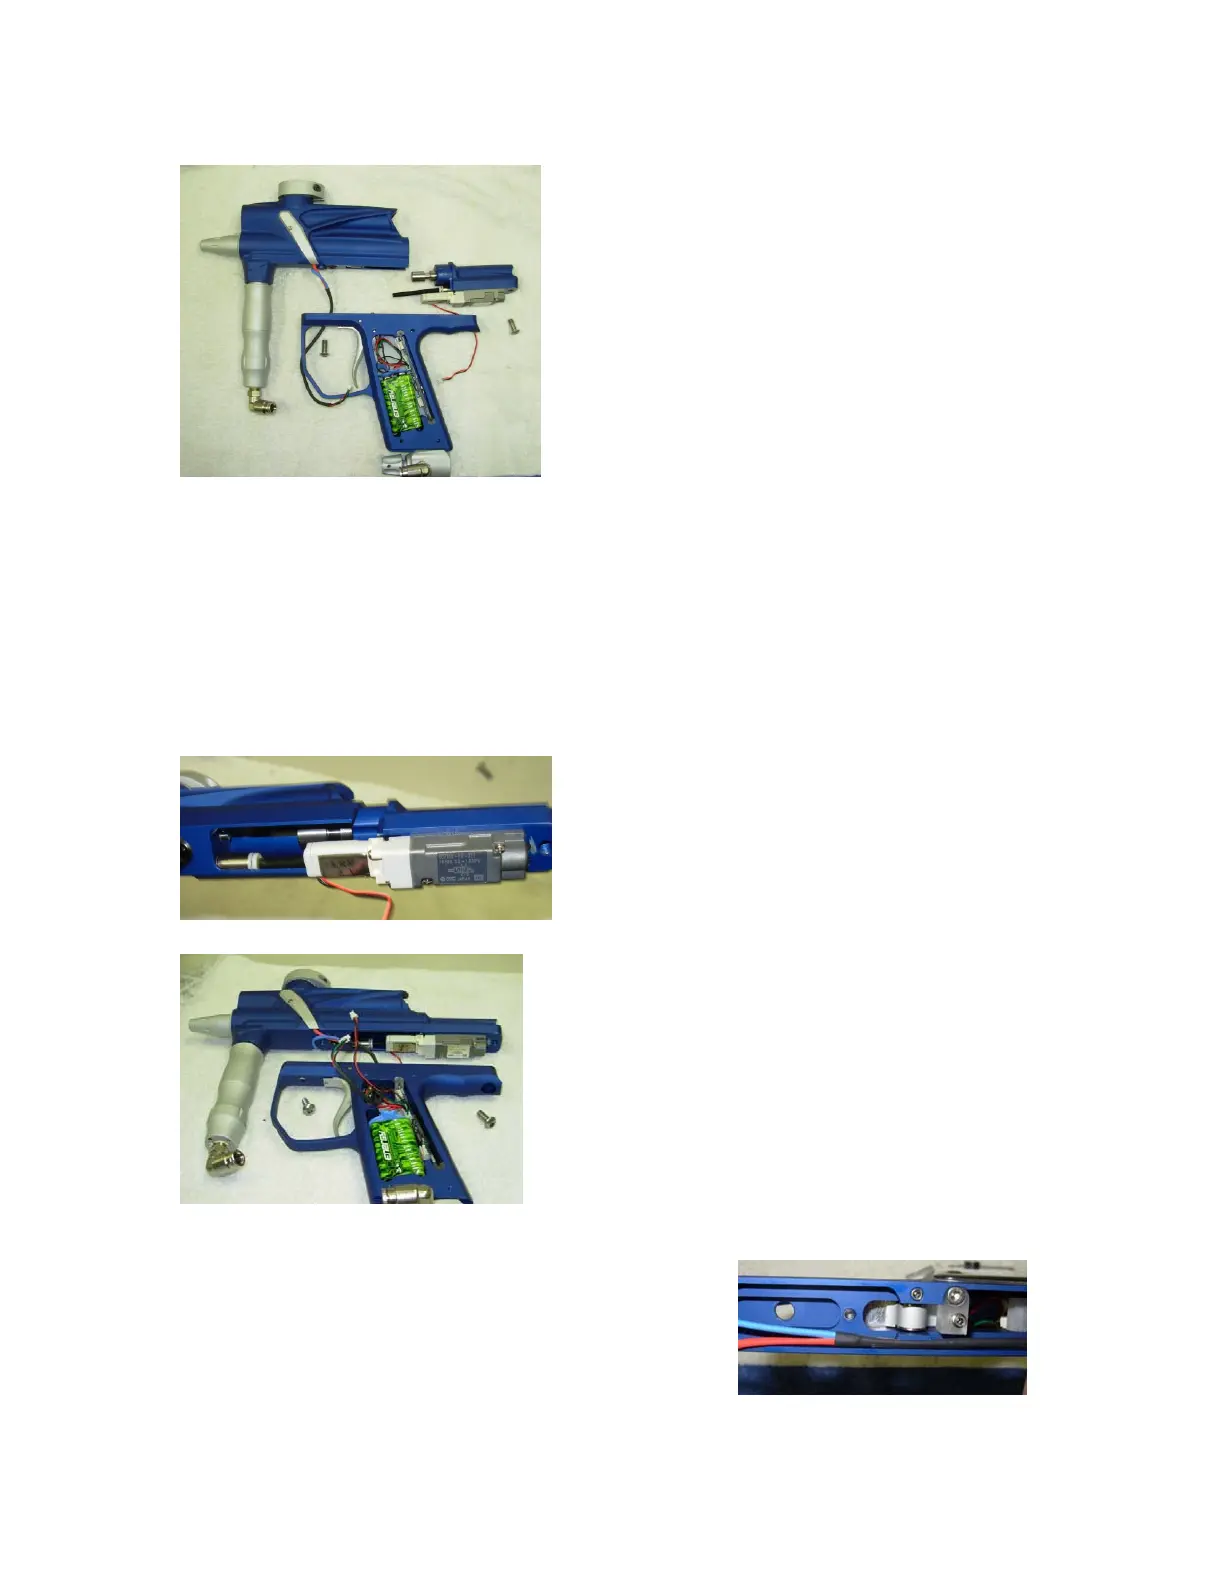
Slide the ram into the gun body while sliding
the hose into the fitting. The gun now
consists of two half’s: the gun body with the
ram, and the Trigger frame.
Feed the eye wires and the solenoid wire into
the trigger frame – but do not connect them to
the board. Align the body over the trigger
frame, looking at the screw holes in the gun
body and the trigger frame the trigger frame
should be about a half inch forward of
alignment to the gun body. Notice the
channel cut between the side of the trigger
frame and trigger. One side has the trigger
spring stop; one side has a channel to hold the eye wires.
Reach in with an Allen wrench and push the eye
wires into the groove in the trigger frame. The
wires do not have to go fully into the groove as
there is also a groove cut into the gun body for the
wires. Pushing them into the trigger frame groove
holds the wires so they do not get cut.
15