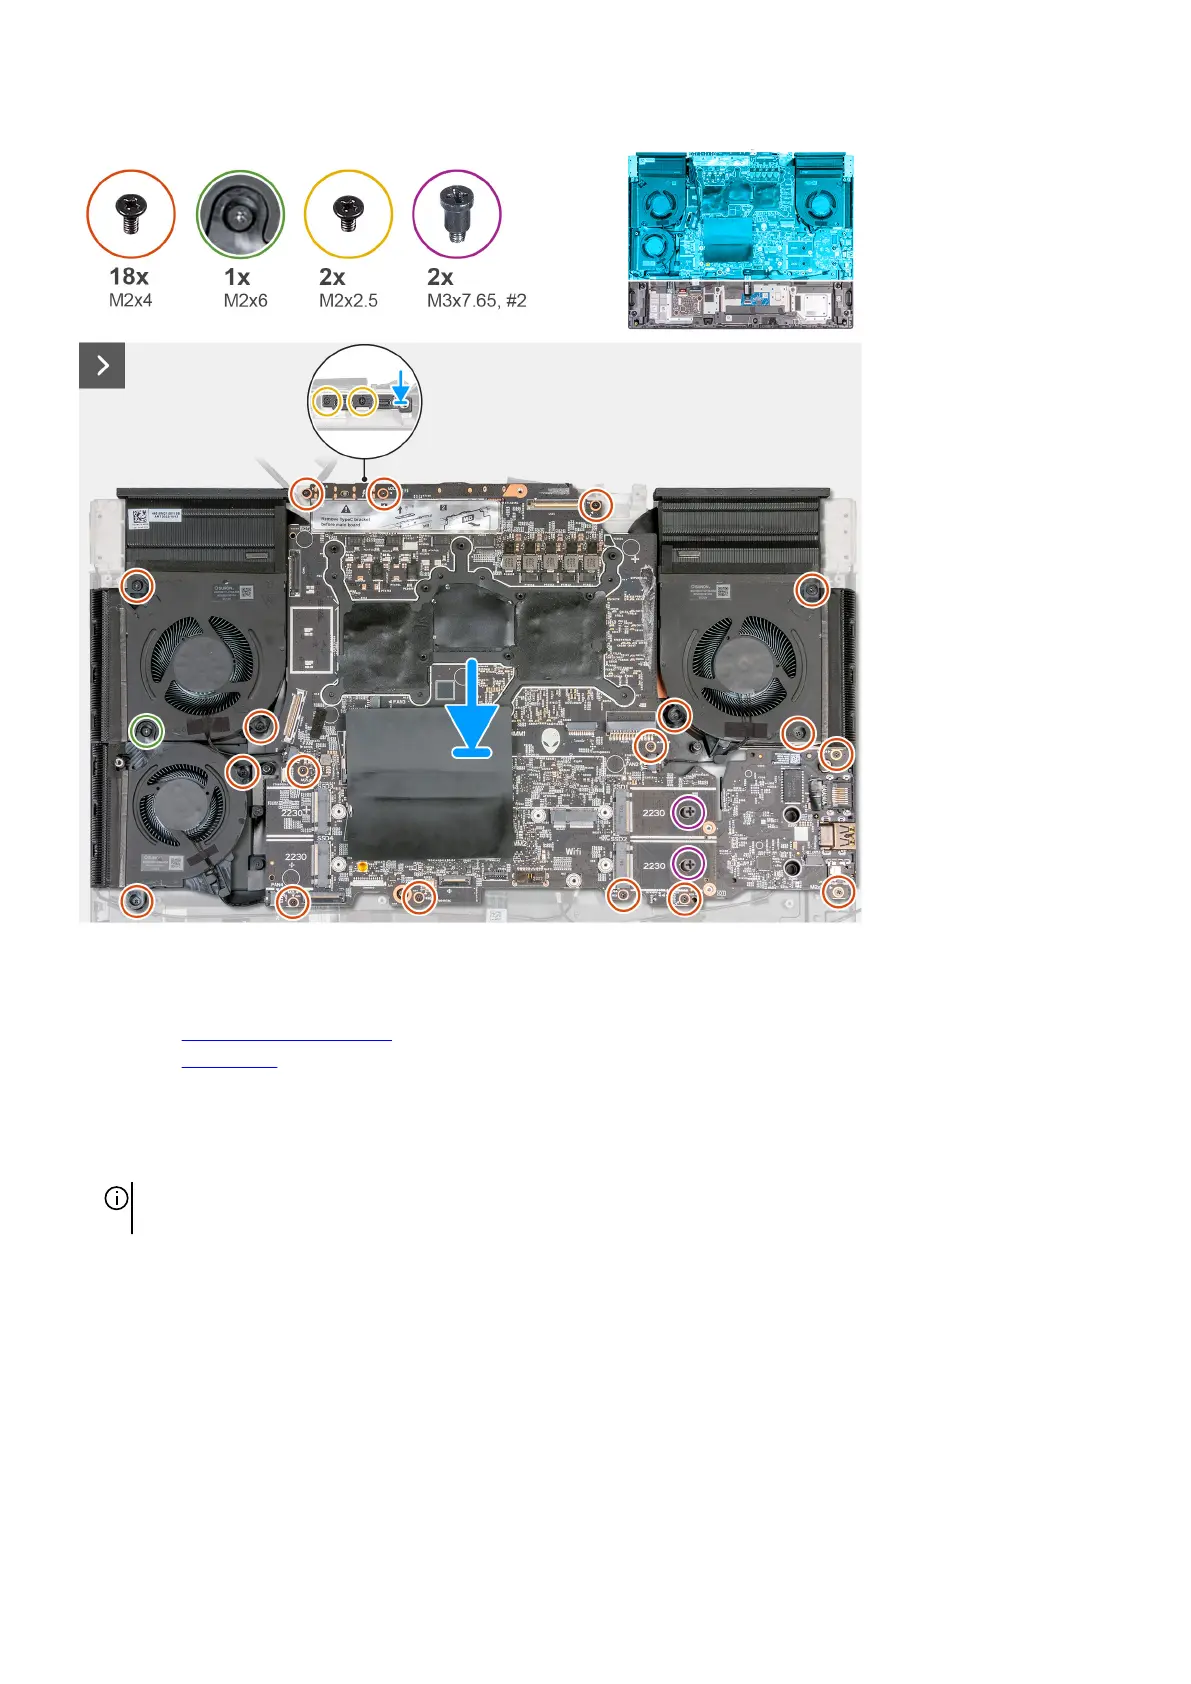
Steps
1. Turn the system board over.
2. Install the fan and heat-sink assembly.
3. Install the audio board.
4. Turn the system-board assembly over.
5. Using the alignment posts, place the system-board assembly on the palm-rest and keyboard assembly.
6. Replace the eighteen screws (M2x4) and one screw (M2x6) that secure the system board to the palm-rest and keyboard
assembly.
NOTE: Replace the two screws (M3x7.65, #2) that secure the M.2 2230 SSD slots on the system board. This step is
applicable only for the computers shipped with M.2 2230 solid-state drives.
7. Place the Type-C bracket on the system board and align the screw holes on the bracket to the screw holes on the system board.
8. Replace the two screws (M2x2.5) that secure the Type-C bracket to the system board.
57