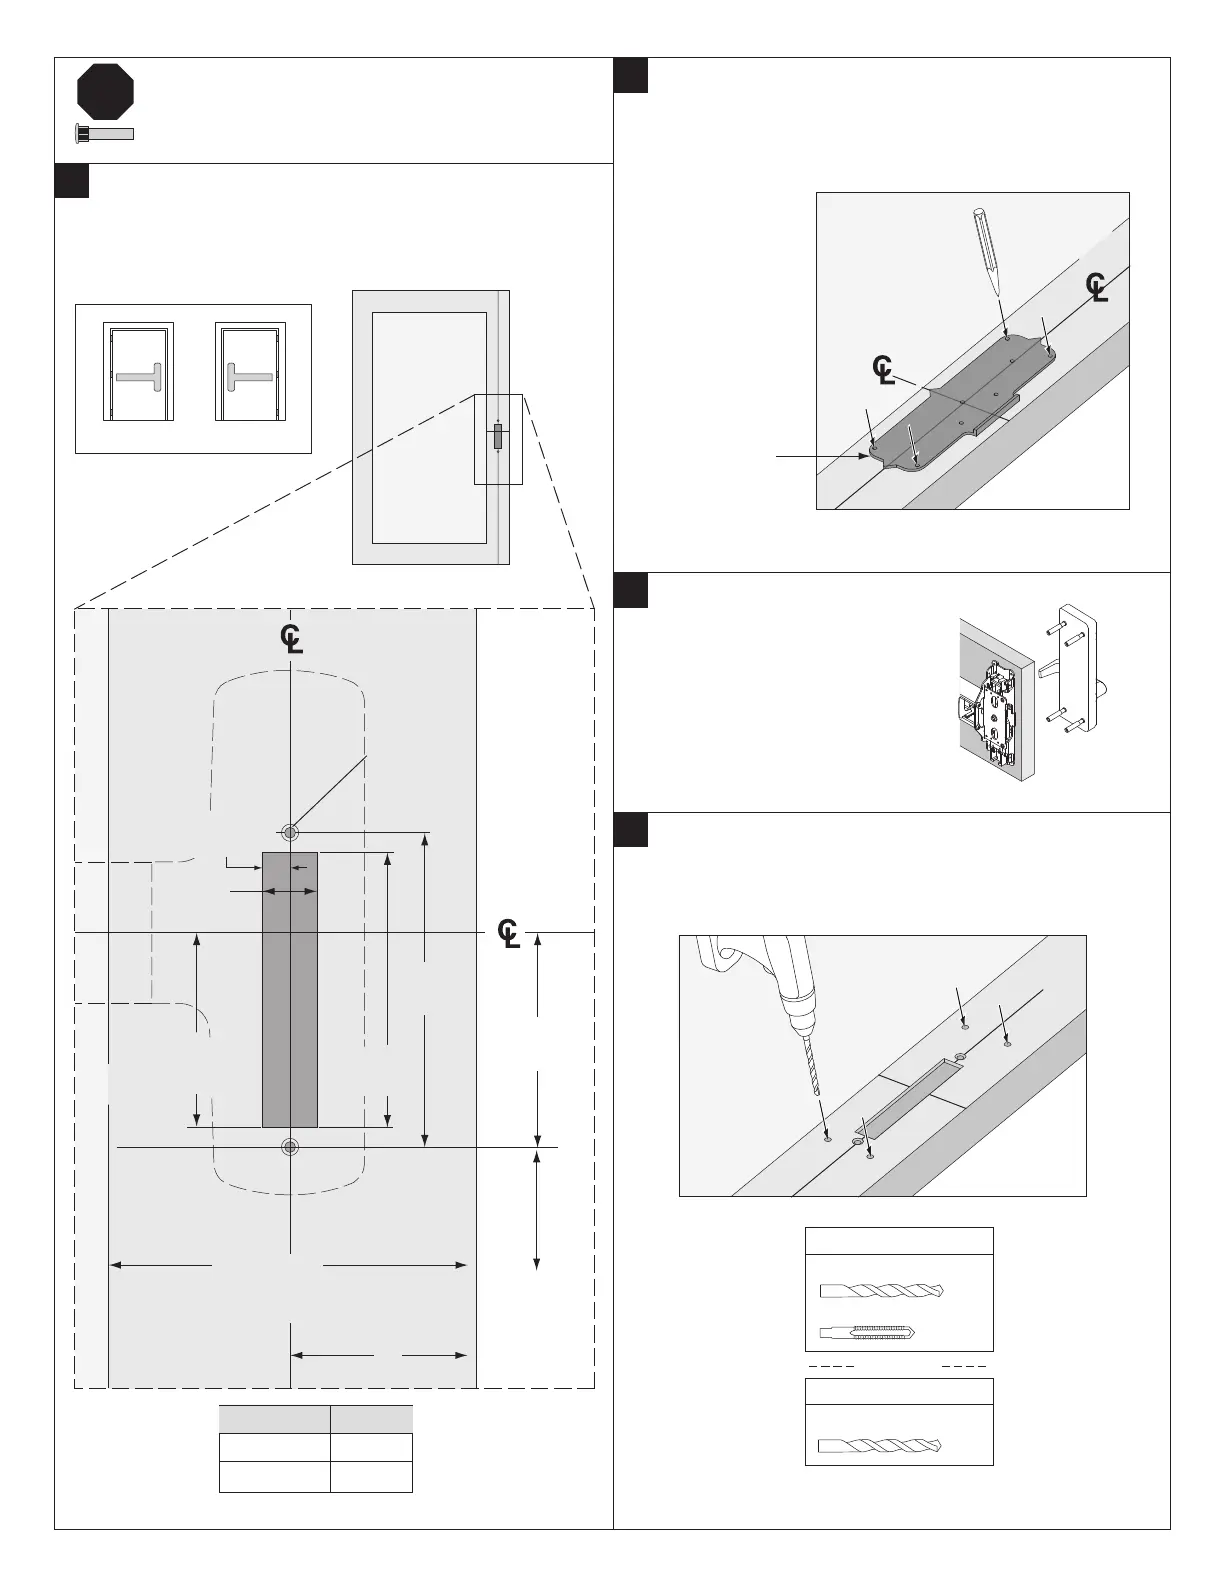
5"
(127 mm)
4³⁄₈"
(112 mm)
3³⁄₁₆"
(80 mm)
⁷⁄₈"
(22 mm)
A =
B
⁷⁄₁₆"
(11 mm)
Stile width
Ancho del escalón
Largeur du montant
A B
1³⁄₄"
2³⁄₄"4¹⁄₂" or greater
3¹⁄₂" to 4¹⁄₂"
Prepare 4 Holes
Prepare 4 Orificios
Préparer 4 Orifices
3¹⁄₂"
(80 mm)
36¹⁄₂" (92.7 cm)
to bottom of door
A la parte inferior
de la puerta
de la porte
inférieure
Rod
Barra
Tige
If sexbolts are in box, see Sexbolt Preparation on page 7
Si los pernos macho-hembra se encuentran en la caja,
consulte preparación de pernos macho-hembra en la página 7
Si les colonnettes sont dans la boîte, voir
« Préparation de colonnette » à la page 7
!
Device
Dispositivo
Dispositif
Rod
Barra
Tige
Device
Dispositivo
Dispositif
⁷⁄₃₂" (6 mm) Dia.
countersink for
avellanador por
fraisure pour
#8-32 screw/tornillo/vis
x2
1
Prepare Door Cutout
Prepare el Corte de la Puerta
Préparer le Découpage de Porte
4
Mark 4 Holes
Marque 4 Orificios
Marquer 4 Orifices
Plastic template
Plantilla de Plástico
Gabarit de Plastique
3
F-25-C
#25
#10-24
25-C
¹⁄₈" (3 mm) X 1" (25 mm)
OR O OU
RHR LHR
If Installing Trim, Go To Trim
Instructions
Si Instala la Moldura, Vaya a
las Instrucciones de Moldura
Si Installation d'une Garniture,
voir «Instructions de
Garniture »
Trim
Moldura
Garniture
 Loading...