Do you have a question about the Allen-Bradley 1756-L74 and is the answer not in the manual?
Table identifying minimum software versions for controller use.
Guidelines to prevent damage from electrostatic discharge.
Precautions when removing or inserting modules while powered.
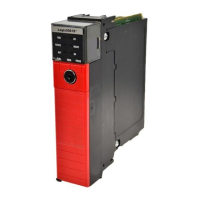
Step-by-step guide for installing the 1756-L7x controller.
Instructions for inserting the controller key.
Considerations and steps for removing the Energy Storage Module (ESM).
Steps for installing the Energy Storage Module (ESM).
Precautions to consider before installing or removing ControlLogix controllers.
Details on environmental requirements and enclosure considerations for operation.
Guidelines to prevent damage from electrostatic discharge.
Precautions when removing or inserting modules while powered.
Tasks to complete before installing the controller and power supply.
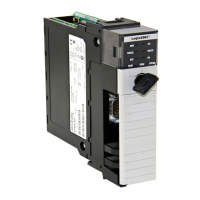
Step-by-step guide for installing the 1756-L6x controller.
Information and steps for connecting and replacing the controller battery.
Procedure for installing a 1756-BA1 battery on a series A controller.
Procedure for installing a 1756-BA2 battery on a series B controller.
Procedure for inserting the controller module into the chassis.
Procedure for removing the controller module from the chassis.
Steps to establish a connection to the controller.
Procedure for connecting to the 1756-L7x controller via USB.
Steps to set up the USB driver for RSLinx software.
Procedure for connecting to the 1756-L6x controller via a serial port.
Procedures for upgrading controller firmware using ControlFLASH or AutoFlash.
Step-by-step guide for upgrading firmware using ControlFLASH.
Procedure for upgrading firmware using the AutoFlash feature.
Steps to specify the communication path in RSLogix 5000 software.
Methods to establish an online connection with the controller.
Procedure for downloading a project to the controller.
Steps to download a project using the Who Active dialog box.
Steps to download a project using the Controller Status menu.
Procedure for uploading a project from the controller.
Steps to upload a project using the Who Active dialog box.
Steps to upload a project using the Controller Status menu.
Table to reference controller operation modes and their meanings.
Procedure to change the controller operation mode using the physical switch.
Procedure to change controller operation mode using RSLogix 5000 software.
Procedure for loading or storing projects to the memory card.
Considerations for designing a ControlLogix system and its components.
Details on EtherNet/IP network capabilities and usage.
Description of ControlNet as a real-time network for I/O and data.
Description of DeviceNet network capabilities and usage.
Steps to configure the controller for serial communication.
How ControlLogix controllers produce and consume system-shared tags.
Details on using the MSG instruction to transfer data between devices.
Steps to add local I/O modules to the I/O Configuration.
Steps to add remote I/O modules to the I/O Configuration.
Steps to add distributed I/O modules to the I/O Configuration.
Details on supported digital and analog interfaces for motion.
Information on using motion control instructions for axes.
Explanation of using multiple tasks for scheduling and prioritizing programs.
Details on programs grouping data and logic, and their components.
Using GSV and SSV instructions to get and set controller data.
Information on monitoring I/O connections and detecting timeouts.
Explanation of how redundancy provides system availability.
List of system components required for most redundant systems.
Procedure for building a typical redundant system.
Table summarizing SIL2 configurations and their hardware.
Description of a fail-safe configuration where hardware is not redundant.
Description of a high-availability configuration using redundant controller chassis.
Description of the fault-tolerant configuration using fully-redundant components.
Messages indicated on the status display when the controller is faulted.
Table of specific fault types, codes, and associated messages.
Explanation of I/O fault indication formats and codes.
| Brand | Allen-Bradley |
|---|---|
| Model | 1756-L74 |
| Category | Controller |
| Language | English |