6 Configurable NAT Router
Rockwell Automation Publication 1783-PC017B-EN-P - May 2016
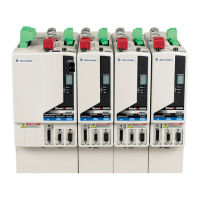
b. From the Ethernet Protocol (TCP/IP) Properties menu, change the IP address to 192.168.1.3 and subnet
mask to 255.255.255.0.
3. Click OK.
4. Install the SD card into the device.
5. Set all DIP switches to the OFF position.
6. Apply power to the device.
7. Go to Start\All Programs\Rockwell Software\BOOTP-DHCP Server and open the utility.
8. Double-click the MAC ID.
9. Enter 192.168.1.1 for the IP address at the New Entry window and click OK.
The IP address appears in the Relation List.
10.Open RSLinx Classic.
11.Navigate to your 1783-NATR router.
12.Right-click the device and select Upload EDS file from device.
13.Click Next at each EDS window.
14.Click Finish.
15.Open a web browser and navigate to 192.168.1.1.
16.Click Configuration and then click one of the links, for example Device Services.
You are prompted to enter a user name and password.
17. Enter admin for the user name and the serial number of the device for the password. The serial number is the
default password.
You are prompted to enter a new password.
18. Enter a new password into the password fields.
Now you can access the Configuration menu items.
If Public port or Private port configuration changes were made, the device must be reset for the changes to
take effect.
19. Navigate to Device Services and under Reset Module click Reset Module.
20.Configure the module. See 1783-UM008
for complete instructions.
21.At the device reset warning dialog box, click Reset Module.
22.Wait until the module reboots.
23.Under Device Configuration, click Save to SD.
The Successful SD configuration save window appears.
24.At the Successful SD configuration save window, click OK.
Add Addresses to the Routing Table
Use the Network Address Translation tab in the web user-interface to add addresses to the routing table.
Navigate to the Network Address Translation table, and perform the following:
1. Verify that NAT Enable is set to Enabled and click New.
2. At the Create New Rule dialog box, enter your own IP addresses and description to configure the individual
translations.
3. Click Add Rule after entering all information.
Access Diagnostics
The 1783-NATR router diagnostics are accessed through the web user-interface by navigating through the links
under the Diagnostics folder.
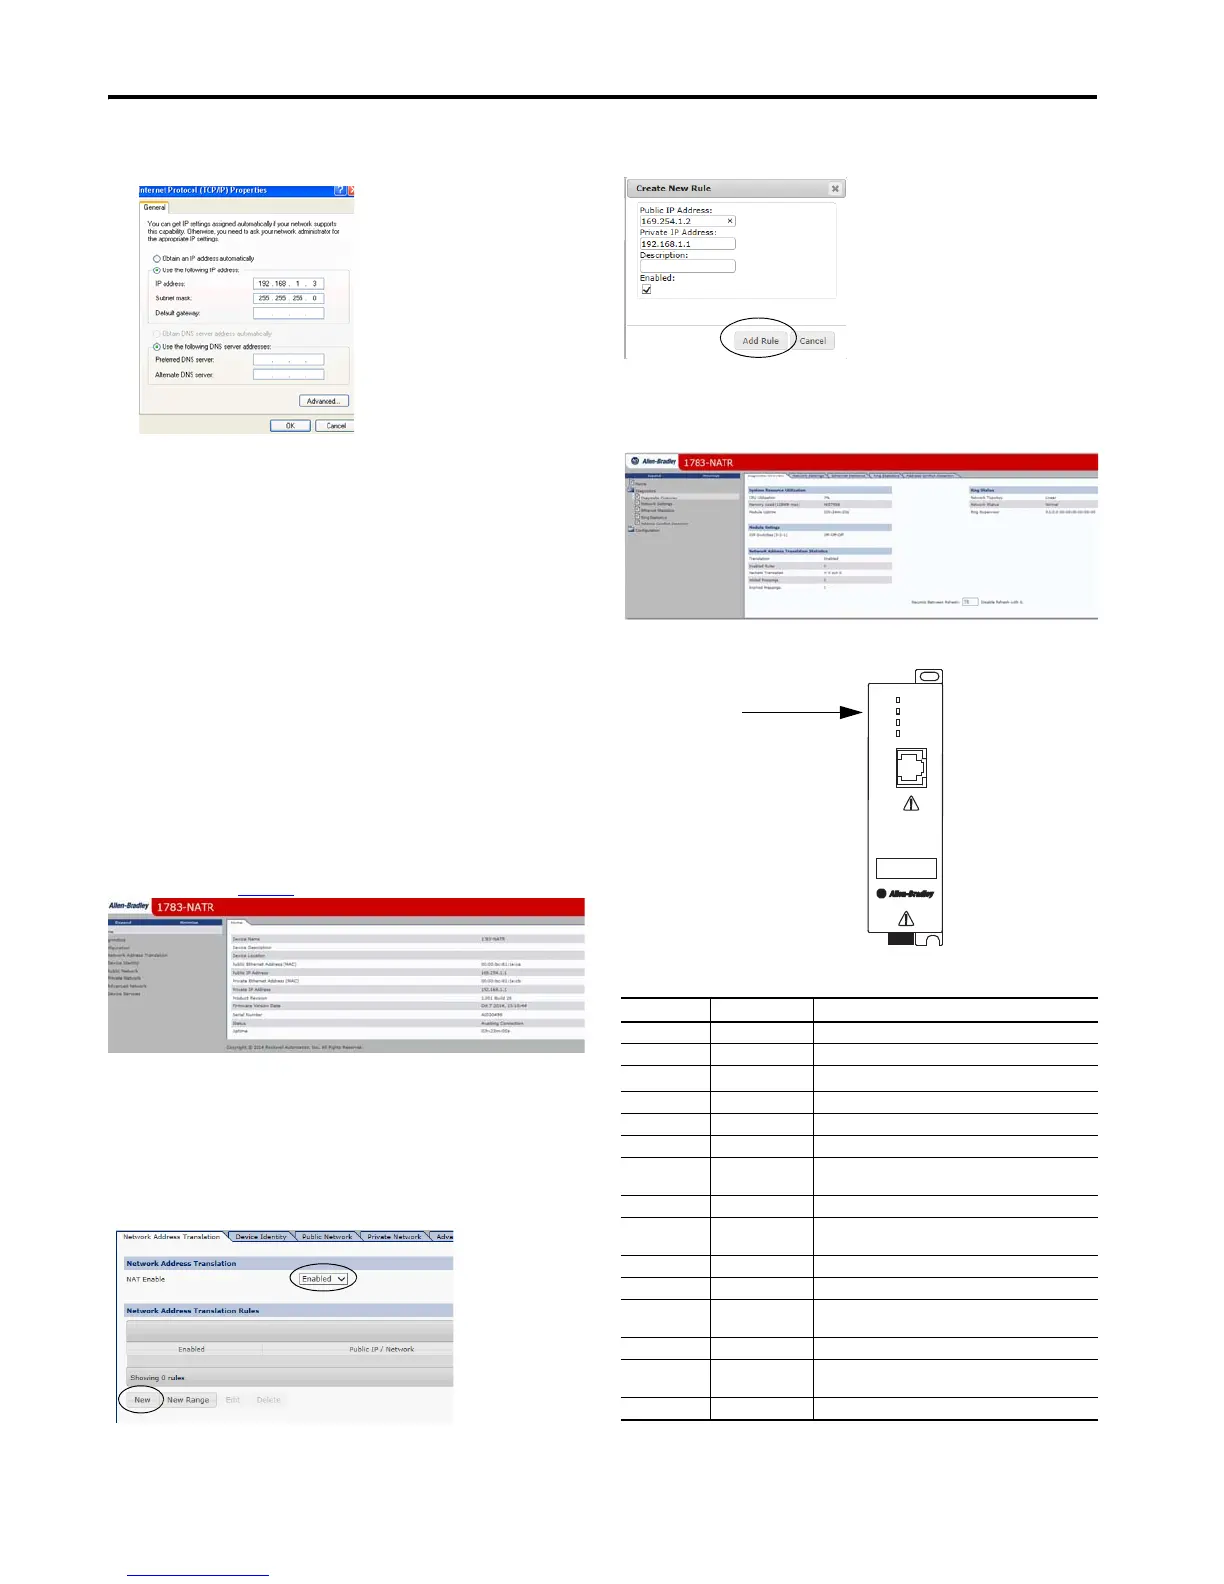
1783-NATR Router Status Indicators
Indicator Description
Indicator Status Description
OK Off Module does not have 24V DC power.
Green Module is operating correctly.
Flashing red
Recoverable fault or duplicate IP address has been detected.
(1)
(1) SD card errors, including missing and unresponsive cards, are considered recoverable faults.
Red An unrecoverable fault has been detected.
Flashing red/green Module is performing a power-up self-test.
LINK 1, LINK 2 Off No data is being transmitted.
Green Private port link that is established at 100 Mbps. Module is
ready to communicate.
Flashing green Data transmission in progress at 100 Mbps
Yellow Private port link that is established at 10 Mbps. Module is ready
to communicate.
Flashing yellow Data transmission in progress at 10 Mbps.
PUBLIC PORT Off No data is being transmitted.
Green Public port link established at 100 Mbps. Module is ready to
communicate.
Flashing green Data transmission in progress at 100 Mbps.
Yellow Public port link established at 10 Mbps. Module is ready to
communicate.
Flashing yellow Data transmission in progress at 10 Mbps.
LINK 1
LINK 2
PUBLIC
PORT
OK
(rear)
(front)
1783-NATR
 Loading...