EasyManua.ls Logo

Allen + Roth BROOKES 21-B43LEDLAV-AR User Manual

Allen + Roth BROOKES 21-B43LEDLAV-AR
16 pages
To Next Page IconTo Next Page
Page #1 background imageLoading...
Page #1 background image
ATTACH YOUR RECEIPT HERE
Serial Number
_______________
Purchase Date
______________
Questions, problems, missing parts? Before returning to the store, call our customer
service department at 1-866-439-9800, 8 a.m. - 8 p.m., EST, Monday - Sunday.
ITEM # 2483272, 2916836, 2916837
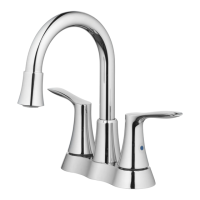
CENTERSET BATHROOM
FAUCET WITH LED LIGHT
MODEL 21-B43LEDLAV-AR
21-B43LEDLAVBN-AR
21-B43LEDLAVMB-AR
Español p. 9
SM20138
ALLEN + ROTH and logo design are trademarks
or registered trademarks of LF, LLC.
All rights reserved.
BROOKES
09/15/20
Questions and Answers:

Allen + Roth BROOKES 21-B43LEDLAV-AR Specifications

General IconGeneral
BrandAllen + Roth
ModelBROOKES 21-B43LEDLAV-AR
CategoryBathroom Fixtures
TypeVanity Light
Fixture FinishBrushed Nickel
Light Bulb TypeLED
Bulb IncludedYes
Voltage120 V
Color Temperature3000 K
Length21 inches
DimmableYes
CertificationETL
Wattage18 W
Height4.5 inches

Summary

Package Contents and Hardware

Hardware Contents

Details on included hardware components, not shown to scale.

Safety Information

Cautionary Notes

Precautions for soldering and protecting sink drains during installation.

Warning Notes

Safety advice for eye protection and water line connection procedures.

Preparation and Specifications

Preparation Steps

Guidance on ensuring all parts are present before starting assembly.

Product Specifications

Technical details including flow rate, certifications, and finish.

Installation Instructions

Step 1: Water Shut-off and Faucet Removal

Procedure to shut off water supply and disconnect/remove the existing faucet.

Step 2: Faucet Body Mounting

Instructions for placing the gasket, inserting faucet shanks, and securing with mounting nuts.

Step 3: Water Supply Line Connection

Connecting water supply lines to faucet shanks and shut-off valves.

Step 4: Drain Assembly Removal

Steps for removing the old pop-up drain assembly and cleaning the sink.

Continued Installation and Aerator Replacement

Step 5: Drain Assembly Installation

Inserting and securing the flange and upper portion of the new drain assembly.

Step 6: Lower Drain Assembly Attachment

Attaching the rubber gasket, mounting nut, and lower drain assembly.

Step 7: Final Checks and Flushing

Checking for leaks, flushing the system, and reattaching the aerator.

Replacing LED Aerator

Instructions on how to remove the LED aerator and install a non-lighted one.

Operating, Cleaning, and Troubleshooting

Operating Instructions

How to control water flow using the faucet handles.

Care and Cleaning

Recommendations for cleaning the faucet to maintain its finish and warranty.

Troubleshooting Common Issues

Solutions for problems like leaks, improper shut-off, and poor water pattern.

Rough-in Dimensions and Replacement Parts

Rough-in Dimensions

Diagram showing critical measurements for faucet installation.

Replacement Parts Identification

List of all available replacement parts with corresponding part numbers.

Limited Lifetime Warranty

Warranty Coverage Details

Information on product defect coverage, finish warranty, and exclusions.

Warranty Claim Inquiries

Contact information for making warranty claims and inquiries.

Related product manuals