EasyManua.ls Logo

Allen + Roth Davidson-60GP-CH User Manual

Allen + Roth Davidson-60GP-CH
30 pages
To Next Page IconTo Next Page
Page #1 background imageLoading...
Page #1 background image
PAGE 1
STANDARD PAGE & GUIDELINES
Title Page
Logos, allowed symbols, standard text boxes & other guidelines
Davidson 60 Glass Panel in Chrome
ITEM #/ARTICLE #/ARTÍCULO #: 3492209
MODEL#/MODÈLE#/MODELO #: Davidson-60GP-CH
Davidson 60 Glass Panel in Satin Nickel
ITEM #/ARTICLE #/ARTÍCULO #: 3492213
MODEL#/MODÈLE#/MODELO #: Davidson-60GP-SN
ALLEN + ROTH and logo design are trademarks or registered trademarks of LF, LLC. All
rights reserved.
ALLEN + ROTH et le logo sont des marques de commerce ou des marques de commerce
déposées de LF, LLC. Tous droits réservés.
ALLEN + ROTH y el diseño del logotipo son marcas comerciales o marcas registradas de
LF, LLC. Todos los derechos reservados.
SM21036
An installation video guide can be found on our Youtube channel:
Un guide d’installation video est disponible sur notre chaîne Youtube:
Una guía de instalación en vídeo está disponible en nuestro canal de Youtube:
https://tinyurl.com/jz6azd7n
Questions, problems, need help?
Call our customer service department at
1-866-439-9800, 8 a.m. - 8 p.m., EST, Monday - Sunday.
You could also contact us at partsplus@lowes.com or visit www.lowespartsplus.com.
English and French speaking representatives available
Vous avez des questions, des problèmes ou besoin d’aide?
Communiquez avec notre service à la clientèle au
1-866-439-9800, entre 8 h et 20 h (HNE), du lundi au dimanche. Des représentants
Vous pouvez aussi nous contacter à partsplus@lowes.com ou sur www.lowespartsplus.com.
anglophones et francophones sont disponibles.
¿Preguntas, problemas, necesita ayuda?
Llame a nuestro Departamento de Servicio al Cliente al
1-866-439-9800, de lunes a domingo de 8 a.m. a 8 p.m., hora estándar del Este.
También puede ponerse en contacto con nosotros en partsplus@lowes.com o visitar www.lowespartsplus.com.
Representantes que hablan inglés y francés disponibles.
INSTALLATION MANUAL
MANUEL D’INSTALLATION
MANUAL DE INSTALACIÓN
Davidson 60 Glass Panel in Matte Black
ITEM #/ARTICLE #/ARTÍCULO #: 5489072
MODEL#/MODÈLE#/MODELO #: Davidson-60GP-MB
Davidson 60 Glass Panel in Oil Rubbed Bronze
ITEM #/ARTICLE #/ARTÍCULO #: 15SGP-DAVI60-ORBWM
MODEL#/MODÈLE#/MODELO #: Davidson-60GP-ORB
2023-10-11
Question and Answer IconNeed help?

Do you have a question about the Allen + Roth Davidson-60GP-CH and is the answer not in the manual?

Allen + Roth Davidson-60GP-CH Specifications

General IconGeneral
BrandAllen + Roth
ModelDavidson-60GP-CH
CategoryBathroom Fixtures
FinishChrome
MaterialMetal
Number of Handles2
Mounting LocationWall
Width (in)60
Installation TypeWall Mounted

Summary

Davidson Shower Installation Manual

Product Identification

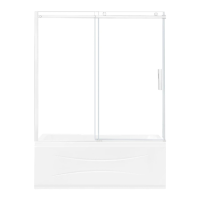
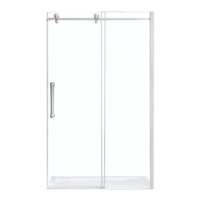
Lists Davidson shower models and item numbers.

Installation Manual Overview

Main document title and purpose.

Online Video Guide

Link to YouTube installation video for guidance.

Customer Support Information

Contact details for questions, problems, and assistance.

Shower Dimensions

Key Measurement Labels (A-F)

Labels for shower height, width, panel, and opening dimensions.

Required Installation Space

Attention note on the necessary shower space measurement.

Wall-to-Wall Installation Requirements

Finished Surface Distance (D)

Measure finished surface distance before installing tracks.

Support Bar Adjustability and Cutting

Information on adjusting support bar and how to cut it.

Shower Door Height Consideration

Ensure door height does not exceed wall height.

Installation Structure and Guidelines

Installation Structure Overview Diagram

Visual representation of wall structure for installation.

Recommended Wall Measurements

Details on wall structure and measurements for product installation.

Installation Code Compliance

Adherence to local/national building and plumbing codes is required.

Frequently Asked Questions (FAQ)

Common questions regarding cement and base installation.

Package Contents - Component Identification

All Parts Diagram (A-O)

Diagram showing all components labeled A through O.

Package Contents - Individual Components

Component List with Quantities

Visual list of each part with its quantity.

Parts List - Main Components

Part A: Wall Track

Details for the wall track component.

Part B: Fixed Panel

Details for the fixed panel component.

Part C: Support Bar Anchor

Details for the support bar anchor.

Part D: Shower Door Stopper

Details for the shower door stopper.

Part E: Support Bar

Details for the support bar.

Part F: Fixed Panel Bracket

Details for the fixed panel bracket.

Part G: Door Roller

Details for the door roller.

Part H: Door Panel

Details for the door panel.

Part I: Vertical Seal Strip

Details for the vertical seal strip.

Parts List - Accessories and Hardware

Part J: Door Handle

Details for the door handle.

Part K: Bottom Seal Strip

Details for the door bottom seal strip.

Part L: Vertical Seal Strip

Details for the glass panel vertical seal strip.

Part M: Sliding Door Guide

Details for the sliding door guide.

Part N: Decorative Cap

Details for the decorative cap.

Part O: Decorative Track

Details for the decorative track.

Complete Hardware Kit

Details for the complete hardware kit.

Hardware and Tools Required

Supplied Hardware List (AA-EE, FF-II)

List of included hardware components with identifiers.

Required Tools (Not Supplied)

List of tools needed for installation that are not included.

Preparation and Installation Orientation

Door Opening Direction (Right-to-Left vs. Left-to-Right)

Instructions for handling different door opening directions.

Shower Head Placement FAQ and Warning

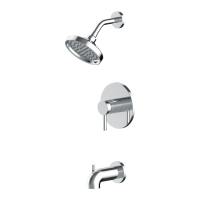
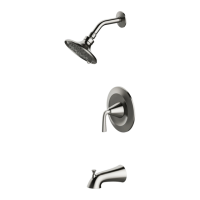
Advice on shower head placement to prevent leaks.

General Safety Precautions

Handling and Personal Safety

Guidelines for wearing safety gear and handling the product.

Glass Handling and Tempering Warnings

Critical safety advice for handling tempered glass.

Tool Usage and Product Modification Restrictions

Rules on using tools and not modifying the glass.

Inspection and Installation Environment

Checking parts, ensuring a level floor, and consulting codes.

Safety Notices and Pre-Assembly Checks

Warranty and Distributor Liability Notice

Information on warranty voidance and distributor responsibility.

Two-Person Installation Requirement

Emphasizes the need for at least two people for installation.

Parts Verification Before Assembly

Instruction to compare parts with lists before starting assembly.

Pre-Installation Checks

Read All Instructions

Instruction to read all manual sections before beginning.

Wall and Base Leveling Requirements

Ensuring walls are plumb and the base is level for proper fit.

Alcove Shower Installation Diagram

Illustrative guide for alcove shower setup.

Wall Track Installation

Positioning and Drilling the Wall Track

Steps for placing and drilling the wall track.

Using Wall Anchors for Studless Walls

Guidance on using anchors when studs are not present.

Securing the Wall Track

How to fix the wall track with screws.

Wall Anchor Installation Warning

Important note on when to use or not use wall anchors.

Fixed Panel and Support Bar Installation - Part 1

Inserting Fixed Panel into Wall Track

Step to place the fixed panel into the wall track.

Sliding Door Guide Installation

Step to slide the guide onto the fixed panel.

Support Bar Adjustment and Cutting

Trimming Support Bar Requirement

When the glass panel width requires support bar trimming.

Support Bar Cutting Calculation

Formula for calculating the correct length to cut the support bar.

Cutting Restriction: Door Side Only

Important instruction to cut only the side of the bar without holes.

Fixed Panel and Support Bar Installation - Part 2

Attaching Stoppers and Support Bar Anchor

Sliding stoppers and anchor onto the support bar.

Mounting Support Bar to Fixed Panel

Fixing the support bar to the fixed panel using brackets.

Marking Support Bar Anchor Location

Marking the wall for the support bar anchor placement.

Marking Door Guide Position

Marking the wall for the door guide.

Fixed Panel and Support Bar Installation - Part 3

Removing Sliding Guide and Support Bar

Steps to remove the guide and support bar.

Removing Fixed Panel

Steps to completely remove the fixed panel.

Marking Sliding Door Guide Hole

Marking the position for the sliding door guide hole.

Fixed Panel and Support Bar Installation - Part 4

Drilling and Installing Sliding Door Guide

Installing the door guide using screws and caps.

Placing and Marking Support Bar Anchor

Repositioning and marking the support bar anchor.

Securing Support Bar Anchor to Wall

Drilling and fixing the anchor with screws and anchors.

Helpful Hint: Silicone for Holes

Tip to add silicone to holes before inserting screws.

Warning: Studs vs. Wall Anchors

Guidance on using anchors with studs or composite walls.

Fixed Panel and Support Bar Installation - Part 5

Placing Fixed Panel and Door Guide

Placing the fixed panel and repositioning the door guide.

Sliding Support Bar Anchor

Sliding the support bar anchor back onto the support bar.

Securing Fixed Panel to Support Bar

Fixing the fixed panel to the support bar using brackets.

Warning: Positioning Door Panel (H)

Instruction to place door panel inside enclosure for easier steps.

Shower Door Installation - Part 1

Installing Bottom Seal Strip

Inserting the seal strip onto the bottom of the door panel.

Installing Door Panel onto Rollers

Attaching the door panel to the door rollers.

Shower Door Installation - Part 2

Adjusting Roller Hook Position

Raising or lowering the roller hook for proper fit.

Hanging Door Panel on Support Bar

Hanging the door panel by its rollers onto the support bar.

Placing Bottom of Door into Guide

Ensuring the door bottom is correctly placed within the guide.

Shower Door Installation - Part 3

Raising Hook for Free Movement

Adjusting hook height for smooth door movement.

Ensuring Roller Stays on Support Bar

Setting hook height to prevent roller derailment.

Leveling the Glass Panel

Adjusting Glass Level with Eccentric Rollers

Using eccentric mechanism to adjust glass panel level.

Helpful Hint: Highest Glass Position

Identifying the highest glass position via eccentric wheel.

Helpful Hint: Lowest Glass Position

Identifying the lowest glass position via eccentric wheel.

Seal Strips Installation - Part 1

Installing Vertical Glass Panel Seal Strips

Fitting the two vertical seal strips onto the glass panels.

Installing Door Closing End Seal Strip

Attaching the seal strip to the closing end of the door.

Seal Strips Installation - Part 2

Securing Door Stopper Near Anchor

Placing and loosely securing the door stopper.

Measuring Wall to Seal Strip Distance

Measuring 'X' distance between wall and seal strip lip.

Adjusting and Securing Door Stopper

Moving and tightly securing the stopper based on measurement.

Placing Second Door Stopper

Positioning the second stopper on the opposite side of the support bar.

Handle Installation

Installing Decorative Track and Caps

Sliding decorative caps onto the track and placing it.

Fixing Fixed Panel to Wall Track

Securing the fixed panel to the wall track using fittings.

Installing the Handle

Attaching the door handle to the panel.

Helpful Hint: Silicone for Holes

Tip to apply silicone to screw holes for better seal.

Sealing and Final Checks

Ensuring Door Functionality and Connection

Verifying the door closes tightly and opens smoothly.

Applying Silicone Sealant

Applying clear silicone sealant around fixed components.

Silicone Drying Time and Leak Prevention

Allowing 24 hours for drying and warning against improper application.

Maintenance and Care

Daily Cleaning Instructions

Using a wet cloth and mild liquid cleaner for daily upkeep.

Prohibited Cleaning Agents and Tools

Warning against abrasive cleaners, scrapers, and metallic brushes.

Bolt Tightening and Periodic Checks

Instructions for tightening support bolts and checking them.

Customer Service Contact for Assistance

Reiteration of contact information for support.

Limited Product Warranty

Warranty Coverage Details

Warranty periods for different product parts.

Warranty Exclusions and Limitations

Conditions and causes not covered by the warranty.

Warranty Claim Procedure

Steps to follow when making a warranty claim.

Disclaimer of Warranties and Remedies

Legal disclaimers regarding expressed and implied warranties.

Related product manuals