EasyManua.ls Logo

Allen + Roth CANTERBURY 1227VA-60-242-901-SR User Manual

Allen + Roth CANTERBURY 1227VA-60-242-901-SR
11 pages
To Next Page IconTo Next Page
Page #1 background imageLoading...
Page #1 background image
1
1227VA-60-242-901-SR CANTERBURY LT GRAY 60-IN VANITY WHITE TOP-SR
1227VA-60-242-900-SR CANTERBURY LT GRAY 60-IN VANITY MARBLE TOP-SR
1227VA-60-201-901-SR CANTERBURY WHITE 60-IN VANITY WHITE TOP-SR
1227VA-60-201-900-SR CANTERBURY WHITE 60-IN VANITY MARBLE TOP-SR
MODEL NUMBER DESCRIPTION
ATTACH YOUR RECEIPT HERE
Serial Number__________________ Purchase Date__________________
Questions, problems, missing parts? Before returning to your retailer, call our customer service
department at 1-866-439-9800, 8 a.m. - 8 p.m., EST, Monday - Sunday.
60-IN VANITY WITH TOP
welcoming • sophisticated • inspiring
ITEM #
3839329; 3839330; 3839331; 3839332
MODEL #1227VA-60-201-900-SR; 1227VA-60-201-901-SR; 1227VA-60-242-900-SR; 1227VA-60-242-901-SR
Question and Answer IconNeed help?

Do you have a question about the Allen + Roth CANTERBURY 1227VA-60-242-901-SR and is the answer not in the manual?
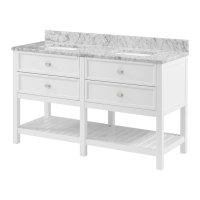
Allen + Roth CANTERBURY 1227VA-60-242-901-SR Specifications

General IconGeneral
Collection NameCanterbury
Mounting LocationFreestanding
Number of Drawers2
Number of Doors2
Sink ShapeRectangular
Width (Inches)60
Depth (Inches)22
Height (Inches)34.5
Cabinet ColorWhite
Top ColorWhite
Hardware FinishBrushed Nickel
BrandAllen + Roth
Model1227VA-60-242-901-SR
FinishPainted
Number of Handles2
Installation TypeFreestanding
Valve IncludedNo
ADA CompliantNo
MaterialWood
CategoryBathroom Vanity

Summary

Package and Hardware Contents

Package Contents

Lists all components included in the product packaging for assembly.

Hardware Contents

Details all necessary hardware and tools supplied for product assembly.

Safety Information

Safety Warnings and Precautions

Crucial safety advice and warnings for proper handling and assembly.

Preparation and Installation

Preparation Steps

Guidance on checking parts and preparing the workspace before assembly.

Installation Instructions

Step-by-step guide for assembling and mounting the vanity.

Installation: Drawer Removal and Workspace

Step 1: Drawer Removal

Instructions for safely removing drawers from the vanity base.

Step 2: Workspace Preparation

Guidance on cleaning the area and positioning the vanity cabinet.

Installation: Cabinet Securing and Top Preparation

Step 3: Securing Cabinet

Procedure for securing the vanity cabinet to wall studs.

Step 4: Top and Backsplash Prep

Instructions for unpacking and preparing the top and backsplash.

Installation: Top Attachment and Sink Template

Step 5: Attaching Top

Steps for applying caulk and attaching the vanity top to the base.

Step 6: Sink Template Placement

Guidance on aligning and placing sink templates on the vanity top.

Installation: Sink Caulk and Final Placement

Step 7: Sink Caulk Application

Instructions for applying silicone caulk around the sink area.

Step 8: Sink Installation

Procedure for gently lowering and setting the sinks into the top.

Installation: Drawer Reinstallation and Backsplash

Step 9: Drawer Reinstallation

Guide for reinserting drawers back into the vanity glides.

Step 10: Backsplash Attachment

Steps for attaching the backsplash and completing assembly.

Care and Maintenance

Cleaning and Protection

Recommendations for dusting, cleaning, and protecting the vanity surface.

Warranty Information

Replacement Parts List (Model 1227VA-60-201-SR)

Replacement Parts List (Model 1227VA-60-242-SR)

Related product manuals