2-6
SECTION 2
OPERATIONS
055561; 01/12
2.3, continued
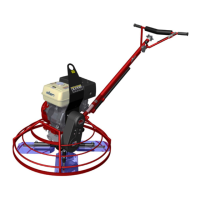
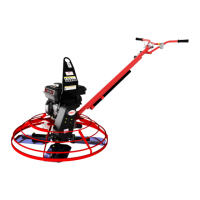
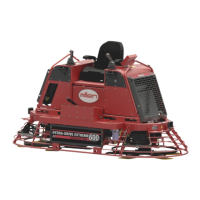
Controls
1. Fine Pitch Control Handle – To adjust the pitch of the blades, turn the handle either clock-
wise or counter-clockwise to achieve the desired blade pitch.
2. Handlebar Adjuster – Change the angle/height of the handle bars by loosening bolts, adjust
handlebars to desired location, tighten bolts firmly to hold handlebars in that position.
3. Handle Bar – When operating the trowel, place both hands on each grip to maneuver the
trowel.
4. Recoil Starter Housing – Automatically spools the recoil starter rope when using to start the
engine.
5. Hand Grip – Replace hand grips when they become worn or damaged.
6. Centrifugal "Kill" Switch – In the event the operator loses control of the trowel, this switch
will shut-down the engine.
7. Lifting Tube - Use this tube to lift the trowel onto a slab. Tube is to be inserted into socket
located in front of the gearbox.
8. Throttle Lever – Controls engine speed. Returns engine to idle when released.
9. Trowel Lifting Point – The trowel is equipped with a lifting bail that can be used to safely lift
and move the trowel.
10. Main Tube - When disassembling components inside the tube exercise caution.
11. Guard Ring - NEVER! put hands or feet inside guard ring while the machine is running.
12. Engine – This trowel uses a Honda engine.
13. Trowel Arm – NEVER operate the trowel with a bent, broken or out of adjustment trowel
arm. If the blades show uneven wear patterns or some blades wear out faster than others, the
trowel arm may need to be adjusted. Use the trowel arm alignment tool P/N 016863 to adjust
the trowel arms.
14. Blades – This trowel is equipped with combination blades. These blades are versatile and
should take care of most troweling needs. In addition pans can be attached to the trowel arms
that will allow the trowel to float on "wet" concrete.
18. Belt Cover – Remove this cover to gain access to the drive belt. NEVER operate the trowel
with this cover removed.