Allworx
®
Connect™ Server Family Installation Guide
866.ALLWORX * +1 585 421 3850 Page 11
www.allworx.com
Version: F Revised: June 21, 2018
3.3 Wall Mount
The table below indicates a list of all equipment and requirements necessary to wall mount the
Connect server.
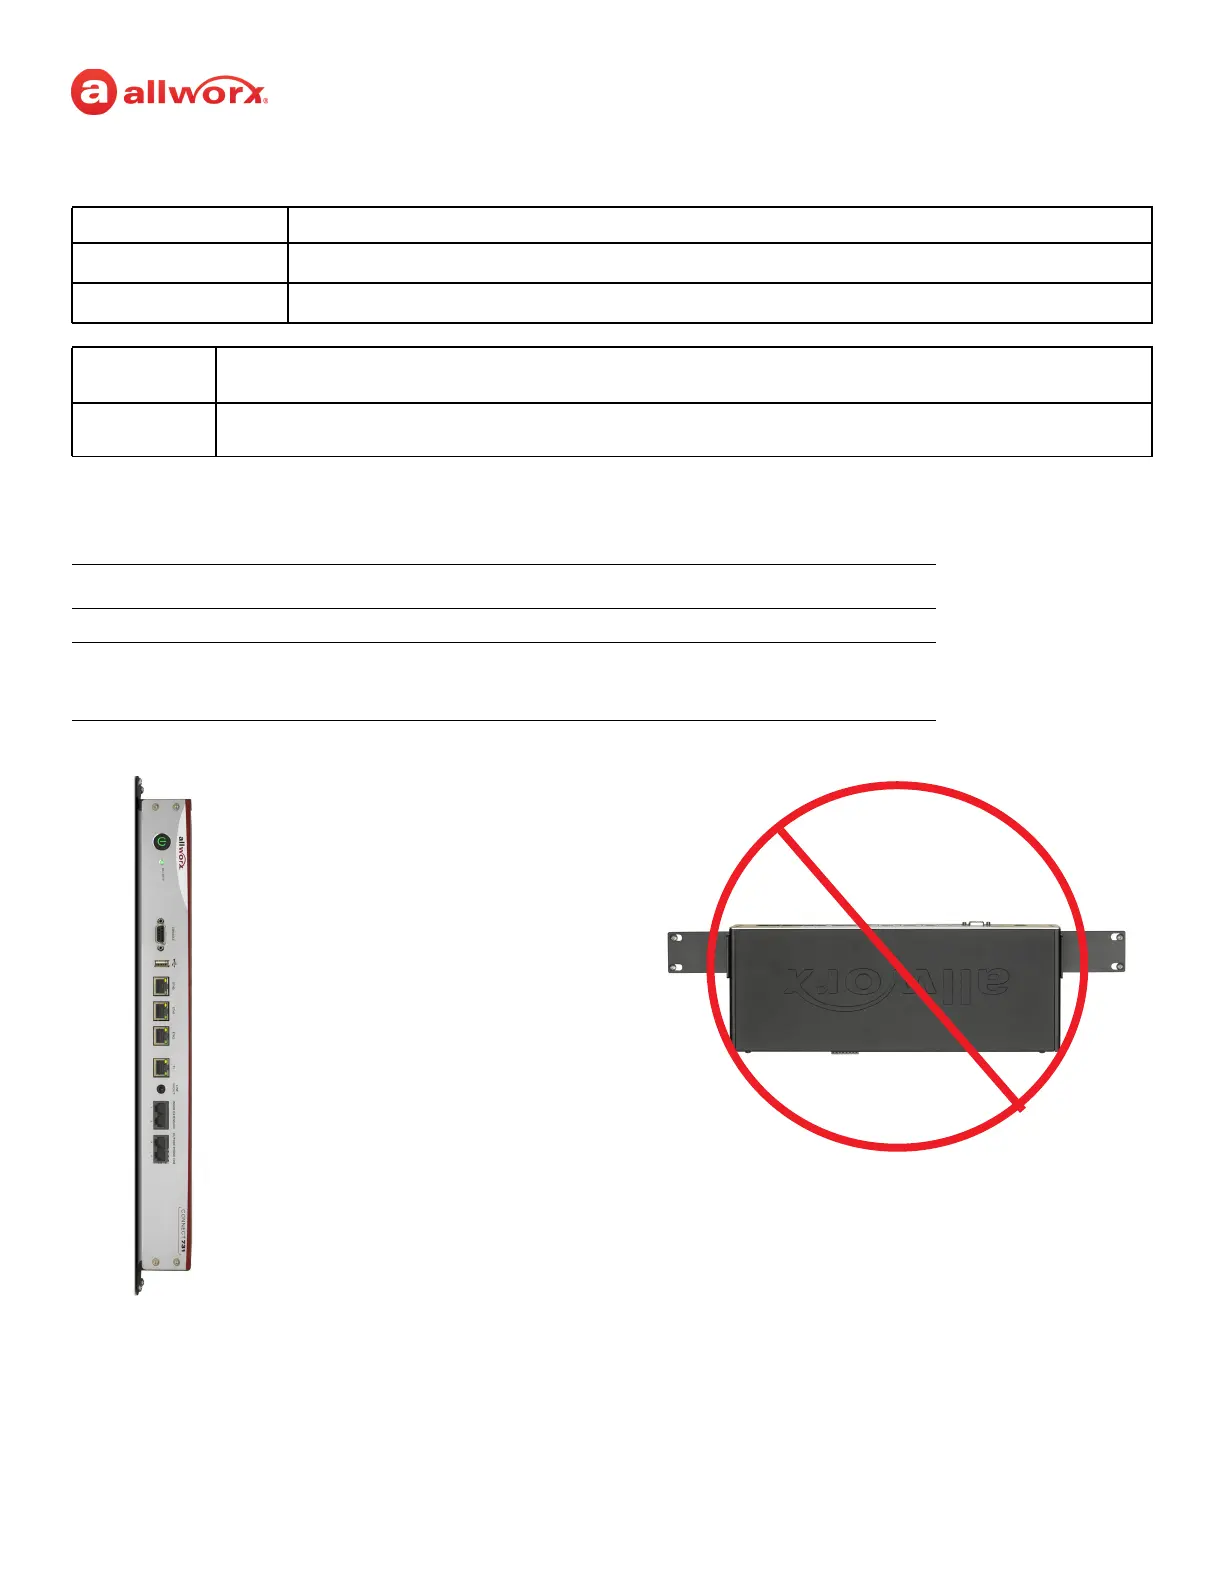
Verify the correct orientation prior to mounting the Connect server to the wall.
To mount the Connect server to a wall:
1. Verify the clearance around the Connect server front and rear panels to accommodate the
power, network, and telephony connections.
Caution:
Securely mount the Connect server to the wall to avoid equipment damage or personal injury.
MISE EN GARDE :
Installez solidement le serveur Connect au mur, de façon à éviter dommages matériels et blessures.
PRECAUCIÓN:
Monte el servidor Connect de manera segura en la pared para evitar daños al equipo o lesiones personales.
Note:
For Connect 731 Wall Mount only: Discard the power cord and only use a UL listed power cord of type SJ or SO or
better.
Note:
Mount the Connect server with the front facing left or right, not up or down
Equipment Qty Requirements
Rack
1
1U high rack mount standard 19” rack
Rack Mount Kit
1
Includes:
• Two rack ears
• Eight 6-32 flat head screws
Required
wall mount
orientation