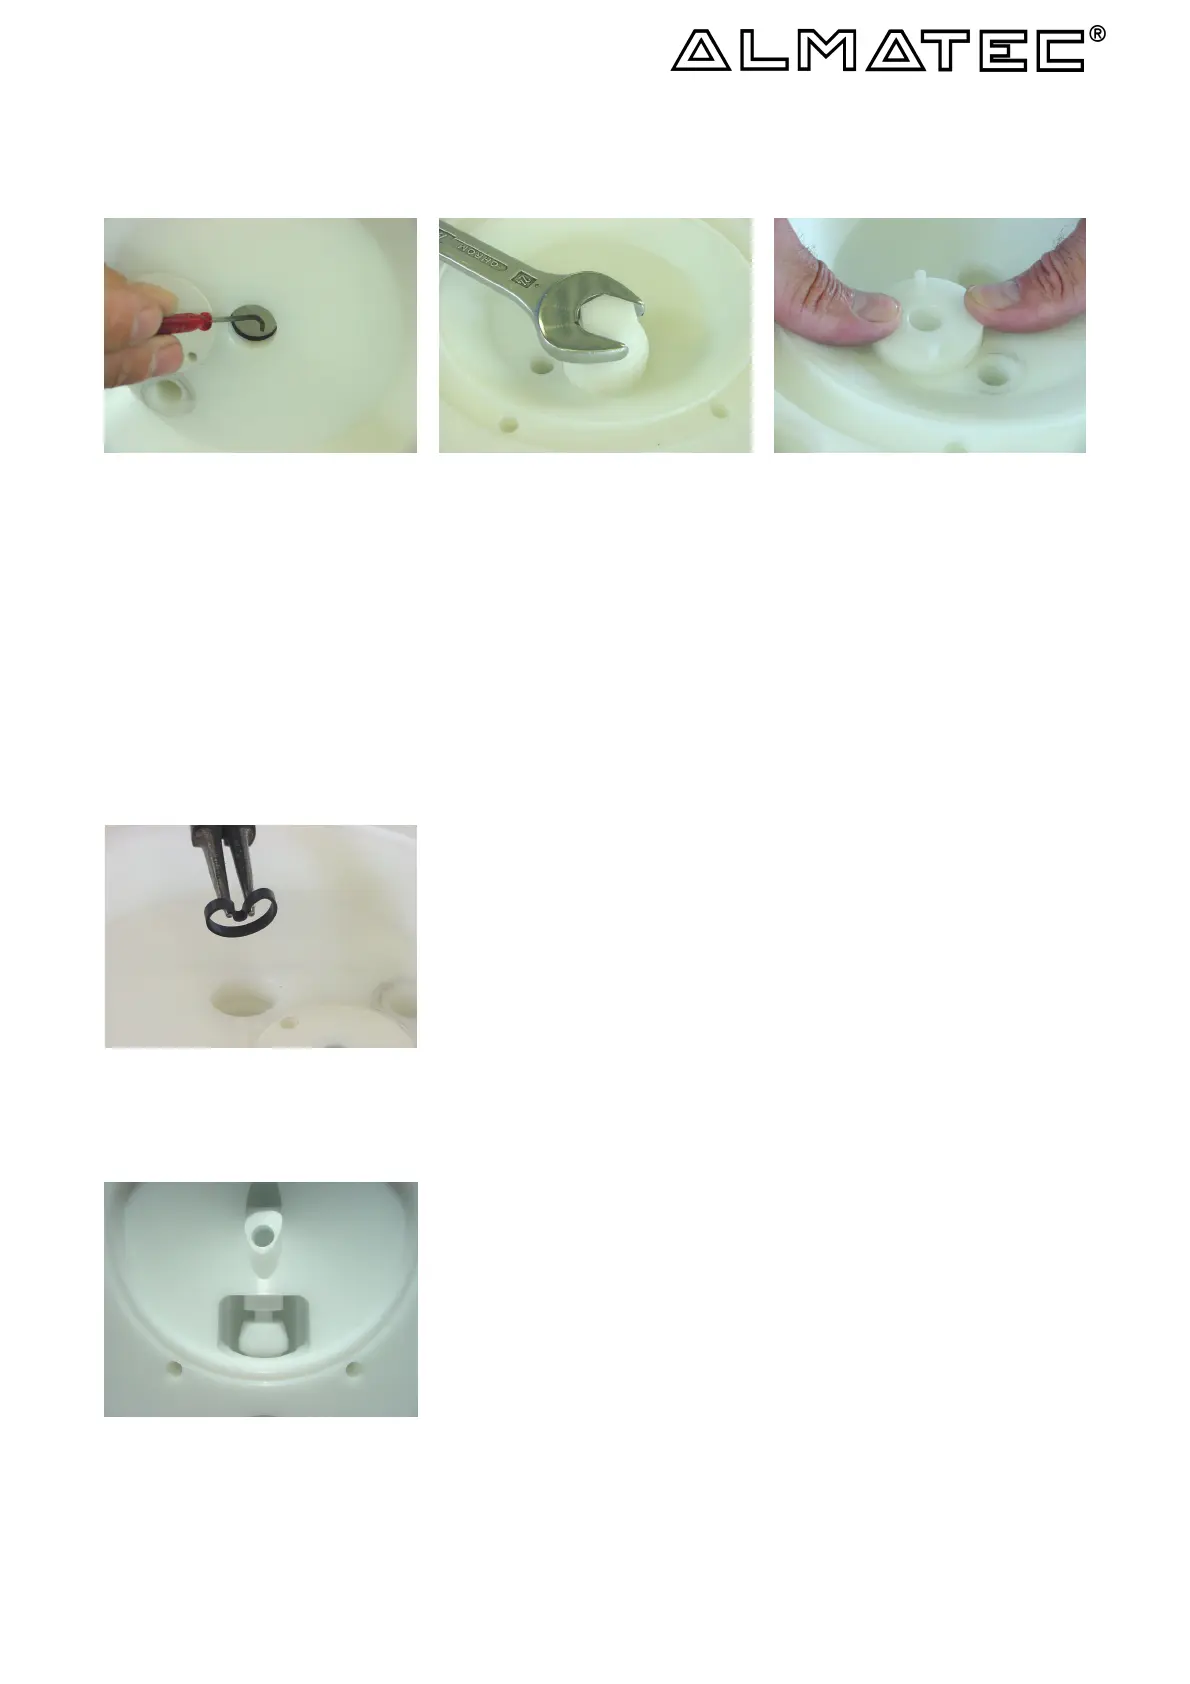
muffler [21], the air inlet [19] and the air filter [20] out of the center housing [2]. To remove the PERSWING P
®
air control system, screw off both end caps using the plastic mounting tool delivered with the pump (figure 7.2).
Take out main and pilot piston. Push out the air valve housing with the mounting tool turned around (figure
7.3).
figure 7.1
figure 7.2
figure 7.3
Assembly
The re-assembly of the components is principally carried out vice-versa to the dismantling. Here are some
additional references.
For the installation of the PERSWING P
®
air control system, first screw in one end cap flushly into the center
housing [2]. Insert one of the six O-rings air-valve housing [24] into the end cap from the inside. Moisture the
four O-rings [24] of the air-valve housing with a bit of water and push the housing into the center housing [2]
using the mounting tool. Take care that it slips in softly. Do never insert the housing violently with a hammer. In
case the housing cocks or hardly gets in, take it out again completely and start again. Insert the main piston
and the pilot piston. Lay the sixth O-ring [24] on the edge of the air valve housing and screw in the second end
cap.
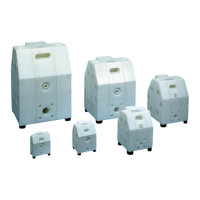
To assemble new piston rings [18], carefully shape them like kidneys
with locking ring pliers and insert the rings into the grooves in the center
housing [2] (figure 7.4); completely press the rings into the grooves
smoothly using some round tool.
figure 7.4
Screw the set screws [17] into the diaphragms and tighten them. Fix the
diaphragms [14] completely into the shaft [16] with the set screws [17].
Adjust the bores in the center housing [2] to the diaphragm on both
sides (turn slightly backwards if necessary). The sealing surfaces of the
diaphragms and the side housings [1] have to be absolutely clean and
undamaged; mere small scratches can cause leaking (if necessary,
smoothen the housing surfaces carefully with fine sandpaper).
Cautiously push the O-rings, sleeve [11] into the side housings [1] and
the center housing [2] (avoid bending the rings by all means! If
necessary, moisture and softly twist the rings). When building in cylinder
valves, take care that these valves [9] are set into the valve stops [4,6]
with the pin on their top (figure 7.5). Shove one diaphragm [14] into the
center housing [2], lay the side housing [1] onto the diaphragm and fix
its position with housing bolts [15]. After that, shove the other diaphragm
[14] into the center housing [2] and carefully push the housing bolts [15]
completely through the center housing [2] [slightly turning the bolts helps
them to find their way]. Take care, that the diaphragms [14] are not
damaged. Adjust the second side housing [1]. Fix the housing bolts
[15] crosswise evenly according to the given torque values until the side
housings [1] are situated on the center housing [2]. Any further
tightening of the bolts does not improve sealing but can deform the
housing! Before putting the pump back into operation, the tightness of
the pump has to be checked.
figure 7.5
7