READ BEFORE PROCEEDING!
TO AVOID SERIOUS DAMAGE NOT COVERED UNDER
WARRANTY READ THIS MANUAL CAREFULLY BEFORE
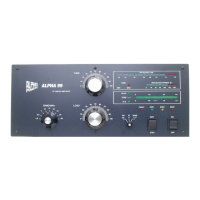
INSTALLING YOUR ALPHA 89
The ALPHA 89 is easy to install, but failure to carry out each procedure exactly as described in this manual is likely to
lead to amplifier damage which is not covered under warranty. Damage to other station equipment also may result.
Important precautions are given on this and the next page.
INSTALLING YOUR ALPHA 89
1. Be careful not to twist or warp the chassis when handling the amplifier with its cover removed. Never lift the chassis
by one comer when the transformer is in place.
2. When installing or removing the transformer, move carefully and follow the instructions in this manual exactly. When
installing, insure that all connectors are properly mated and fully seated. Don't force them! Tuck the transformer handle out
of the way so it doesn't interfere with the cover. It is necessary to install at least one of the transformer bolts to eliminate
potentially hazardous voltage buildup between the transformer and chassis.
When removing the transformer, carefully unlock the mated connectors and gently pull them apart.
3. Insure that both tubes are solidly seated in their sockets with the red silicone rubber chimneys firmly seated against
the chassis.
4. Connect the green conductor in the ALPHA 89 power cord only to the power source neutral or ground. Connecting
the green wire to a "hot" line is almost certain to cause immediate damage. Triple check your wiring before plugging
in!
5. Make sure the primary power tap is connected to the tap closest to your actual AC line voltage. See manual section 4.3.
6. Never install cover screws longer than 1/4". Longer screws may penetrate internal boards or wiring and cause severe
damage. Make sure each screw hole in the cover is aligned with its corresponding captive nut in the chassis before inserting
screws.
7. Remove blower motor shipping hardware from rear chassis wall. Save the two 10-32 bolts, fiber washers, and rubber
shim; reinstall this hardware whenever the chassis is transported.
8. Solidly bond all station equipment together. Heavy braid, such as the outer conductor of RG-8/U coaxial cable, is
recommended for the purpose. This is important for personal and equipment safety as well as to avoid RF feedback.
9. DON'T apply AC power with the cover off without contacting ETO customer service first. You may damage both
you and your amplifier!
101193