0170009-J0 Rev B
22
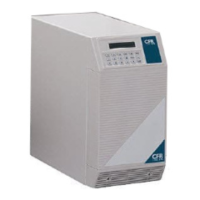
5. Press and hold the UPS ON switch for approximately 3 seconds until the buzzer sounds twice.
6. Screen C appears and the device automatically runs a self-test sequence.
7. Start up of the UPS is complete when the Input Voltage screen (E) appears. If the self-test fails, the
LCD screen appears as shown in screen D. An error code or error status shows on the screen.
8. The charger starts charging the batteries
9. Leave the UPS plugged into the wall receptacle for at least 4 hours to allow the UPS batteries to
charge fully.
5.2 Start Up from the LCD Panel
5.2.1 Start Up In Normal Mode
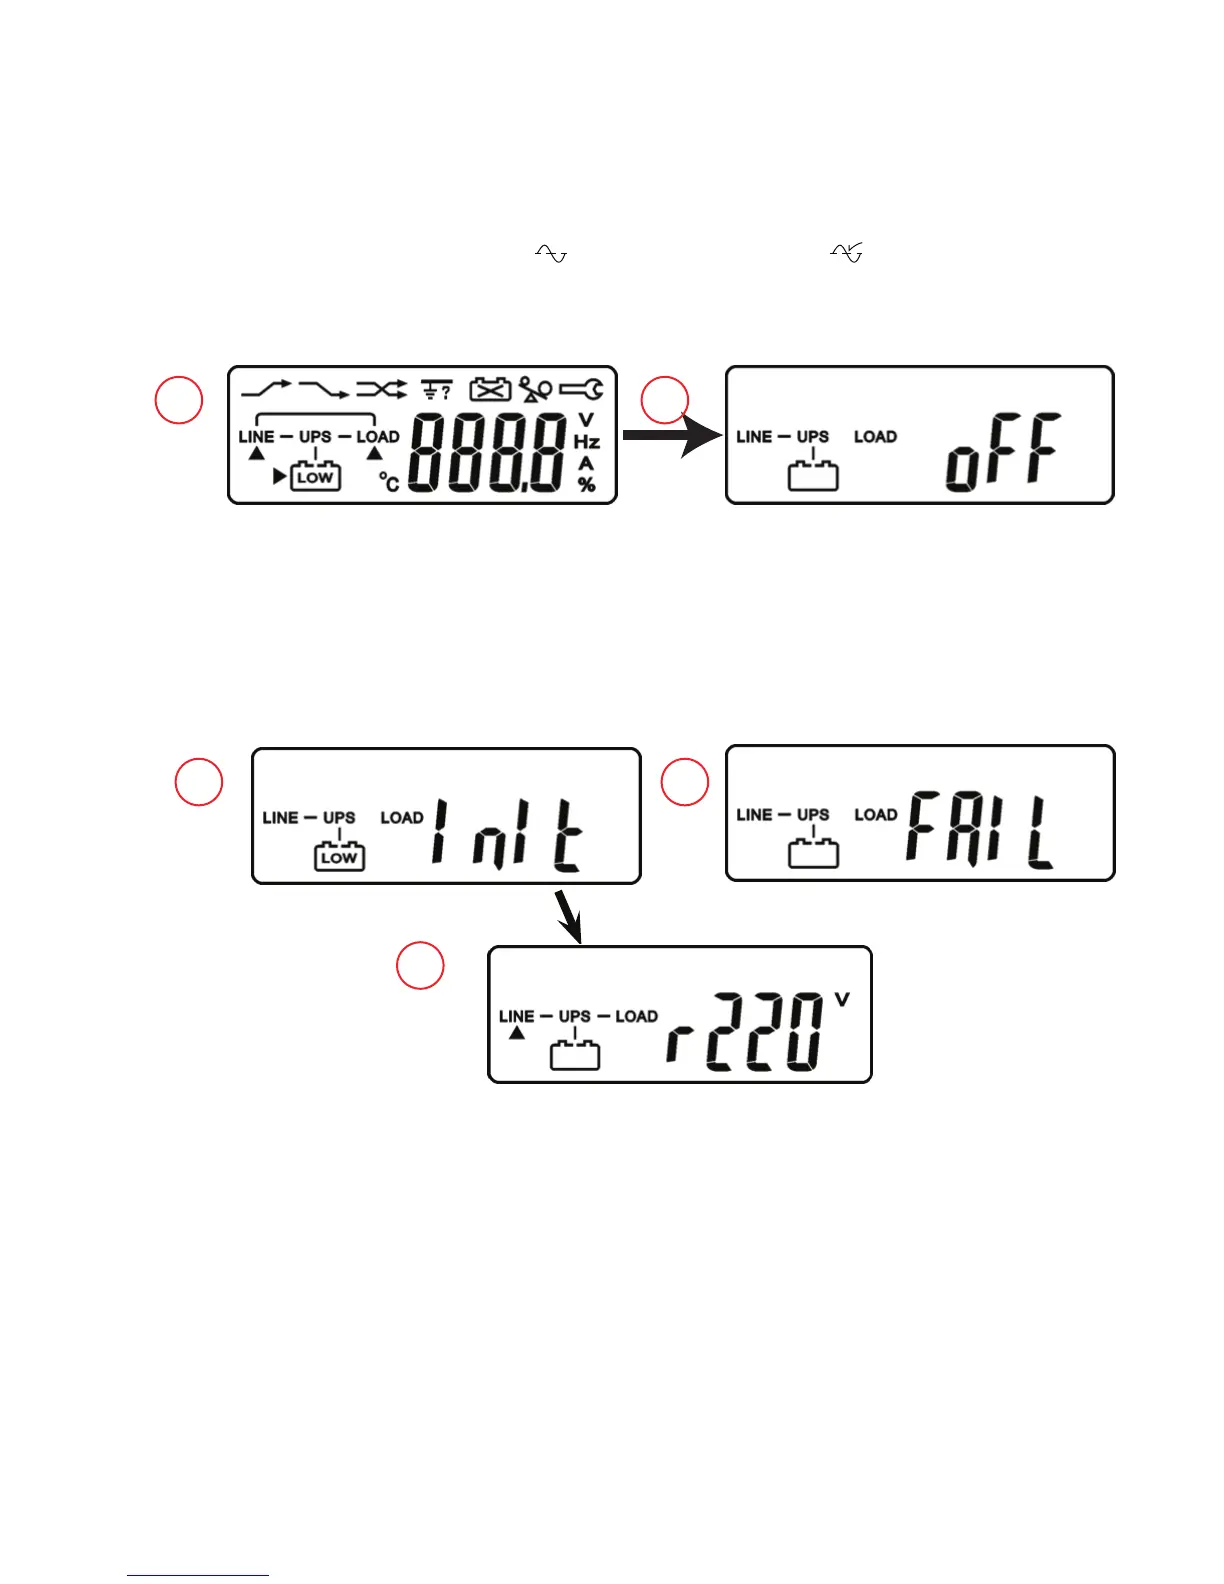
1. Make sure the utility voltage is within the UPS voltage limits.
2. Connect the UPS to the utility wall receptacle.
3. Illumination of the green Utility LED
and the amber Bypass LED indicate that utility and
bypass are normal.
4. The LCD screen changes from A to B as shown
A B
C
D
E
Input Voltage