Nexto Logger
Nexto Series
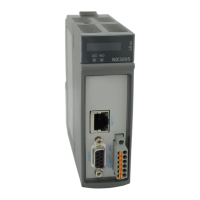
NL717
CE117100 Rev. B
7. Configuration and Usage
The configuration of the Nexto Logger NL717 in a LoRaWAN network is performed through an application for CPUs
developed in the MasterTool IEC XE software in conjunction with the LoRa "NextoLora" library. Will be described in this
topic the entire routine of creating an application and configuring the NL717 in a LoRa network, from registering the activation
keys to using the library to send and receive data through the LoRaWAN network.
Registering a device in a LoRaWAN network requires prior configuration of the device on the server where it will be
registered. This configuration will contain the radio frequency parameters that must be applied as well as the server access
keys. During the creation of a new device (called end node) in the server, several configurations should be noted for later use
when configuring Nexto Logger in the LoRaWAN network.
Among these configurations are:
Frequency Plan (or Regional Band): This parameter defines the frequency plan that the device will operate on. The
setting of this parameter must be in absolute parity between all elements that involve the LoRaWAN network, such as
the server, Gateway and End Device. (e.g. AU915).
Frequency sub-bands (or FSBs): Some frequency plans also offer the configuration of communication sub-bands. As
with frequency plans, sub-bands must be configured accordingly on all network elements (e.g. FSB1).
Adaptive Data Rate (ADR): Defines the optimization of the choice of radio parameters in the device. When enabled,
it allows the server to choose the parameters optimally (e.g. TRUE).
Unique Device Identifier (or Device EUI): Unique identifier of an End node, can be generated by the server or provided
by the device itself. This identifier is a 64-bit key, usually expressed in 8 hex bytes (e.g. [01 02 03 04 05 06 07 08]).
Class: Defines the mode in which the end node will communicate over the LoRaWAN network. This parameter should
be chosen according to the needs of energy use. Class A devices use less energy with some penalties in communication
availability. Class C devices are always available on the network, but use more energy
Activation Modes: Defines the mode in which the end device will be registered to the server. There are two ways
of doing the device validation procedure on the server. The first, called Over the air activation (OTAA), activates the
device via radio communication. During this process, the device communicates with the server using two identification
keys for the server and the application, and then the security and encryption keys are exchanged between the server and
the device in a secure manner. This activation process is called JOIN and ensures that the encryption keys are hidden,
maintaining the security of the network and the secrecy of the communication content.
The two keys required for the JOIN by OTAA process are:
1. Unique application identifier (APP EUI): 8 byte key. (e.g. [01 02 03 04 05 06 07 08]).
2. Application Key (APP Key): 16 byte key (e.g. [01 02 03 04 05 06 07 08 09 0A 0B 0C 0D 0E 0F 10]).
The second activation mode is called Activation By Personalization (ABP), in this activation mode the security keys
are generated by the server and loaded manually on the end device. Since these keys are responsible for encrypting
the content of the communication, this activation mode is highly insecure and should not be used in applications that
demand high reliability. This activation mode does not perform the JOIN process, since the keys will be written directly
to the device. Altogether there are two security keys and one device address.
1. Application session key (APP Session KEY): 16 byte key.
2. Network session key (NWK Session KEY): 16 byte key.
3. Device Address (Dev ADDR): 4 byte key (e.g. [01 02 03 04]).
Once you have the access keys and the other activation configuration parameters for the device, you can start the device on
the network without difficulty. The first step is to open the MasterTool IEC XE development software and create a new project.
The procedure for creating a new project can be seen in the following figures.
When opening MasterTool IEC XE access the menu "File" and then "New Project..." as illustrated in the figure below.
14
 Loading...