LP9 Suspended Installation Guide LP9 Suspended Installation Guide 7 of 11 102-000026 - IG090320-A.0
Installation: Standard Suspension
(Cont.)
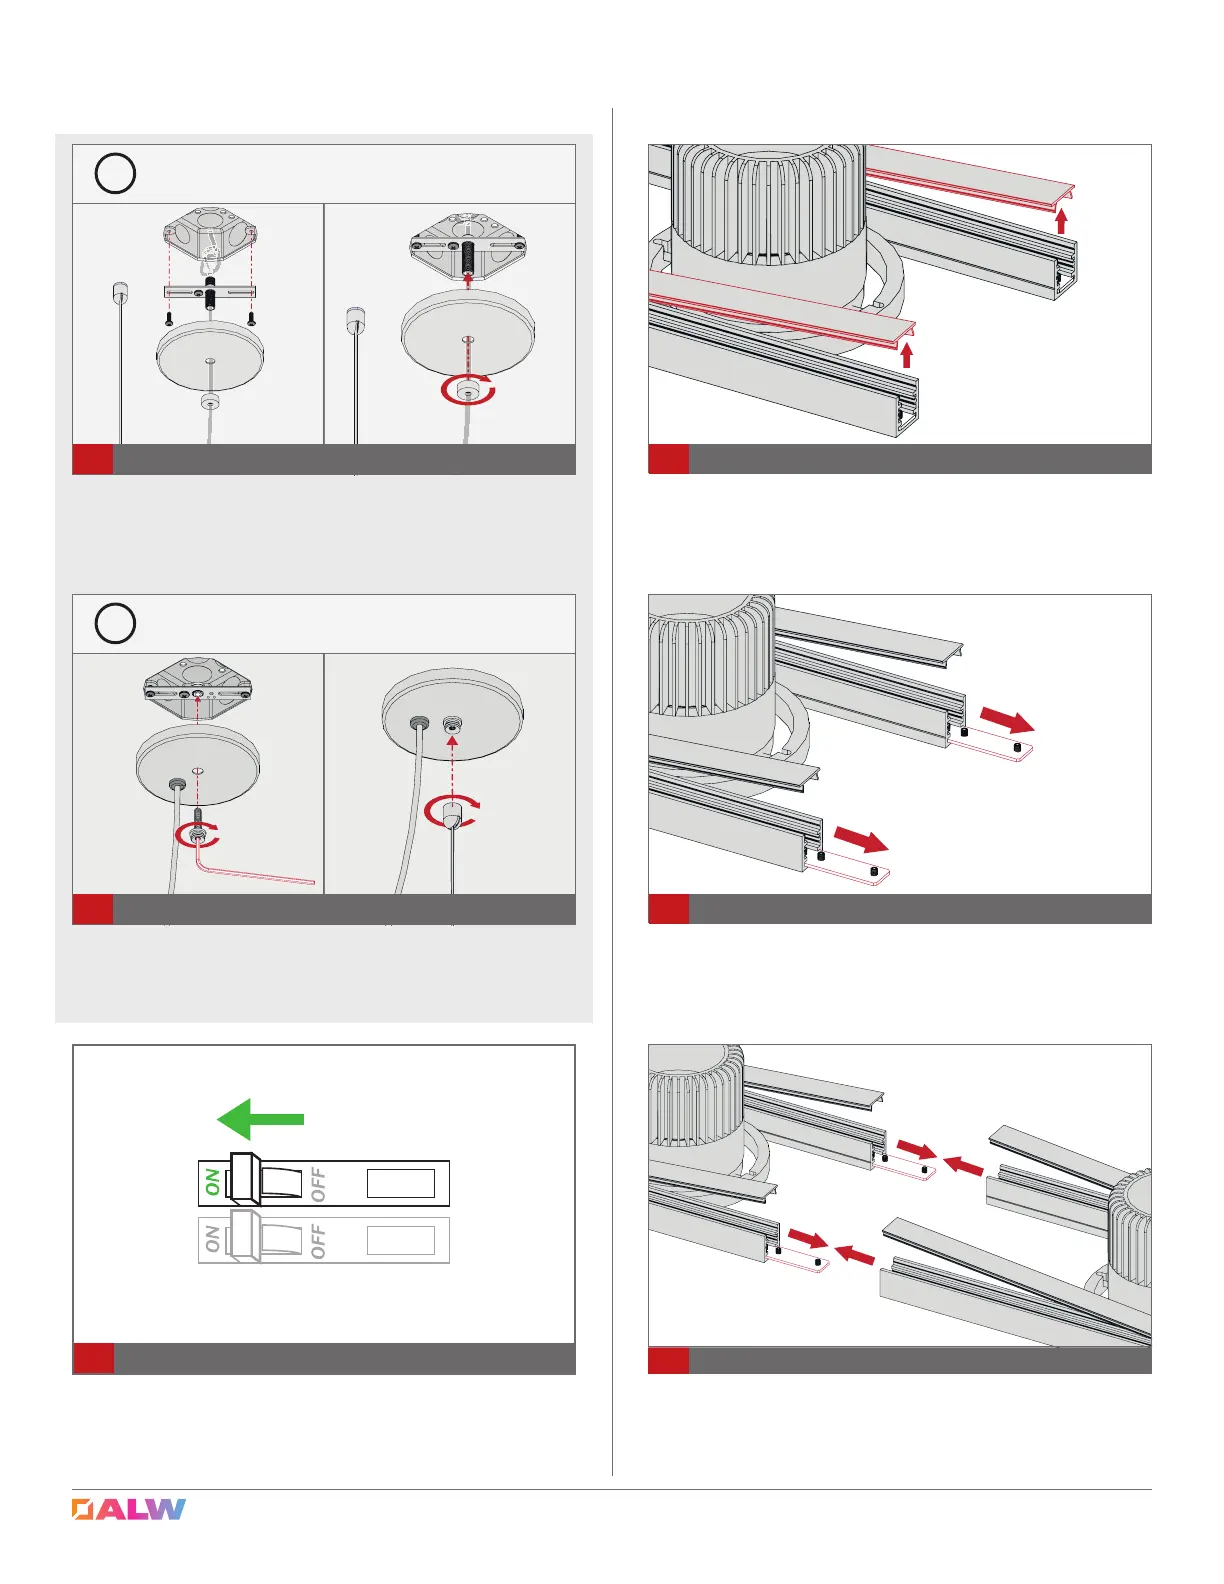
Turn breaker ON and check if xture operates as
intended and that there are no loose connections.
11
Turn Power On
Installation: Connecting Multiple
Sections
Carefully remove metal cover to expose joiner sections.
12
Remove Cover
Mount Canopy Bracket to J-Box using appropriate
mounting hardware, then secure Canopy over J-Box with
Ceiling Fitting using 1/8” Allen Key. Attach bullet (with ca-
ble) to canopy. CAUTION: Do not pinch wire connections.
10B
Combo Canopy Installation
!
DO NOT PINCH OR PUT EXCESSIVE TENSION ON WIRES while
installing canopy.
Mount Canopy Bracket to J-Box using appropriate
mounting hardware, then secure Canopy over J-Box with
nial. CAUTION: Do not pinch wire connections.
10A
Mount Canopy Bracket to J-Box & Secure Canopy
!
DO NOT PINCH OR PUT EXCESSIVE TENSION ON WIRES while
installing canopy.
Loosen set screws on Joining Bar and extend, as shown.
13
Extend Joining Bar
Loosen set screws and slide out joiner bracket halfway
to allow for joining. Join sections together, as shown,
ensuring correct alignment. See nal/record drawing for
more details. CAUTION: Do not pinch wires while joining!
14
Align and Join Sections Together