4
1
2
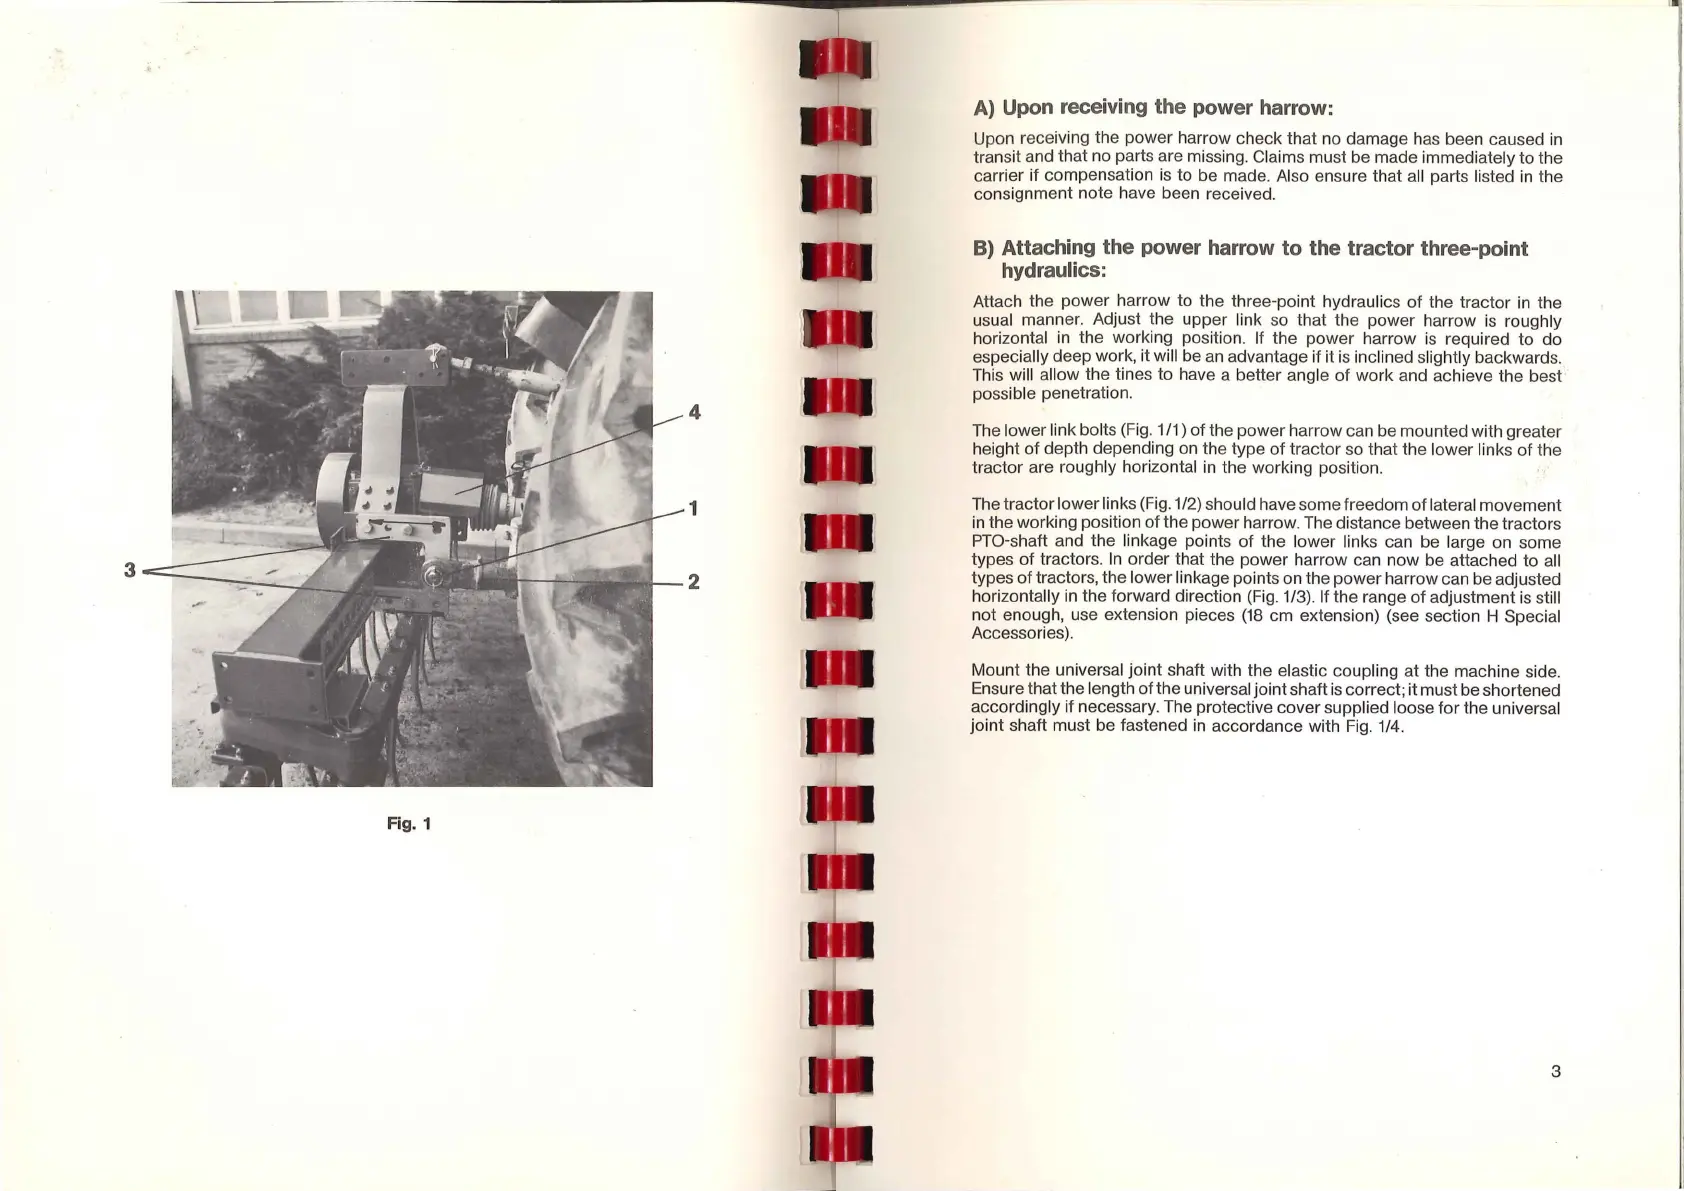
Fig. 1
A}
Upon receiving the power harrow:
Upon receiving the power harrow check that no damage
has
been caused
in
transit and that no parts are missing. Claims must be made immediately to the
carrier if compensation
is
to be made. Also ensure that all parts listed
in
the
consignment note have been received.
B}
Attaching the power harrow
to
the tractor three-point
hydraulics:
Attach the power harrow to the three-point hydraulics
of
the tractor
in
the
usual manner. Adjust the upper link
so
that the power harrow
is
roughly
horizontal
in
the working position. If the power harrow
is
required to do
especially deep work, it will
be
an
advantage if it
is
inclined slightly backwards.,
This will allow the tines to have a better angle of work and achieve the best
possible penetration.
The lower link bolts
(Fig.
1 /1)
of
the power harrow can be mounted with greater
height
of
depth depending
on
the type
of
tractor
so
that the lower links
of
the
tractor are roughly horizontal
in
the working position.
The tractor lower links
(Fig.
1/2) should have some freedom
of
lateral movement
in
the working position of the power harrow. The distance between the tractors
PTO-shaft and the linkage points
of
the lower links can
be
large on some
types
of
tractors.
In
order that the power harrow can now be attached to all
types
of
tractors, the lower linkage points on the power harrow can be adjusted
horizontally
in
the forward direction
(Fig
. 1/3). If the range
of
adjustment
is
still
not enough, use extension pieces
(18
cm extension) (see section H Special
Accessories).
Mount the universal joint shaft with the elastic coupling at the machine side.
Ensure that the length of the universal joint shaft
is
correct; it must be shortened
accordingly if necessary. The protective cover supplied loose for the universal
joint shaft must be fastened
in
accordance with
Fig.
1/4.
3