Version 1.1 ©Copyright 2022, Ambient LLC. All Rights Reserved. Page 3
shown in Figure 2, reference 10.
The ObserverIP2.0 can connect to your network via Wi-Fi (Section 2.4) or directly connected to your
router using the included Ethernet cable (Section 2.5), as shown in Figure 2, reference 8.
Place the powered sensors (including sensor array, indoor thermo-hygro-barometer) about 5 to 10 feet
from the OBSERVERIP2.0 receiver and wait several minutes for the remote sensors to synchronize
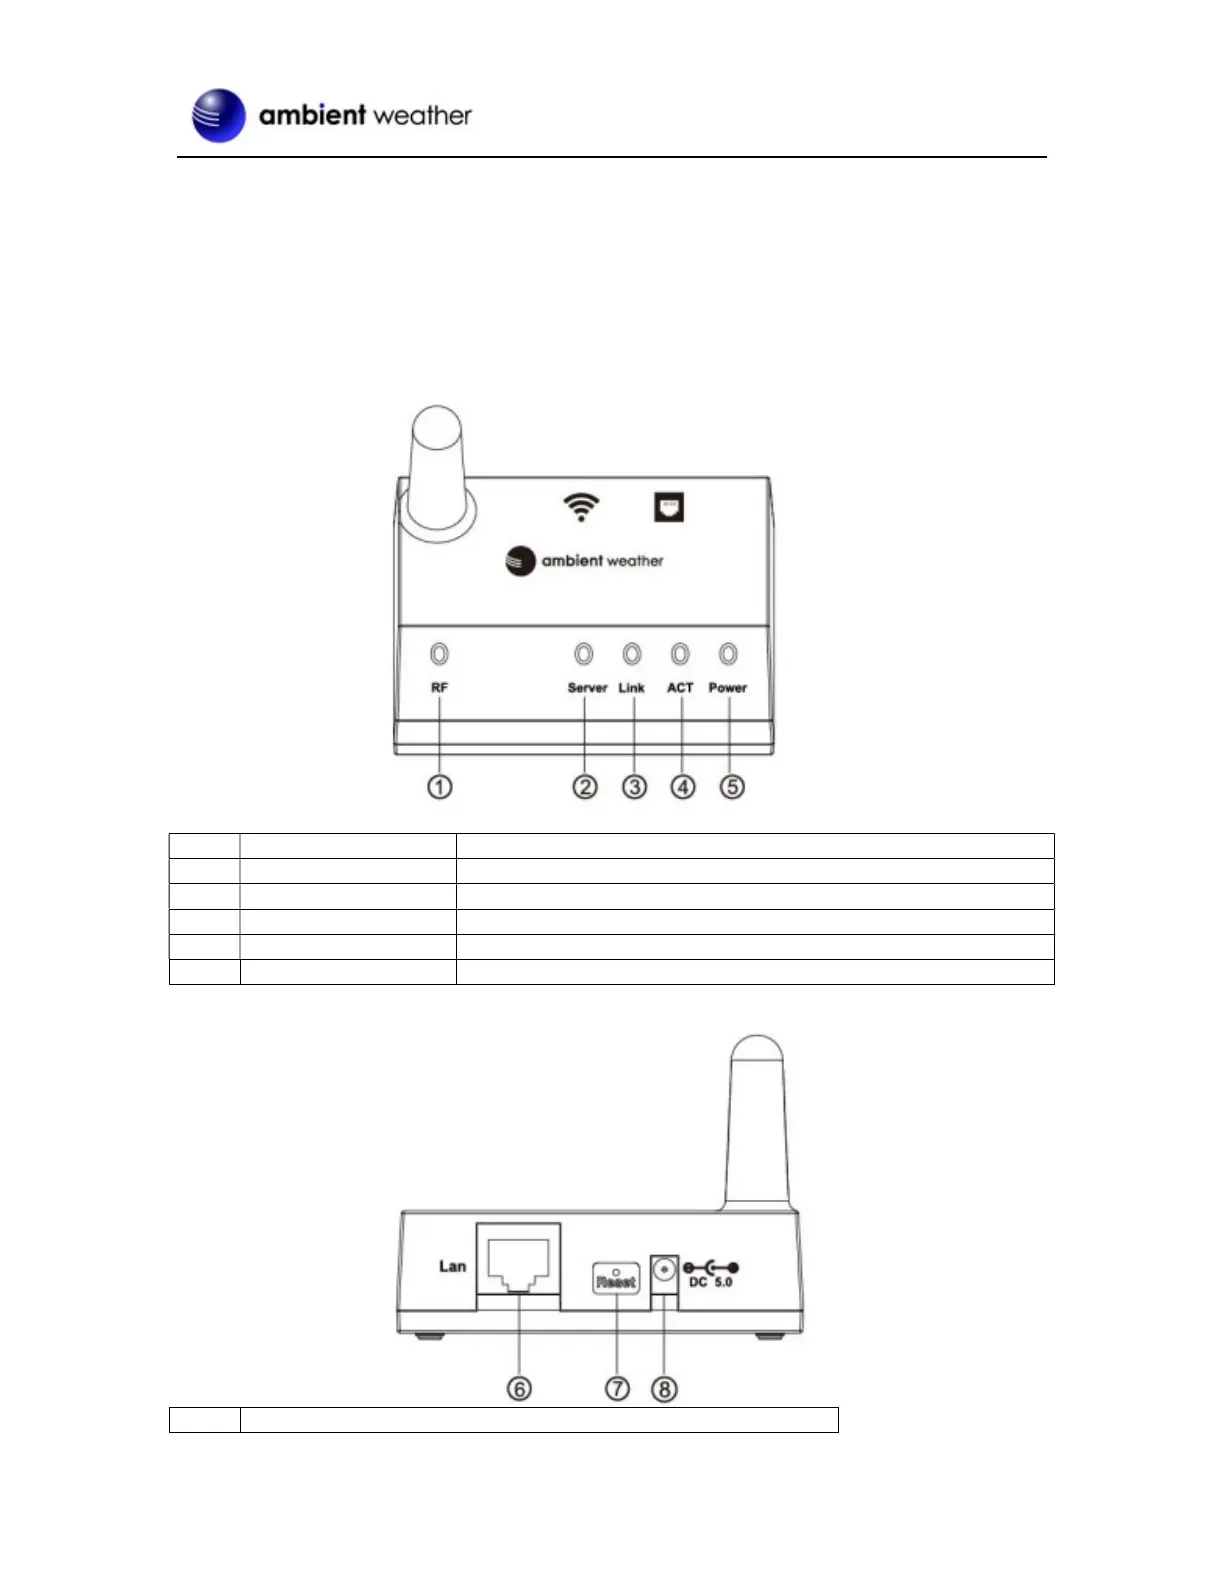
with the receiver. Once synchronized, the Indoor blue LED (Figure 1, reference 2) and Outdoor blue
LED (Figure 1, reference 3) will be illuminated. *Adding additional sensors can be found later in
Section 2.10
Ref. LED Description
On when radio frequency receiver is operating properly
On when connected to AmbientWeather.net internet hosting service
Connect to the internet (or router)
Flashes when there is internet activity
Figure 1
Ref. Description
 Loading...