Do you have a question about the American Standard COMPACT CADET 3 and is the answer not in the manual?
Installation instructions for American Standard Compact Cadet 3 toilet model 2403.
Important safety warning regarding handling the toilet to prevent breakage or injury.
Instructions for properly seating the toilet bowl onto the wax ring and flange.
How to adjust the water level in the tank using the float cup mechanism.
Steps to adjust the lift chain for proper bowl siphoning action.
Specific procedure for setting the correct water level in the tank.
Guide to identify and resolve common toilet flushing and leaking problems.
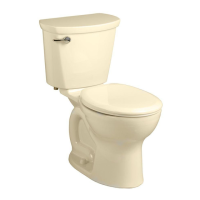
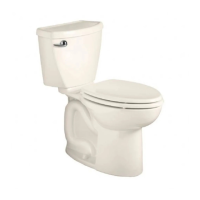
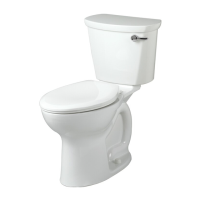
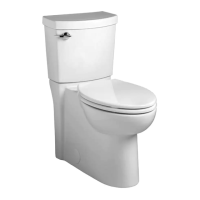
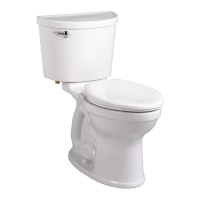
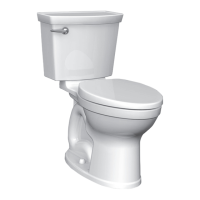
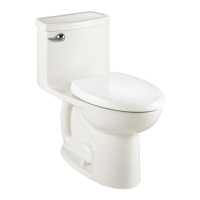
This document provides installation, adjustment, and maintenance instructions for the American Standard Compact Cadet® 3 One-Piece Toilet, Model 2403, which features a compact elongated Right Height™ design with a seat.
The American Standard Compact Cadet® 3 One-Piece Toilet is designed for efficient waste removal and water conservation. It integrates the tank and bowl into a single unit, offering a sleek and easy-to-clean design. The toilet utilizes a flush valve assembly to control water flow from the tank to the bowl, initiating the siphoning action for waste removal. A Fluidmaster water control system manages the water refill process, ensuring the tank is refilled to the appropriate level after each flush. The "Right Height" feature refers to a comfortable bowl height, making it easier for users to sit down and stand up. The compact elongated bowl provides added comfort while maintaining a smaller footprint suitable for various bathroom sizes.
The toilet is operated by a trip lever that activates the flush mechanism. When the lever is pressed, the flapper assembly lifts, allowing water to flow from the tank into the bowl, initiating the flush. The Fluidmaster water control system then automatically refills the tank to a preset level, ready for the next use. The design emphasizes ease of use and reliable performance.
The installation process begins with removing the old toilet. This involves closing the water supply, flushing the tank, disconnecting the supply line, removing old mounting hardware, and cleaning the base area. The mounting surface must be clean and level for proper installation of the new toilet.
Next, closet bolts are installed in the flange channel, spaced 6 inches (152 mm) apart and parallel to the wall. A wax ring is then installed evenly around the waste flange on the inverted toilet, with the tapered end facing the toilet. A thin bead of sealant is also applied around the toilet base for a secure seal.
The toilet is then positioned on the closet flange, ensuring the bolts project through the mounting holes. Retainer washers and nuts are loosely installed, with the "THIS SIDE UP" mark on the washers facing up. The toilet is positioned squarely to the wall and pressed down firmly onto the wax ring and flange with a rocking motion. The nuts are alternately tightened until the toilet is firmly seated on the floor, taking care not to overtighten to avoid damaging the base. Bolt caps are then installed over the washers, and any excess sealant around the base is smoothed off.
Finally, the toilet seat is installed according to the manufacturer's directions. The water supply connection is made, ensuring the correct assembly parts are used based on the type of water supply tubing (metal/copper flared, metal flanged, metal spiral, or vinyl/braided connector). The coupling nut is tightened 1/4 turn beyond hand tight, again with a caution against overtightening to prevent breakage and potential flooding.
After installation, water level adjustments may be necessary. The water level in the tank should be adjusted to the level indicated on the tank by manipulating the float cup. This is done by turning the WATER LEVEL ADJUSTMENT ROD and moving the FLOAT CUP up or down after submerging the float cup for 30 seconds with the water supply on.
If the bowl fails to siphon correctly, the lift chain may need adjustment. This involves removing the bead chain from the retainment clip, taking up any slack, and reinserting it on the lift rod, ensuring the chain is not too taut.
Regular maintenance is crucial for the longevity and performance of the toilet.
For cleaning the toilet, mild, soapy water is recommended. After washing, the toilet should be thoroughly rinsed with clear water and dried with a soft cloth. It is important to avoid abrasive scouring powders, abrasive pads, detergents, disinfectants, or aerosol cleaning products, as these can damage the toilet seat's finish.
The manual provides a comprehensive troubleshooting guide for common issues such as the toilet not flushing, poor or sluggish flush, toilet leaks, and the toilet not shutting off. Each problem is accompanied by possible causes and corrective actions.
For issues like the toilet not flushing, corrective actions include opening the water supply valve, inspecting the supply line for blockages, readjusting the flush valve chain, or cleaning sand or debris from the water control. If the flush is poor or sluggish, users should check the bowl water level, ensure the supply valve is fully open, clear any clogs in the trapway or drain pipe, or verify adequate supply pressure.
Leaks are addressed by reviewing the installation procedures for the supply line connection and the bowl-to-tank/floor connection. If the toilet does not shut off, the flush valve chain may be too tight, the flapper or flush valve seat may be worn, or sand/debris may be lodged in the water control, requiring adjustment, replacement, or cleaning.
The Fluidmaster water control system also has specific maintenance procedures. If the fill valve leaks slowly or turns on and off during periods of non-use, it may indicate a problem with the refill tube or a leaking flush valve. If the fill valve doesn't turn on or refills slowly, a Fluidmaster Model 242 Replacement Seal might be needed. The manual details how to clear sand and rust from the system by removing the valve top, turning the water supply on and off a few times, and then replacing the valve top.
A repair parts list is included, detailing components such as the tank cover, seat and cover, bolt cap kit, trip lever, water control assembly, flush valve assembly, and flapper assembly, along with their respective part numbers and quantities. This allows for easy identification and ordering of replacement parts.
The product comes with a five-year limited warranty from American Standard, covering defects in materials or workmanship. The warranty specifies conditions under which it remains valid, such as proper installation and maintenance, and excludes damages from faulty maintenance, abuse, misuse, accidents, or modifications inconsistent with the product as shipped. It also clarifies that the warranty does not cover labor or other costs of removal or installation, nor incidental or consequential damages. Contact information for service under warranty is provided for residents in the United States, Canada, and Mexico.
| Type | Two-Piece |
|---|---|
| Water Consumption | 1.28 GPF |
| Material | Vitreous China |
| Bowl Shape | Elongated |
| Flush Volume (GPF) | 1.28 |
| Color | White |
| Rough-In Size | 12 inches |
| Flush Type | Gravity |
| Seat Height | 16.5 inches |
| Trapway Size | 2 inches |
| Warranty | Limited Lifetime |