Page 10 <&(%$*4.8"4,7%H'*#$"&8#I%/7*,#*%4,77%JKLLLKLMMKNOPO1 Item 64017
?@<6AQ RS6;@ACRE D@CEA6E@ET6?6AFS
D*,#'(*5*8$%R/*(,$"&8
E&$*- Remove plugs from
ends of Test Leads (included)
before connecting to Meter�
E&$*- Test Lead probes have removable
covers for overvoltage protection� With
covers in place, Test Leads are rated for
use with CAT IV circuits� Exposed probes
are rated for use with CAT II circuits�
T'((*8$%D*,#'(*5*8$
U@;ECEV` To avoid electric shock,
use only one hand to hold Meter
when measuring current�
U@;ECEV` Remove test leads
before taking measurements
with the Current Clamp�
E&$*- Amperage is always tested
in series with circuit under test�
E&$*- To measure 2- and 3-wire power
cords, use an AC Line Splitter (not included)
and follow its instructions�
E&$*- When using manual range
mode, always start with the highest
range if the amperage is unknown�
E&$*- Center conductor between
guides in Clamp jaws, as shown�
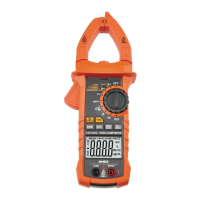
@T0XT%T'((*8$
Measure AC and DC conductors
carrying up to 1000 amperes�
1� Turn the Rotary Switch to the
Mc0Mcc or Jccc position,
depending on the amperage of
the conductor under test�
2� Always start with the highest range
if the amperage is unknown�
3� Using one hand, press Trigger to
open Current Clamp� Position Clamp
jaws around conductor to be tested�
E&$*- When measuring DC current,
ensure that current flows in the direction
indicated by the Positive (+) and Negative
(-) Symbols on the Current Clamp�
4� Read measurement� Switch to
lower ranges, as necessary, to
get the most accurate reading�
5� When testing is complete, turn
Rotary Switch to R<<I%and store Meter�
E&$*- If the Display shows RG while in
manual range mode, the measurement
has exceeded the selected range� A
higher range should be selected�