16308-101 Rev. A • 14
Instructions for Use (continued)
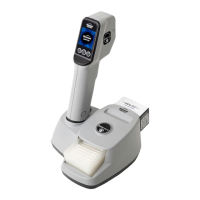
Measurement Screen
ActiView Positioning System Area: The full-color area on screen where
the eye is aligned to the device.
Battery Indicator: The battery icon indicates the battery level.
Species: The species selected. Options are Dog, Cat, Horse, or Rabbit.
Alignment Target: The alignment area, consisting of a circular center
target and level indicators.
Probe Angle Indicator: Two colored marks (green or yellow) appear on
each side of the Alignment Target, indicating the probe angle of the device.
Number of Measurements: The dots indicate the measurements required
and completed (1 or 3+). An empty white dot indicates a required
measurement. A solid yellow dot indicates an unreliable measurement. A
solid blue dot indicates a completed, reliable measurement.
Measure Mode: If AUTO is illuminated, device will automatically measure
when properly aligned. If AUTO is grayed out (ActiView Manual Measure
or Manual Measure modes), then the Manual Measure Button must be
pressed to take a measurement. Pressing and holding the blue Manual
Measure Button will take continuous measurements.
OD: Right eye. The circle will be blue if selected.
OS: Left eye. The circle will be blue if selected.
Menu: To access the Menu, press the center button beneath the Menu icon.
Refer to the Menu section of this manual for details. If an X icon appears,
measurements have been taken. Press the button beneath the X to clear
out all measurements. If Bluetooth is activated and connected, an export
icon (up arrow) will appear after measurements are taken. Press the
button beneath the arrow to transfer the data to an EMR system.
1
1
2
3
4
5
6
7
8
1
1
2
3
4
5
6
7
8
Battery Indicator
Species
Probe Angle Indicator
OS (Left Eye)
OD (Right Eye)
Select OD/OS
Buttons
Menu
Alignment Target
Number of
Measurements
ActiView Positioning
System Area
Measure Mode
9
10
11
9
10
11
Select OD/OS Buttons: Select OD or OS by pressing the corresponding button.
 Loading...