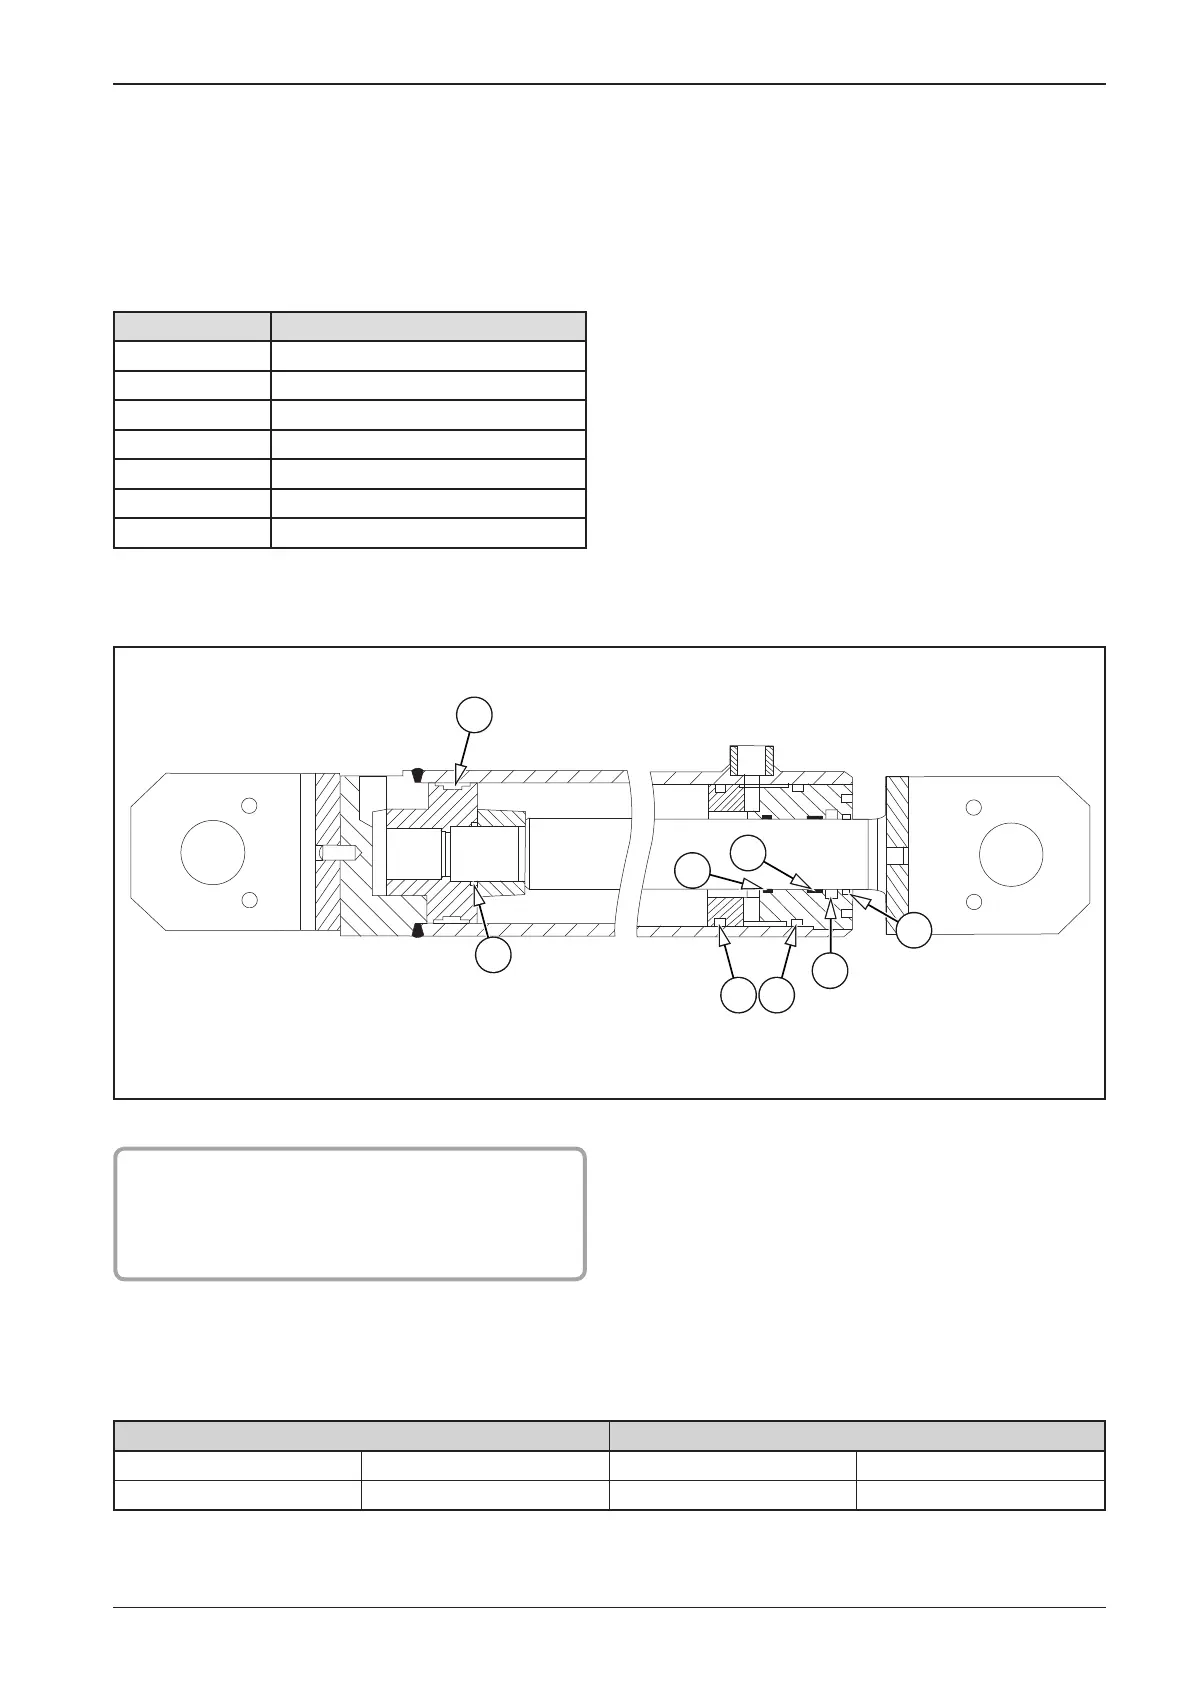
Removal of linear hydraulic motor – replacement of seals
Grease sliding faces, watch out for damage to sliding faces. Install parts with new seals after straightening out the seals. At least 15 min-
utes should elapse between the installation of new seals and the completion of assembly of the linear hydraulic motor. Use xture No.2
for the installation of the piston rod with the piston in the cylinder body. Tighten threaded joints with torque specied in the table.
Note!
The respective sealing material may be ordered as
a kit from the cylinder manufacturer specifying ma-
nufacturing number of the equipment.
TIGHTENING TORQUE TABLE
Hydraulic cylinder 90/45-400
Connection of piston rod Connection of cylinder body, cover
Thread Tighting torque Nm [lb ft] Thread Tighting torque Nm [lb ft]
M 32x2 140 [103] M 95x1,5 200 [183]
Asembly sealing material kits
Item No. Description
1 Sealing
2 Collar
3 Scraping ring
4 Guiding band
5 Guiding band
6 Ring
7 Ring
 Loading...